

Cursor AI Tutorial 2026: Build a Professional Multilingual Website in Under 3 Hours (Zero Coding Required)
Learn how to build a professional, multilingual restaurant website in under 3 hours using Cursor AI. Zero coding required. Step-by-step 2026 tutorial.

Introduction: Welcome to the Future of Web Development
If you’ve never written a line of code in your life, you might think building a professional, high-end website is impossible without hiring an expensive agency.
That used to be true. But in 2026, the game has changed entirely.
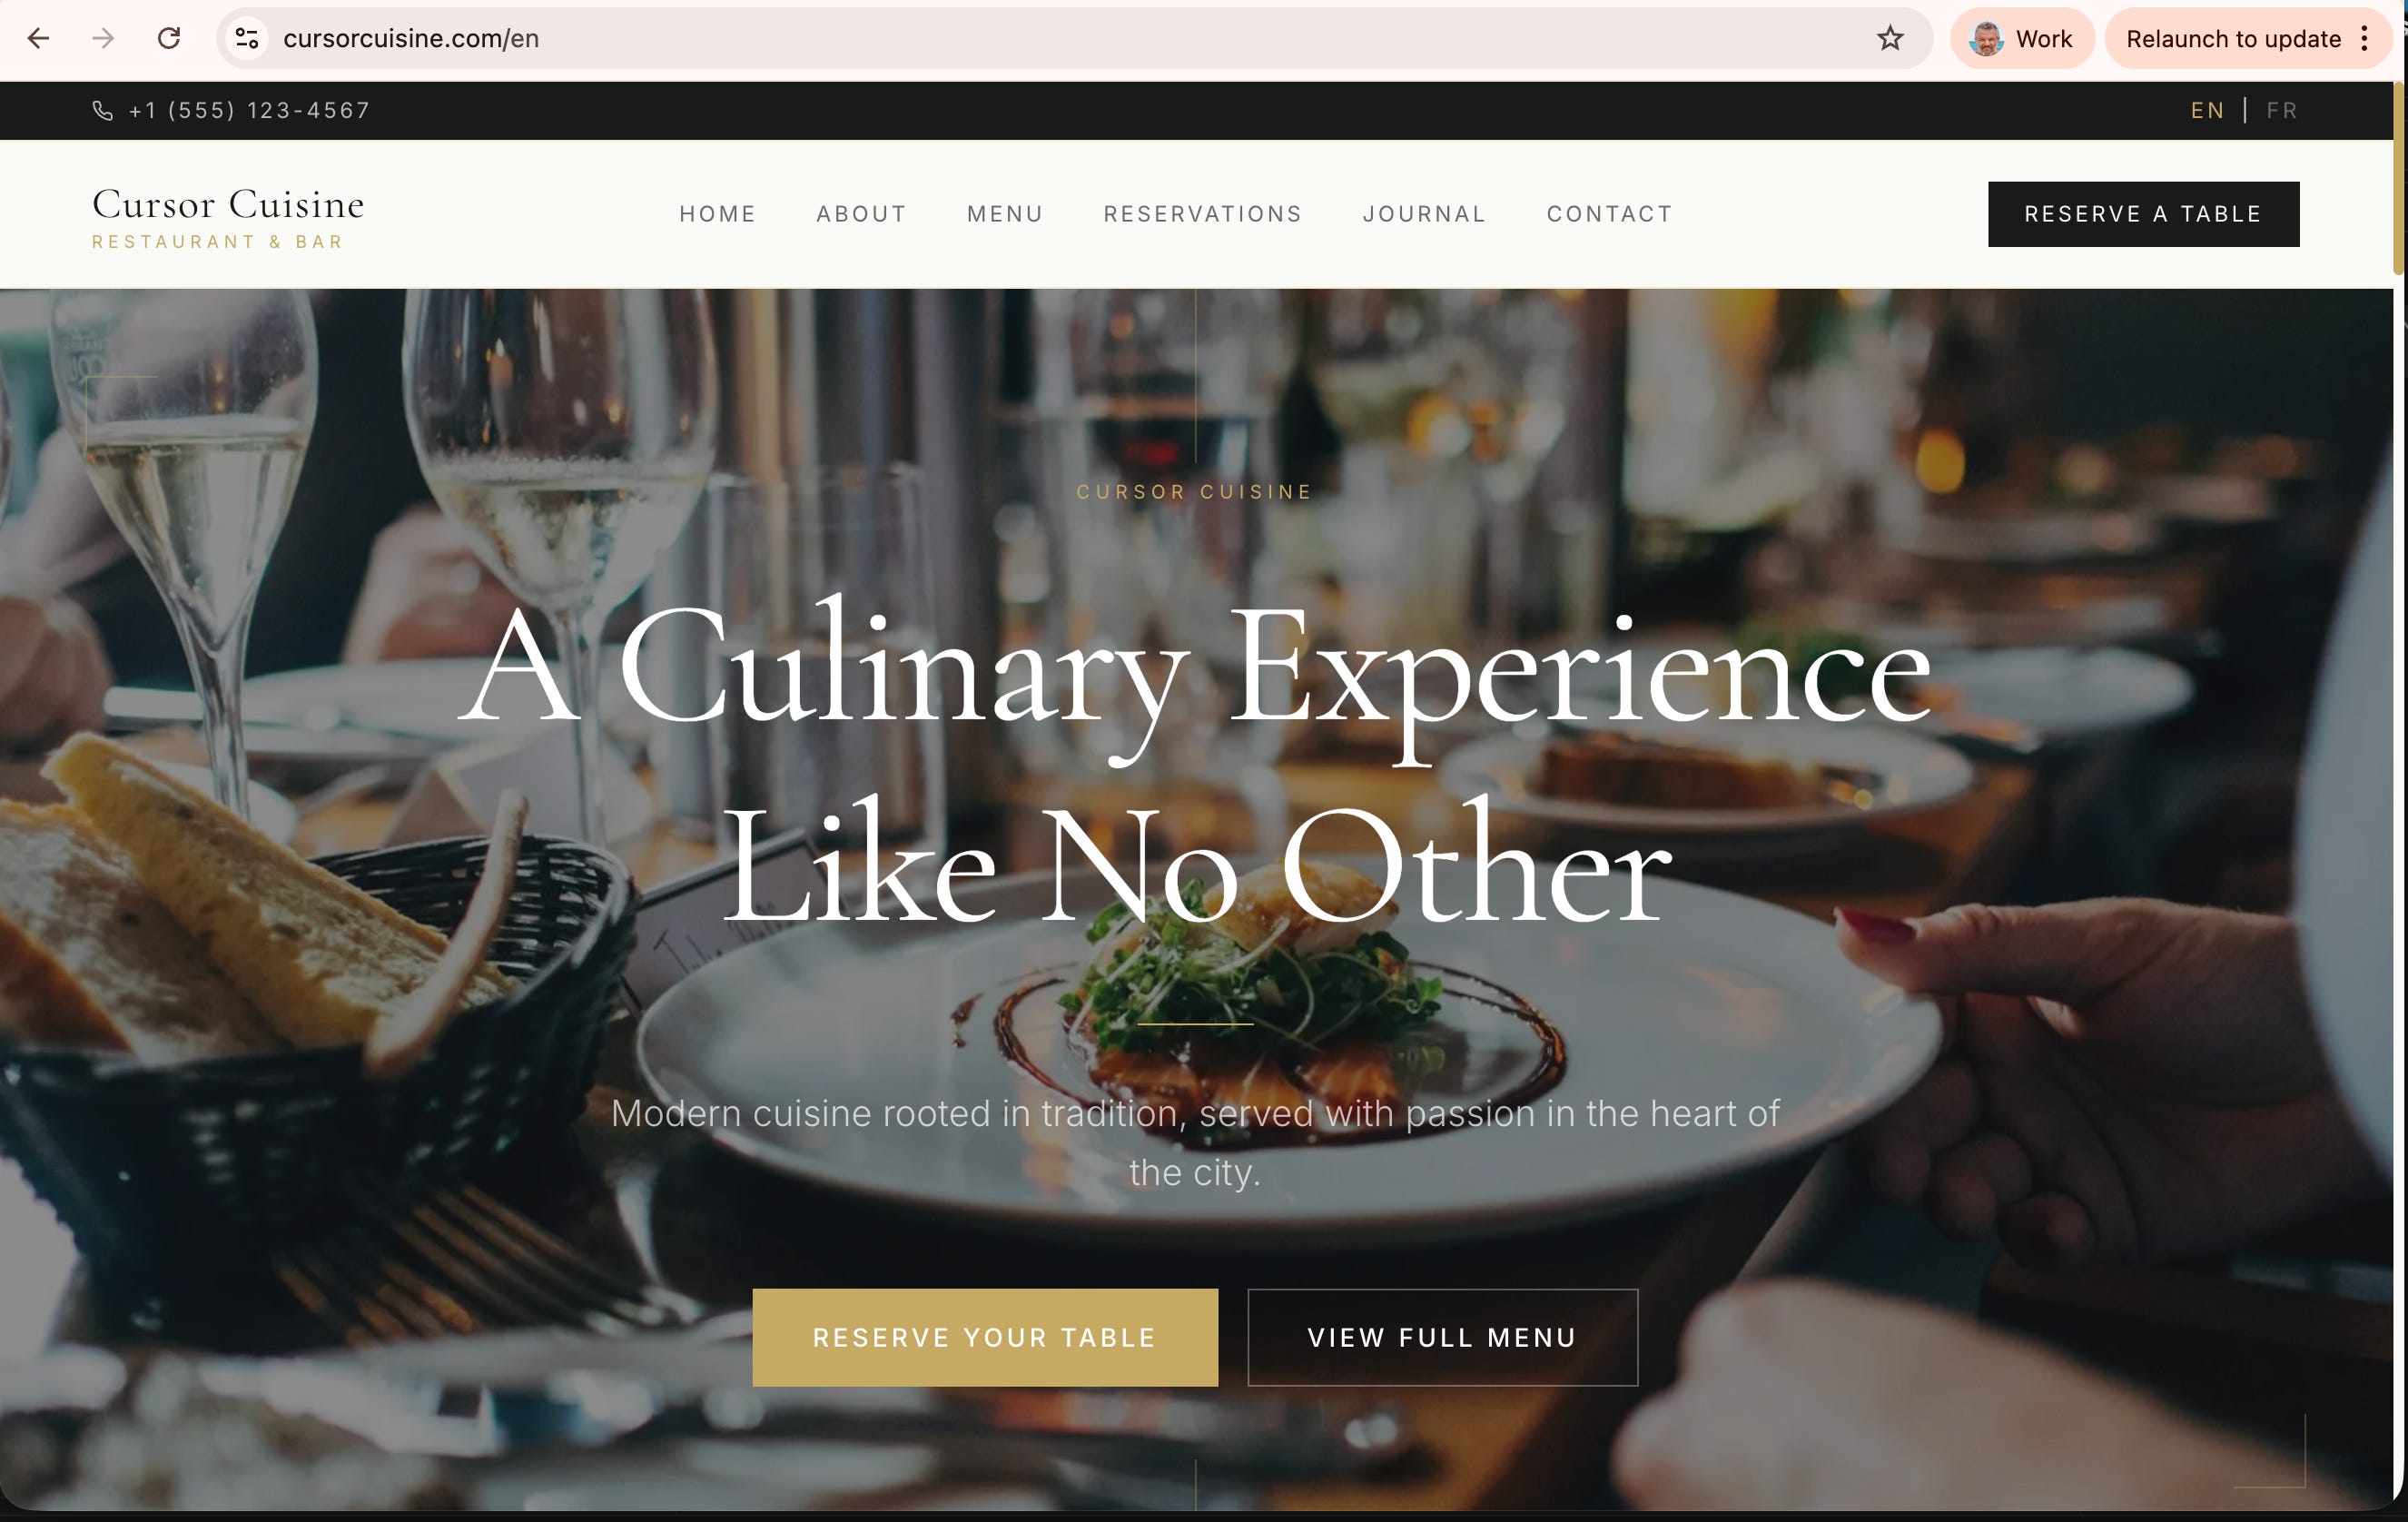
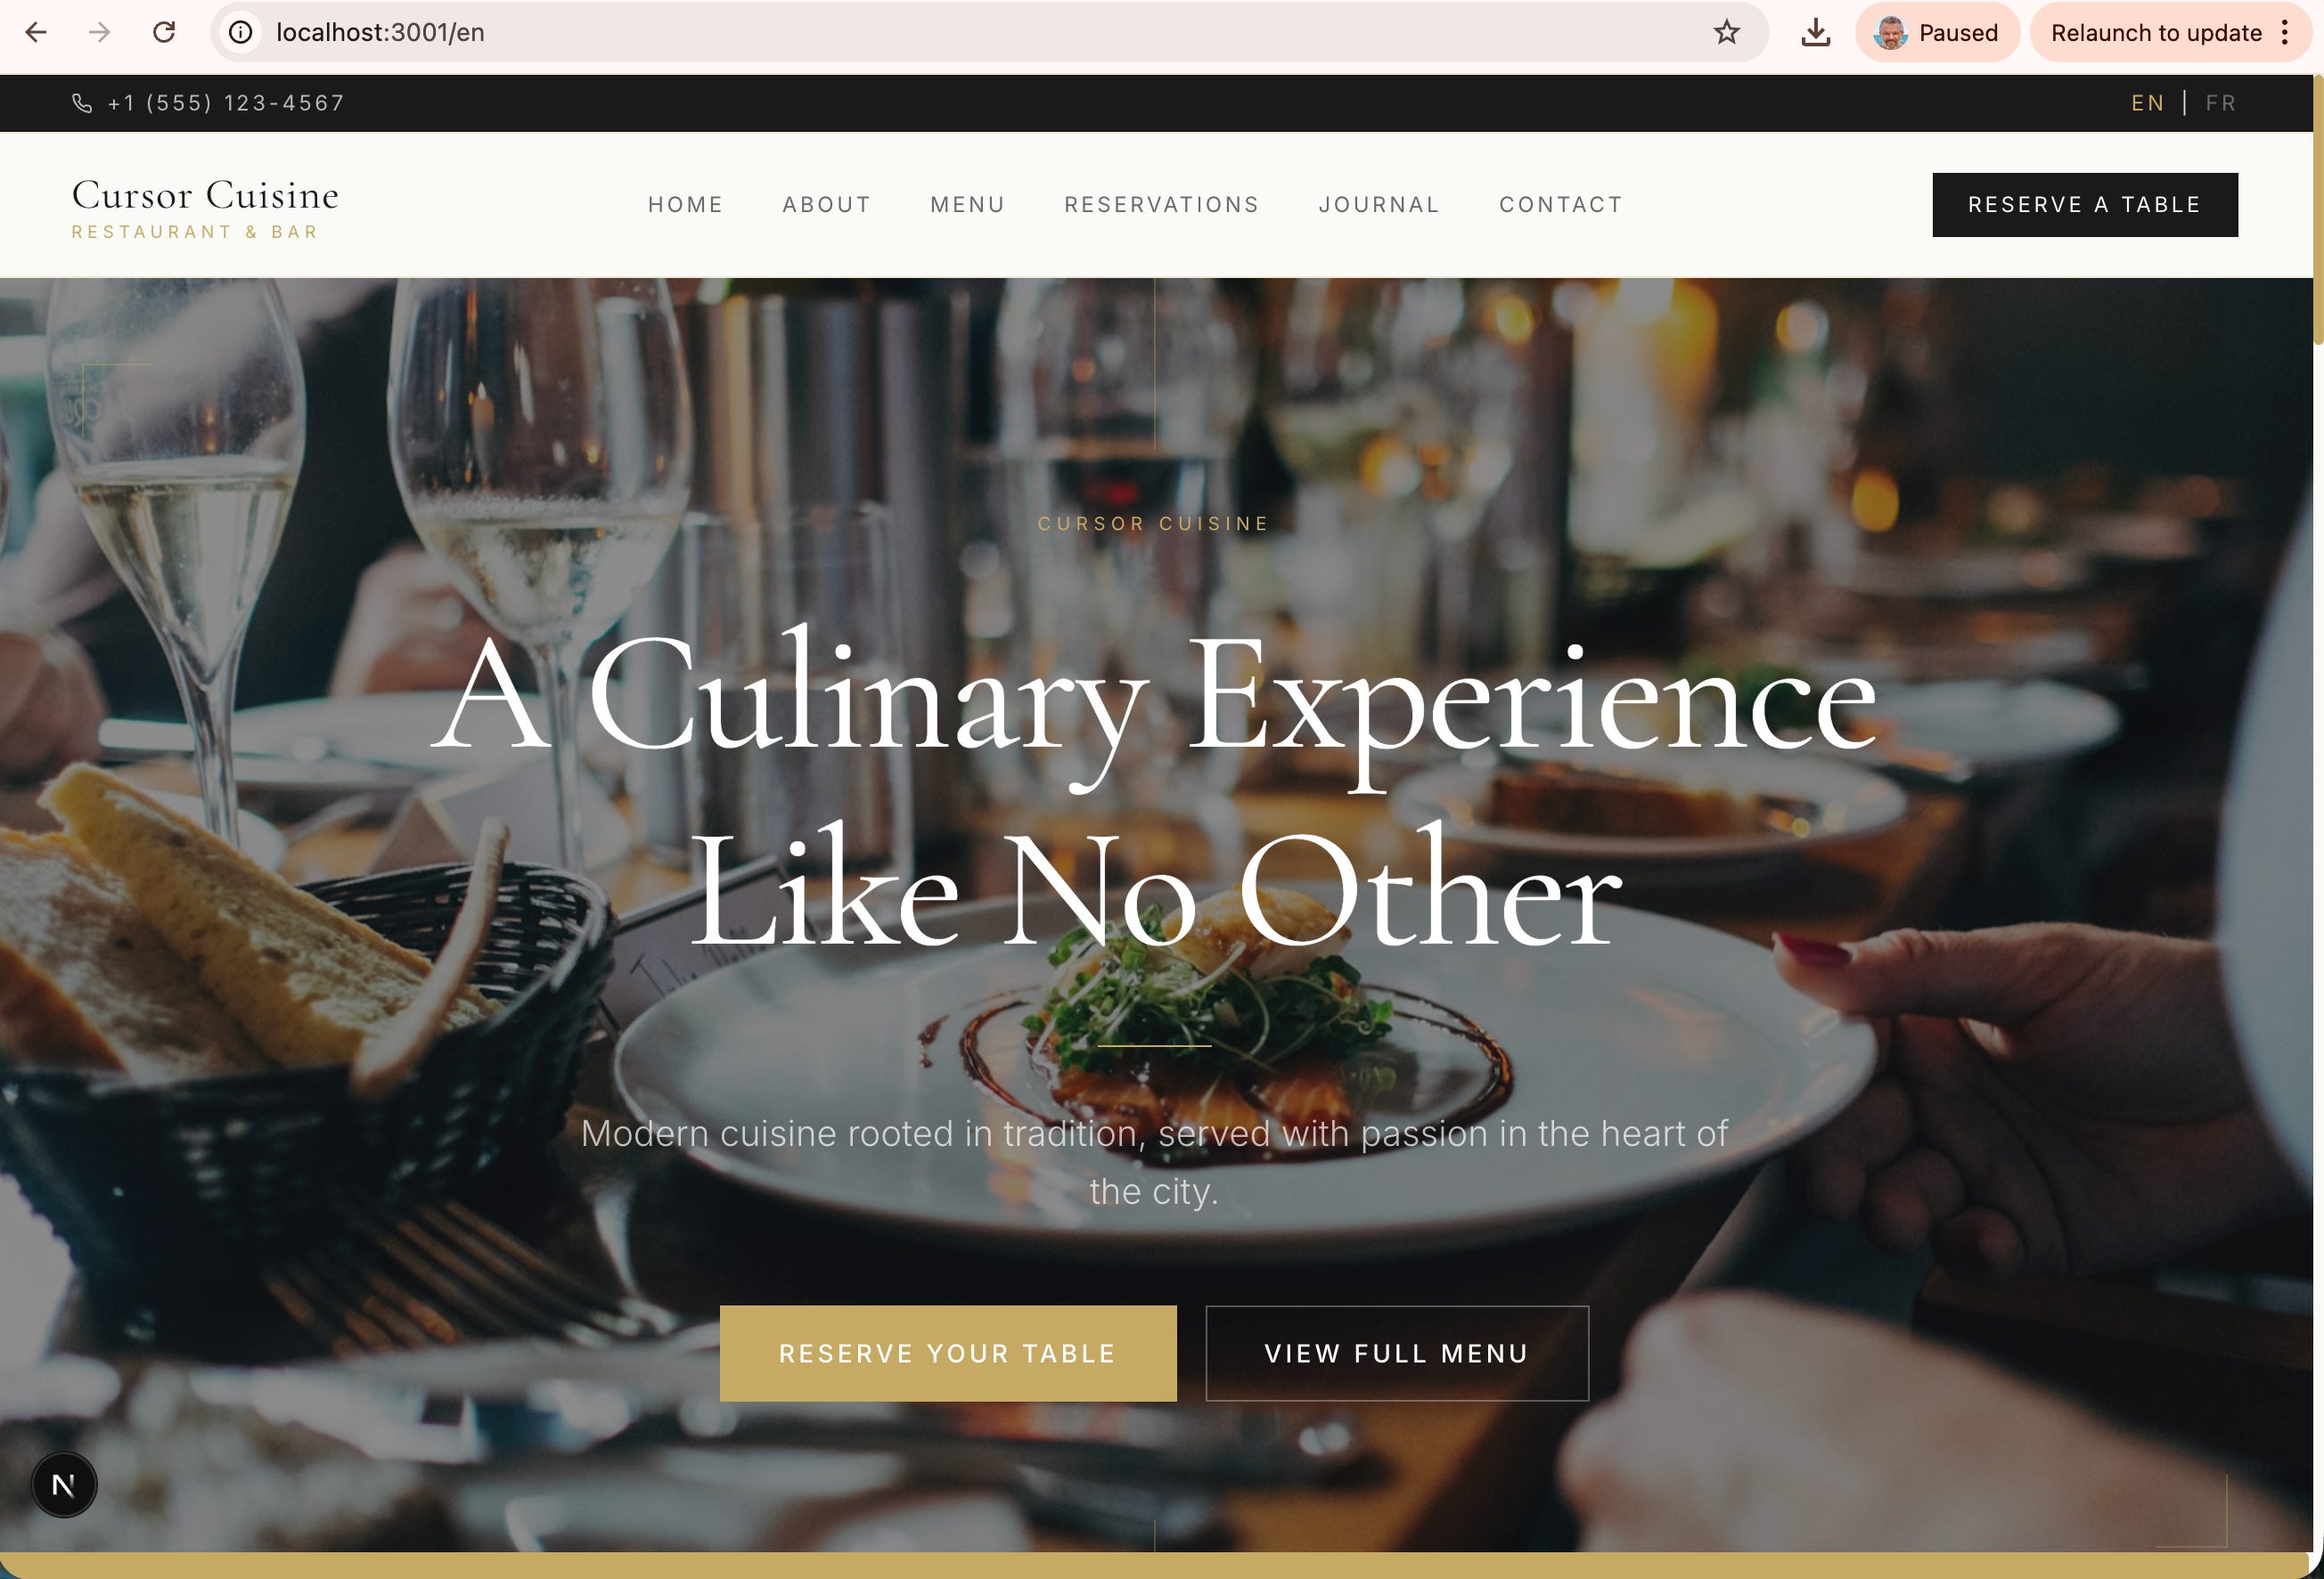
Today, I’m going to show you exactly how to build a sophisticated, multilingual restaurant website called Cursor Cuisine (live example: cursorcuisine.com) in under three hours. And the best part? You don’t need to know how to code. Not even a little bit.
We are going to use Cursor AI, a revolutionary code editor that acts as your personal, senior-level software engineer. You provide the vision; Cursor writes the code.
Here is exactly what we are building:
A stunning, responsive design that looks great on mobile and desktop.
Multilingual Support: One-click switching between English and French.
Live Menu: Easy-to-update food and drink lists.
Reservations: Integrated with OpenTable.
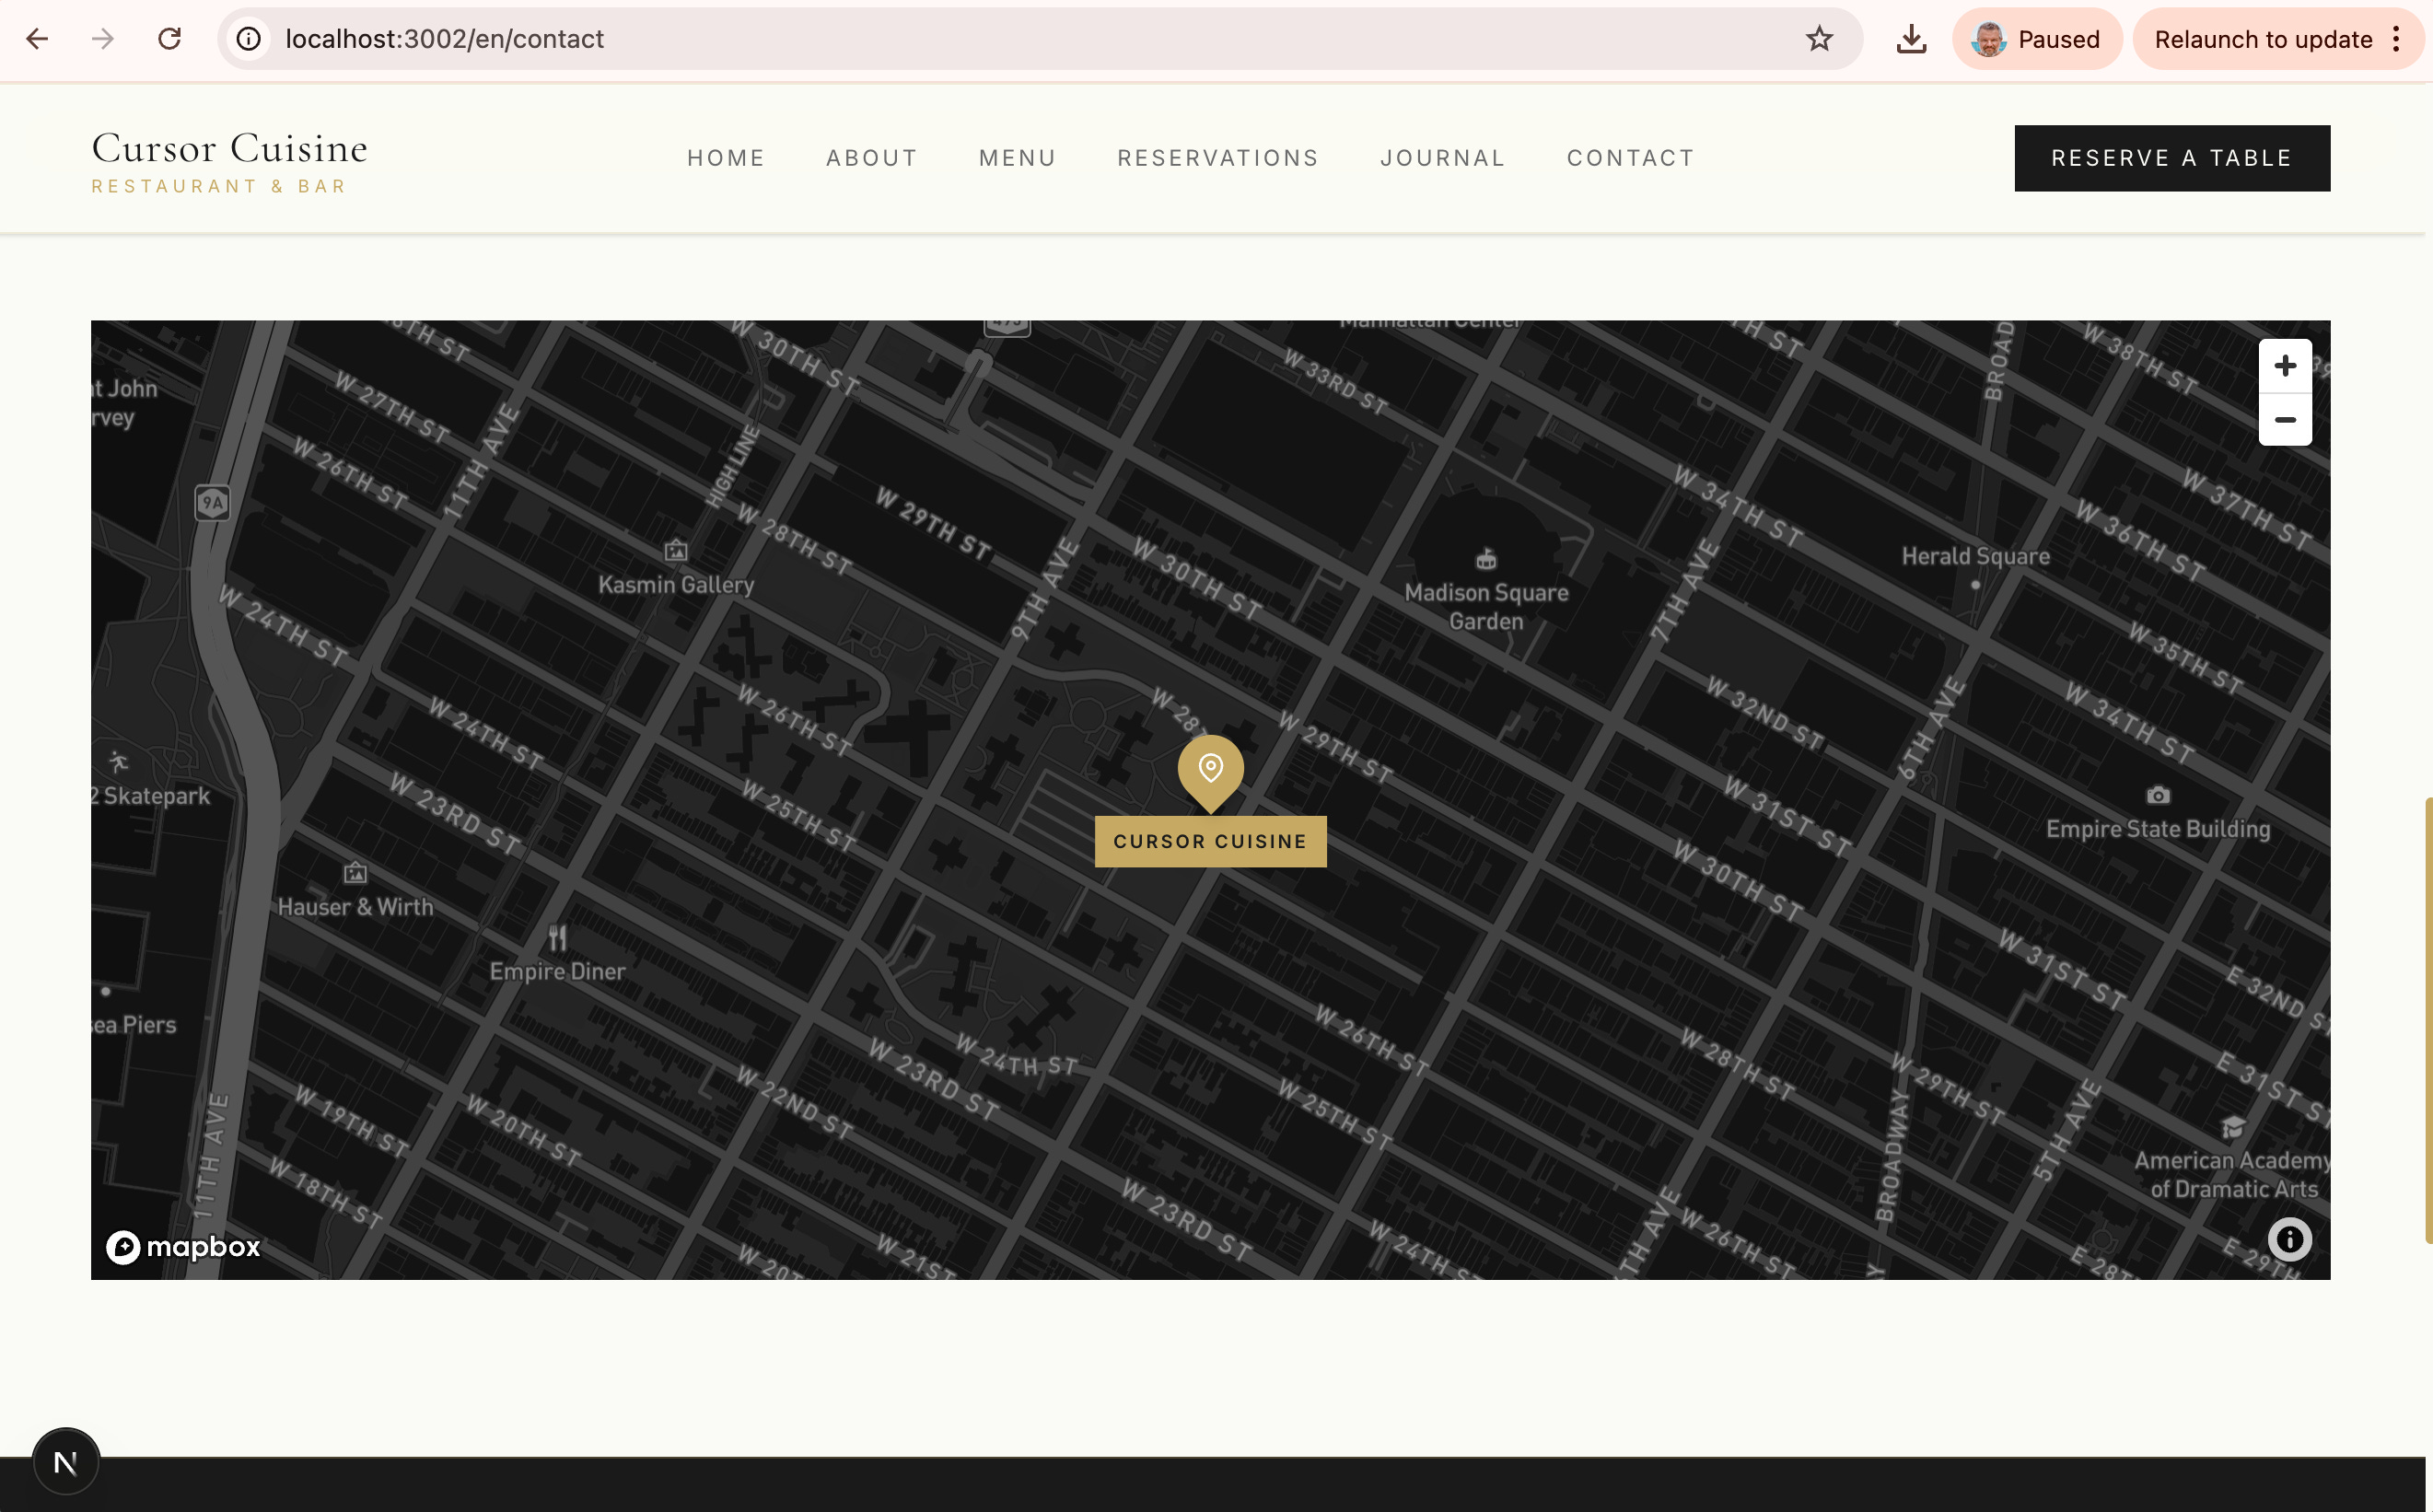
Interactive Map: Custom styling via Mapbox.
Newsletter: Automated sign-ups via Mailchimp and Resend.
CMS (Content Management System): You’ll be able to edit text and photos easily using Sanity.
SEO & AI Optimization: So Google (and AI chatbots like Grok) can find you.
The Toolkit (Total Monthly Cost: ~$20 - $40 depending on trials):
Cursor: Your AI builder (Pro subscription recommended).
Vercel: Hosting (Free tier).
GitHub: Code storage (Free).
Sanity: Content management (Free tier).
Mapbox: Maps (Free tier).
OpenTable: Reservations (Free widget).
Mailchimp/Resend: Email marketing (Free tiers available).
GoDaddy: Domain name (Optional for now, ~$15/year).
Time Estimate: 3 Hours
Difficulty: Beginner (No coding required, just patience!)
Need help with strategy? If you're stuck on the vision, book a 1:1 Consulting Session with me via Calendly. We can map out your project together in under an hour.
Part 1: Setup & Basics – Getting Your Digital Kitchen Ready
Before we cook, we need to prep. The hardest part of this entire process is simply getting the accounts set up. Don’t give up here. Once these tools are talking to each other, the magic happens fast.
Step 1: Download and Install Cursor
Cursor is a “fork” of VS Code, which means it looks and feels like a standard code editor, but it has a super-intelligent AI brain built-in.
Go to cursor.com and download the installer for your OS (Mac/Windows).
Pro Tip: While there is a free tier, if you are building a complex project like this, you will burn through your fast “AI requests” in a few hours. I highly recommend signing up for the Pro plan ($20/mo). It’s cheaper than one hour of a freelance developer’s time.
AI Model Selection: In the settings (or bottom of the chat window), ensure you are using Claude 3.5 Sonnet or Opus 4.5 (if available). These models are currently the best at reasoning through complex coding tasks.
Step 2: The Project Folder
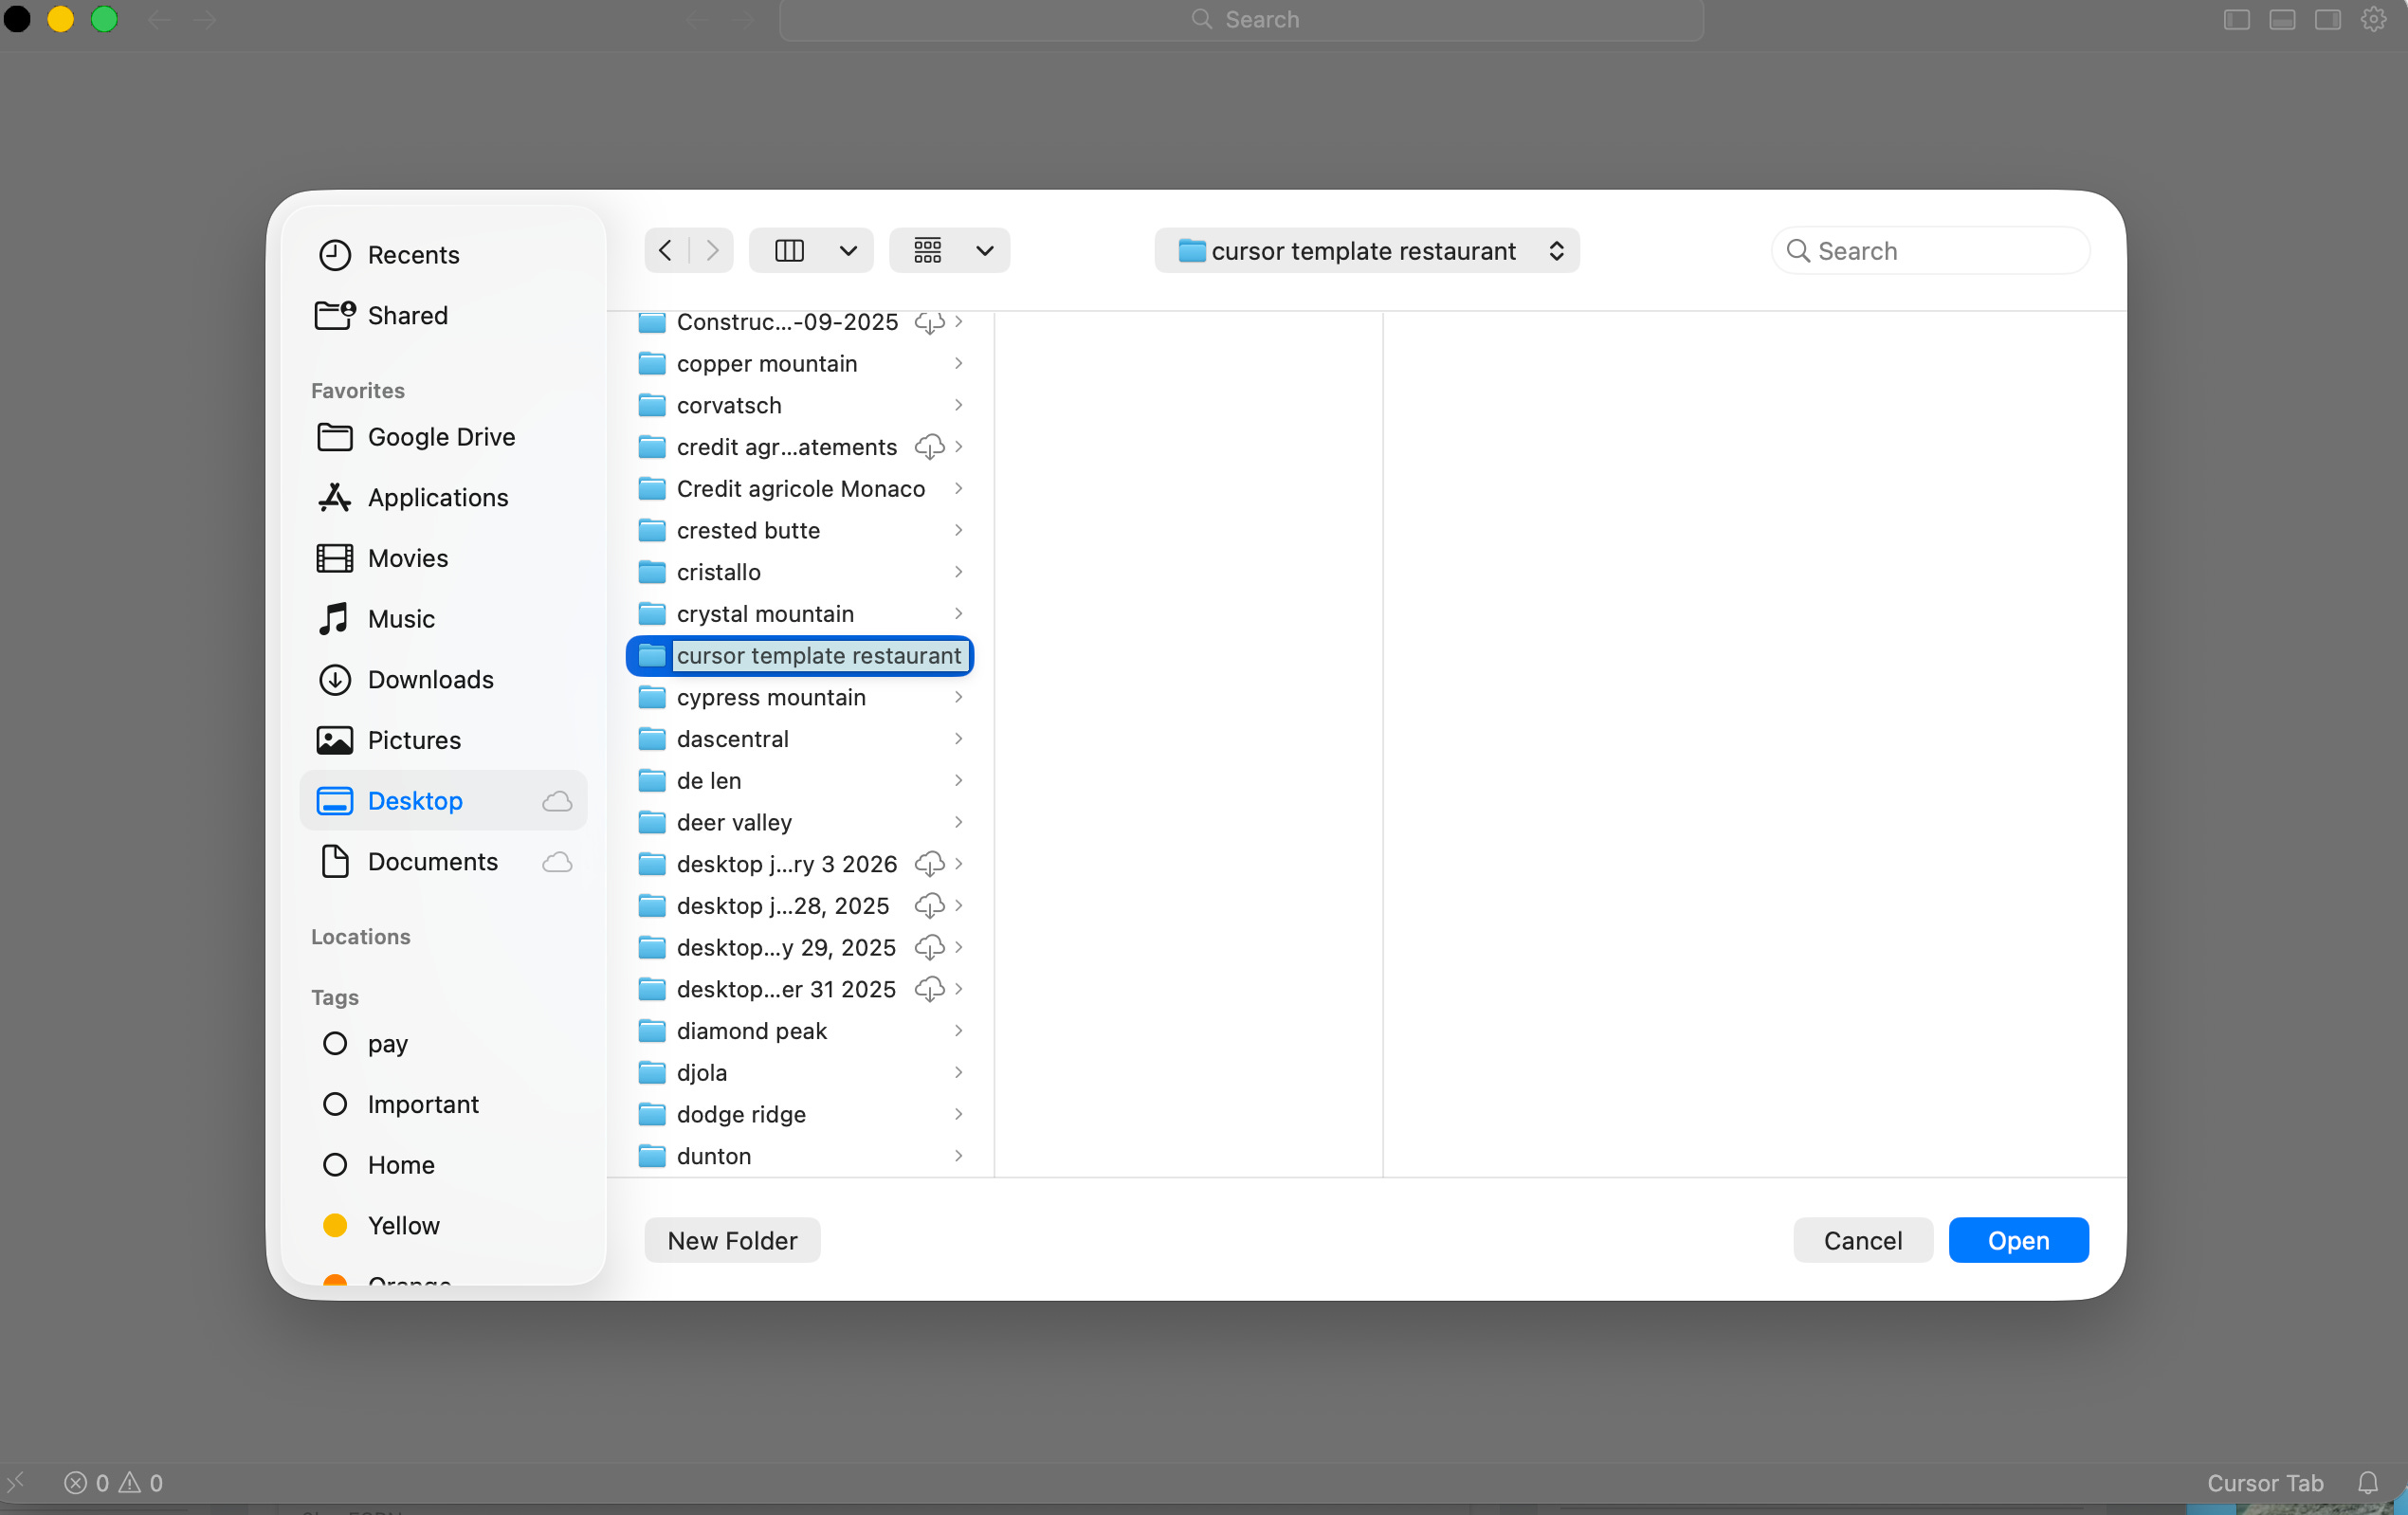
Create a folder on your computer where you will store your work.
Name it:
cursor-cuisineWarning: Make sure this is in a safe place (like your Documents folder), not your Trash or a temporary folder!
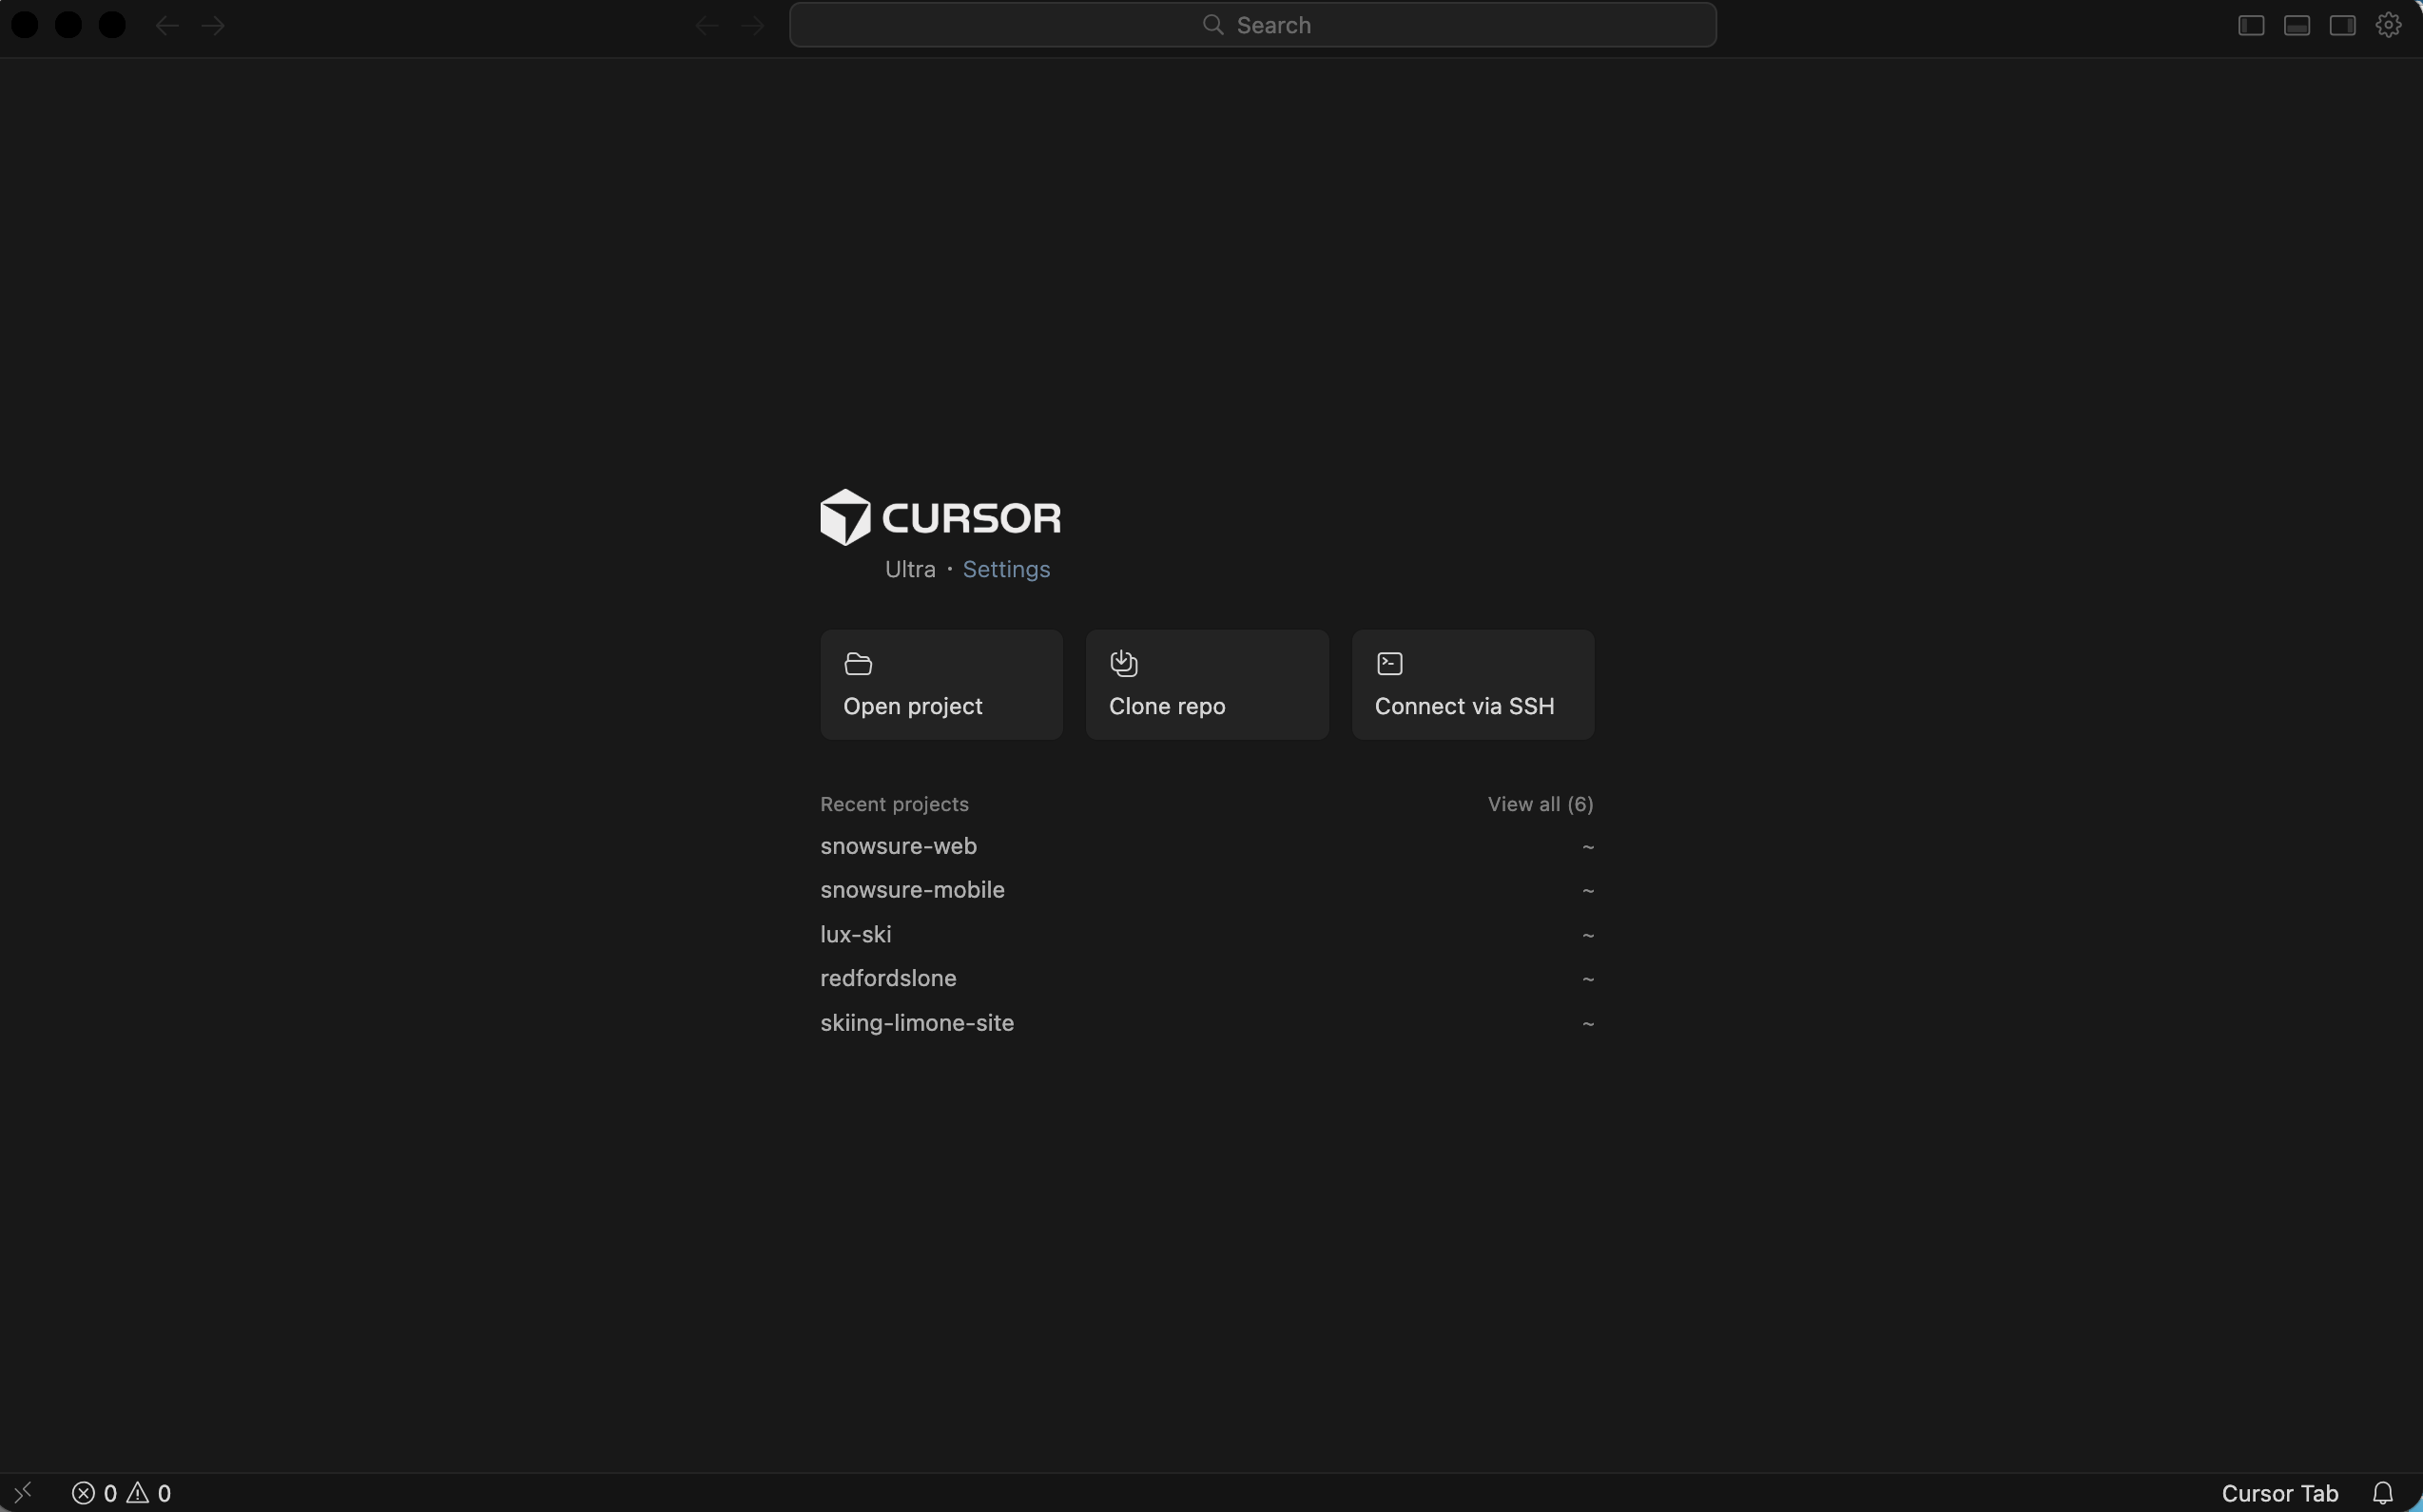
Open Cursor. Go to File > Open Folder and select your new empty cursor-cuisine folder.
Step 3: Your Strategic Advisor (Grok) vs. Your Builder (Cursor)
I use two AIs for this process.
Grok (or ChatGPT): This is my “Strategic Advisor.” I ask it high-level questions like, “What features does a luxury French restaurant website need?”
Cursor: This is my “Builder.” I tell it exactly what to code based on the strategy.
Step 4: The High-Level Prompt
We are going to start by telling Cursor exactly what we want. The more specific you are, the better the result.
Open the Chat Pane in Cursor (Command+L on Mac / Ctrl+L on Windows).
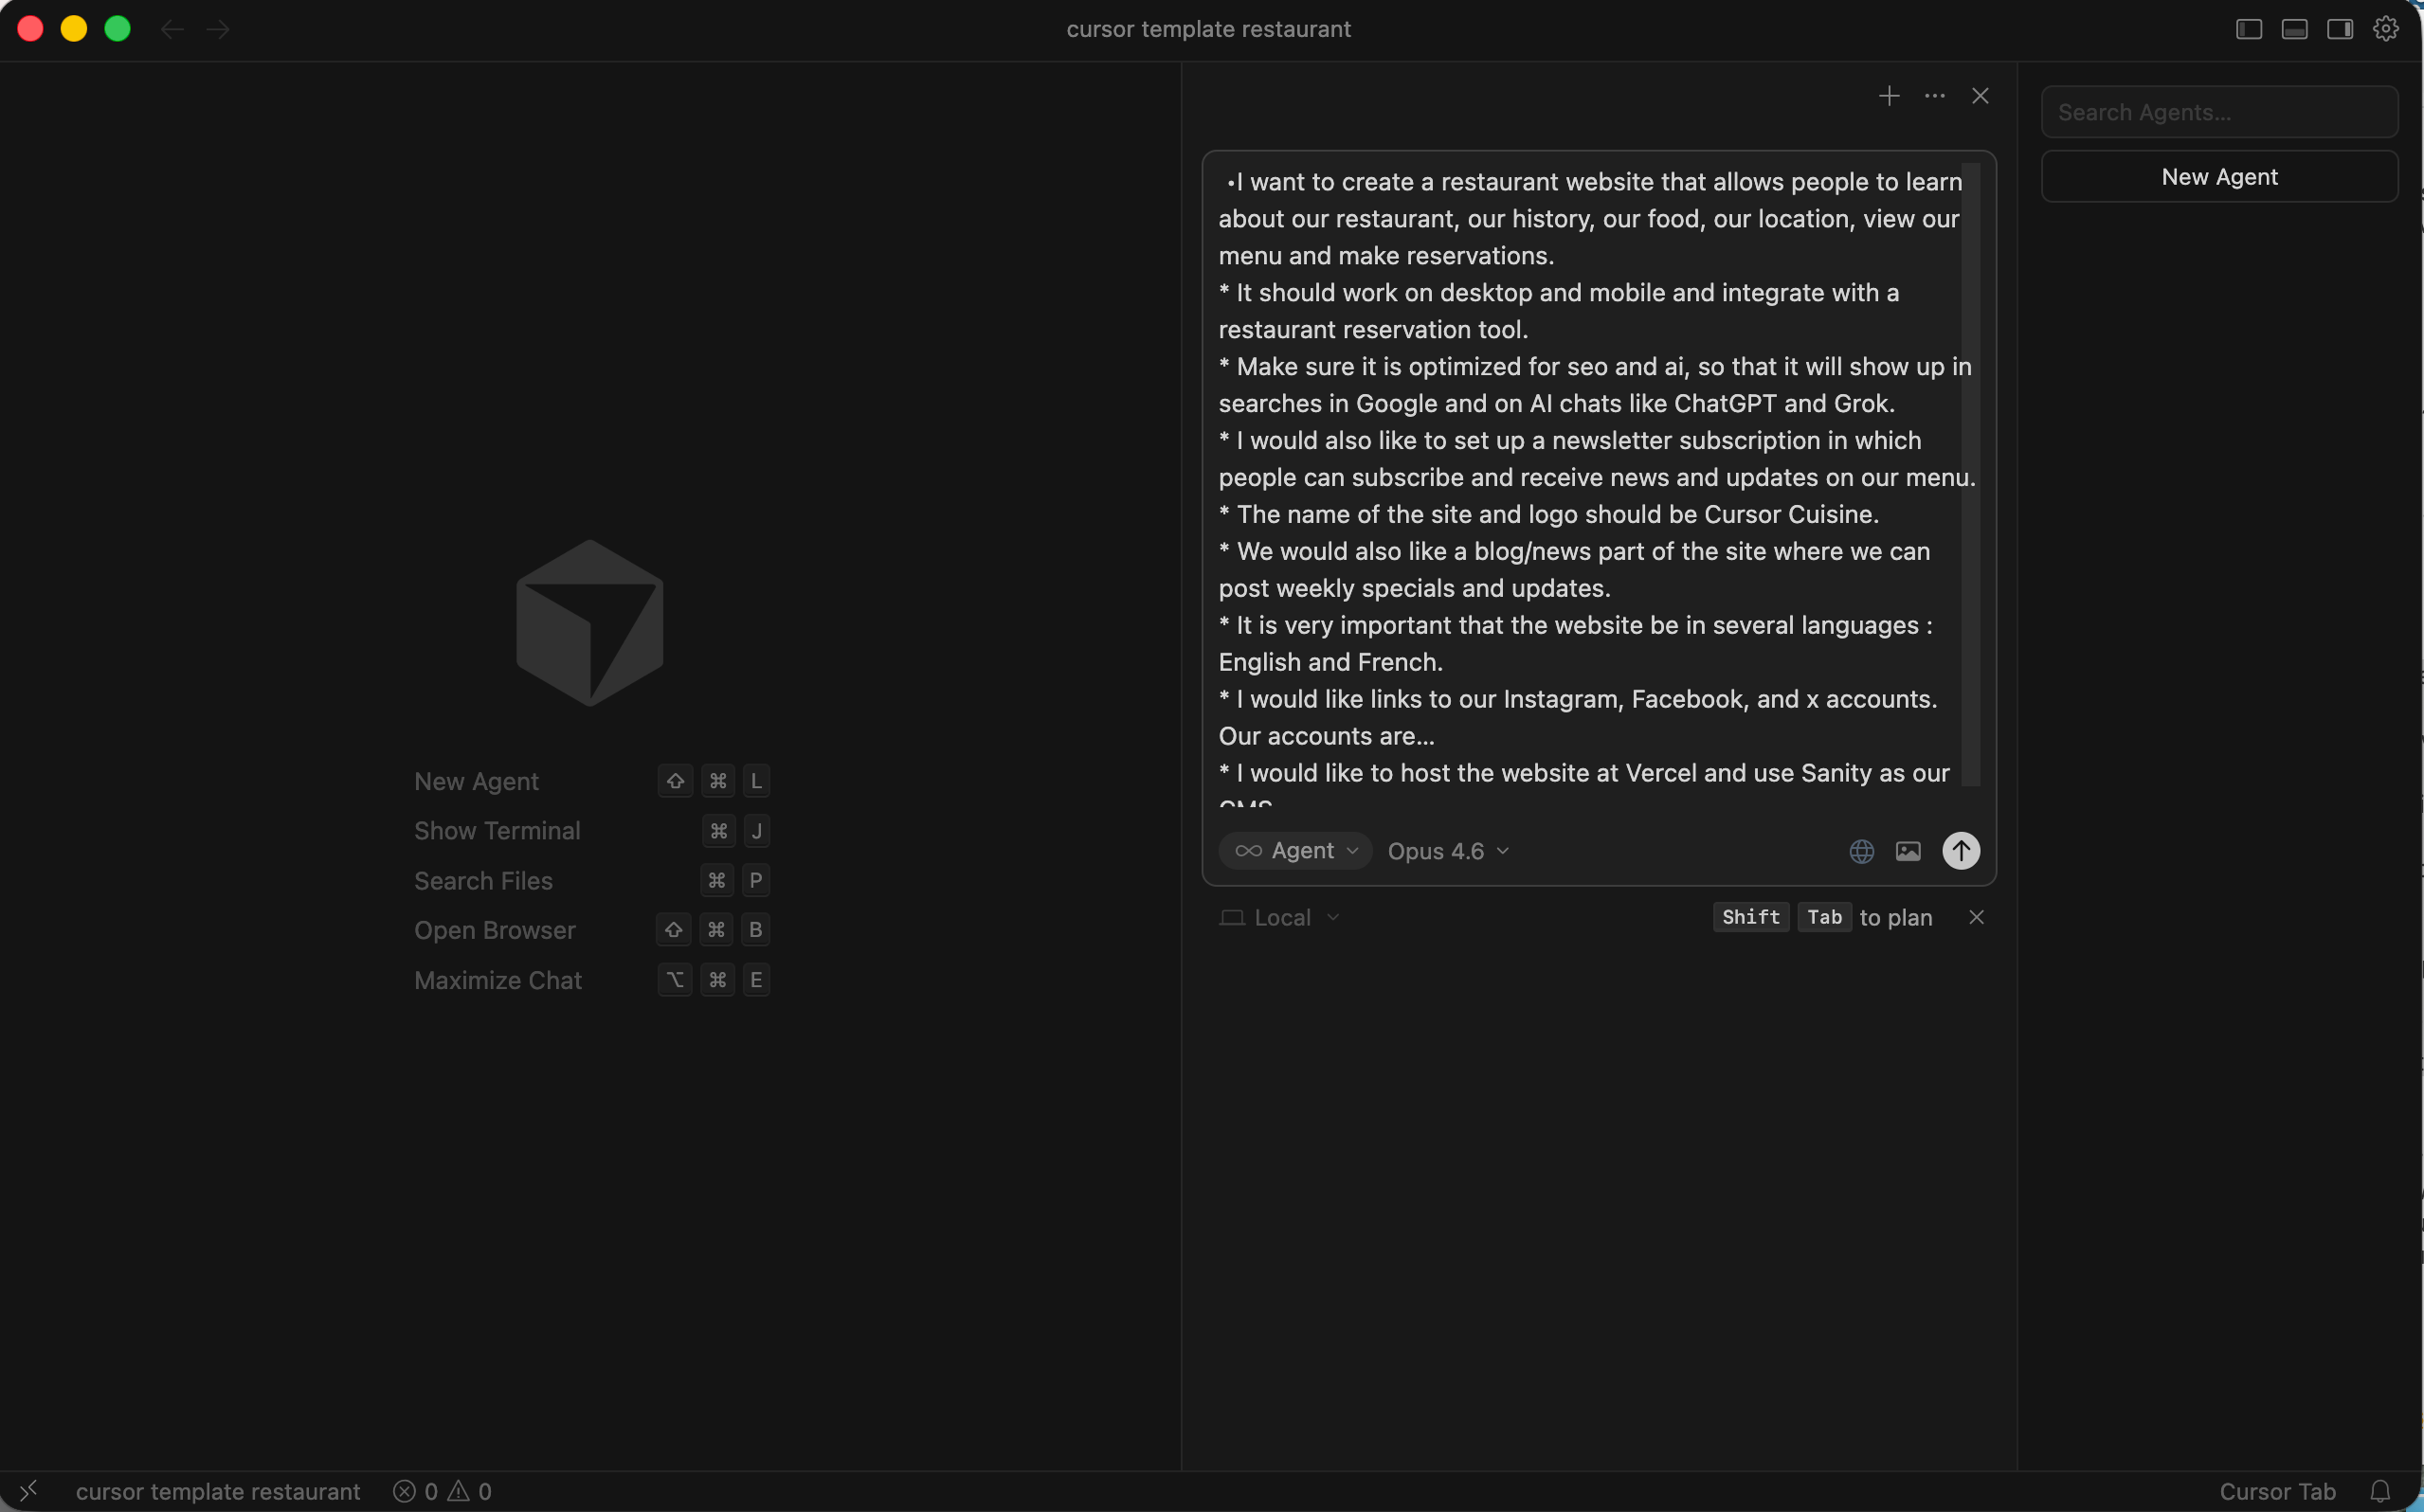
Copy and paste this prompt (or something like this):
“I want to create a professional restaurant website called ‘Cursor Cuisine’. It allows people to learn about our history, view our food, find our location, and make reservations.
Requirements:
Tech Stack: Next.js, Tailwind CSS, Sanity CMS (for content), Vercel (hosting).
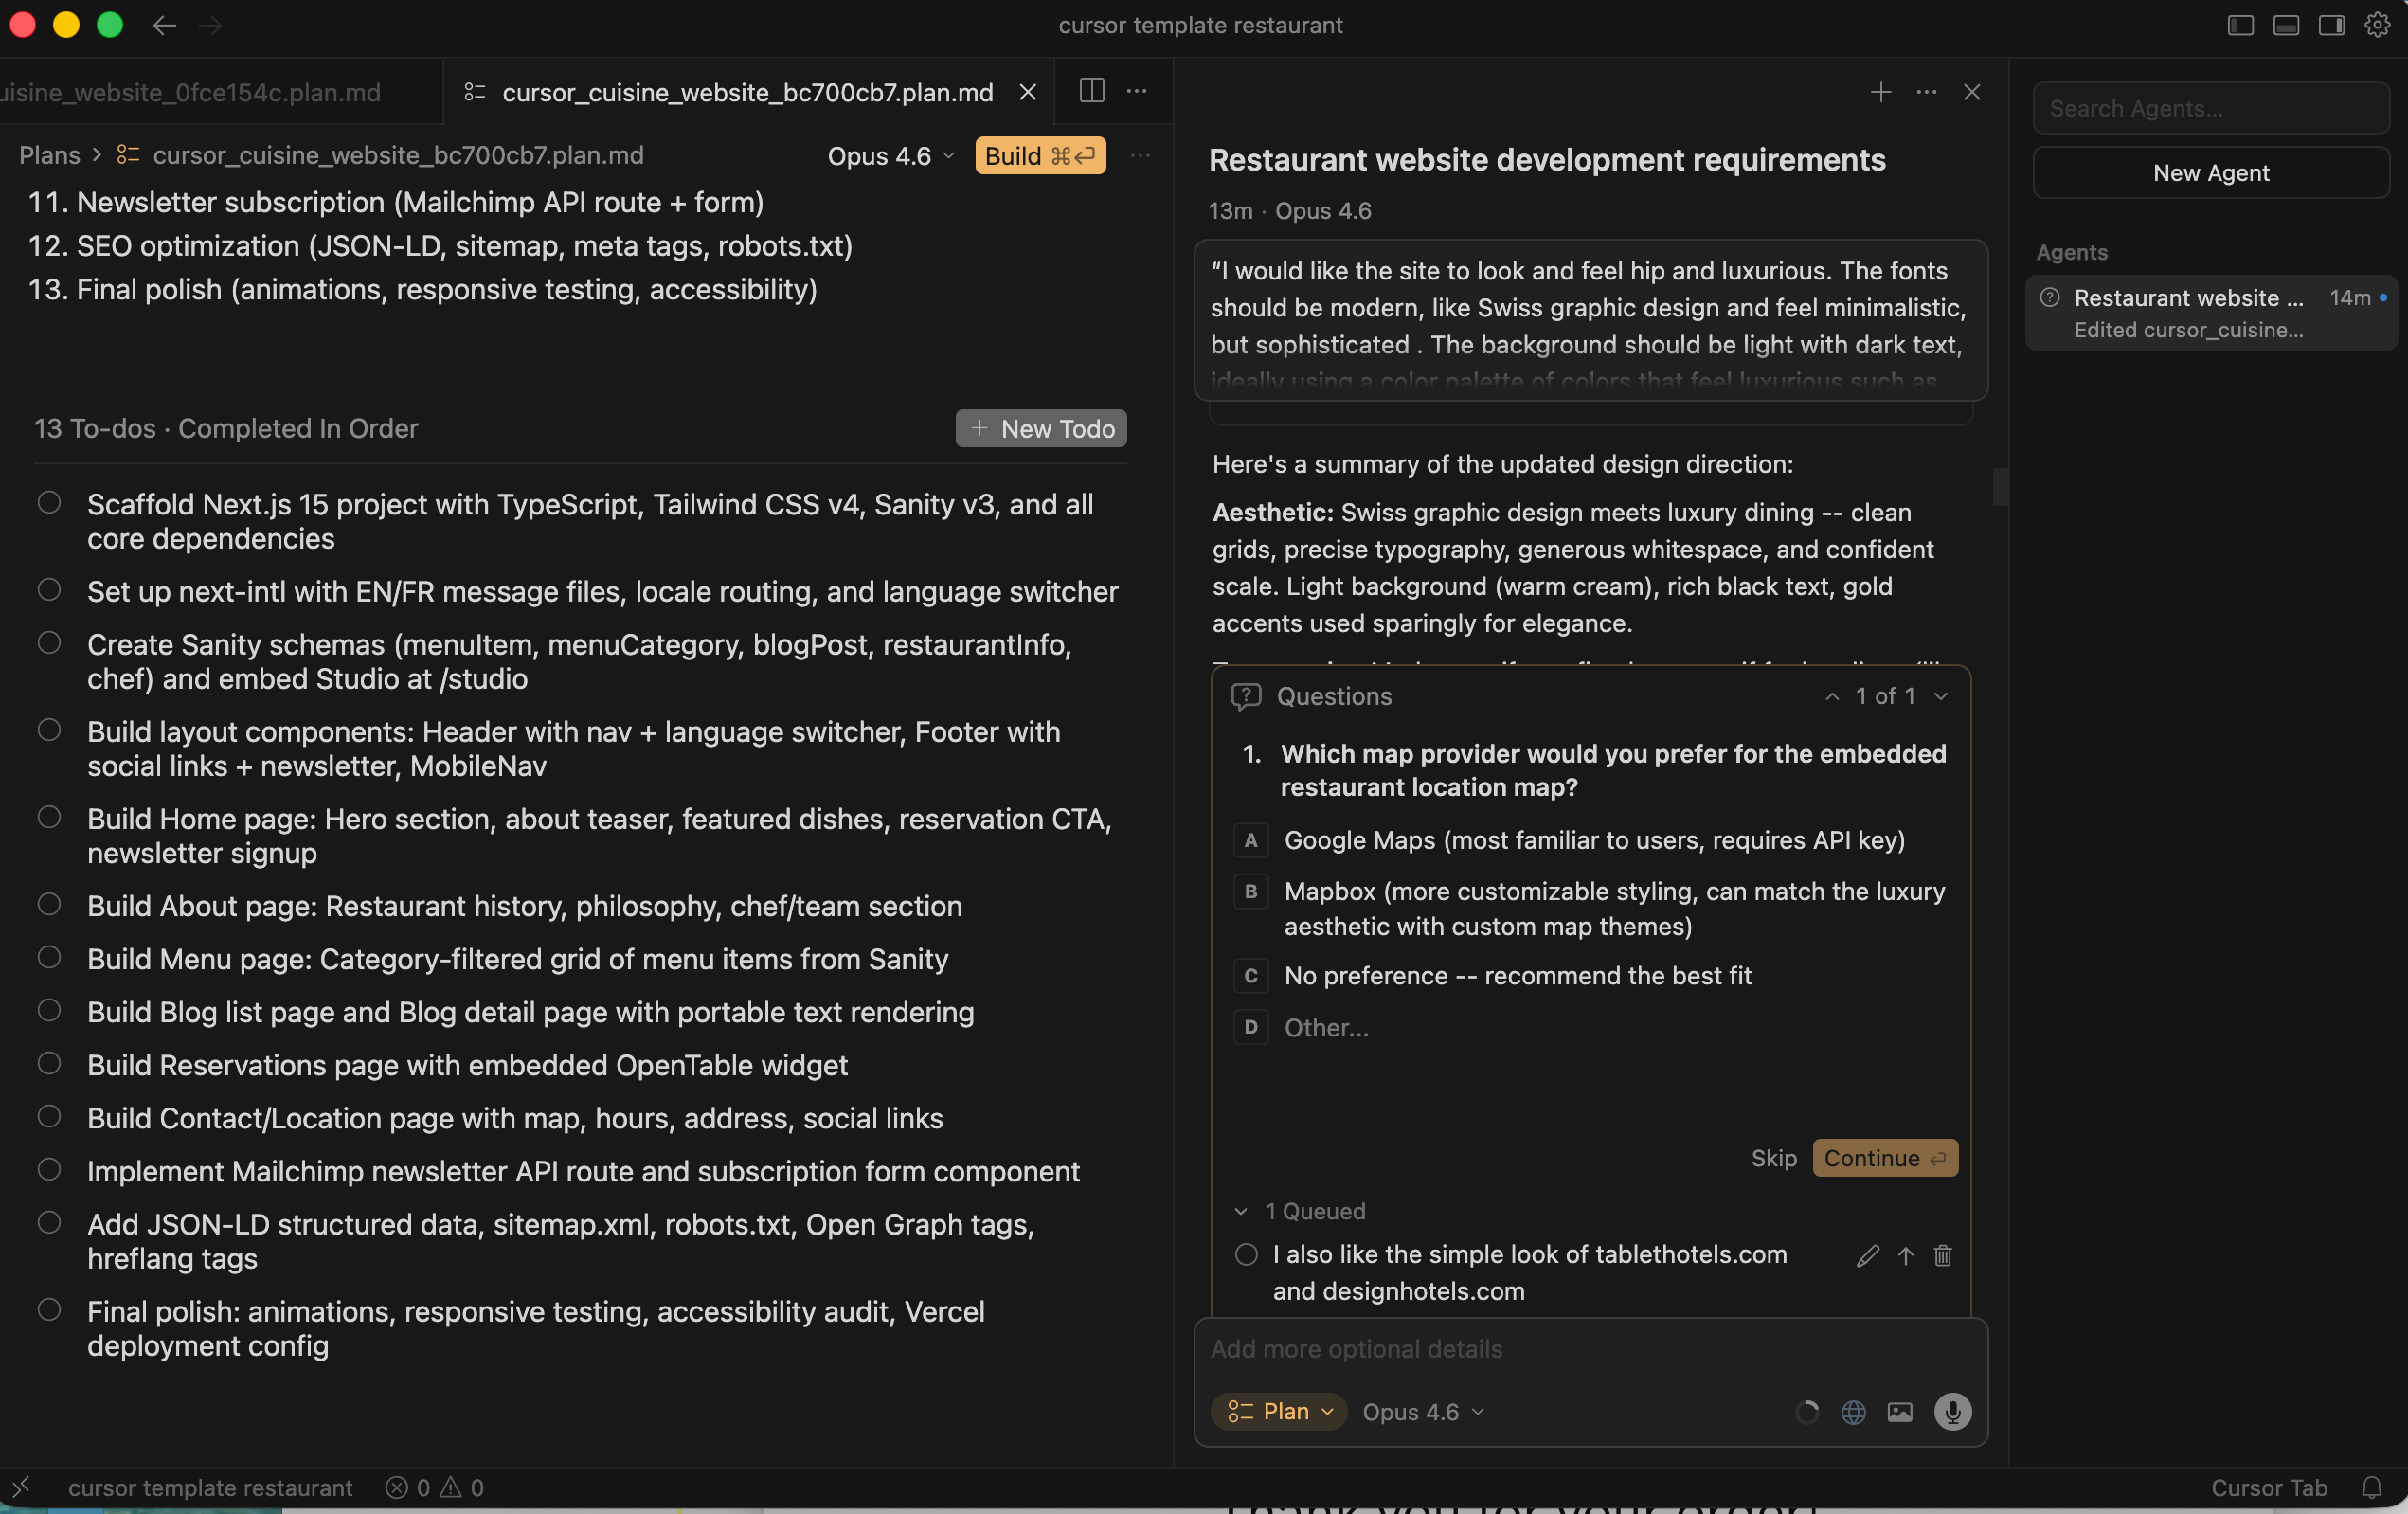
Design: Hip, luxurious, minimalist. Think Swiss graphic design. Light background, dark text, gold accents.
Features:
Mobile and Desktop optimized.
Multilingual: English and French.
Integrations: OpenTable (reservations), Mapbox (map), Mailchimp (newsletter).
SEO Optimized: Ready for Google and AI search.
Pages: Home, Menu, About, Blog, Contact.
Socials: Links to Instagram, Facebook, and X.
Please act as a senior web developer. Start by creating a plan for this project.”
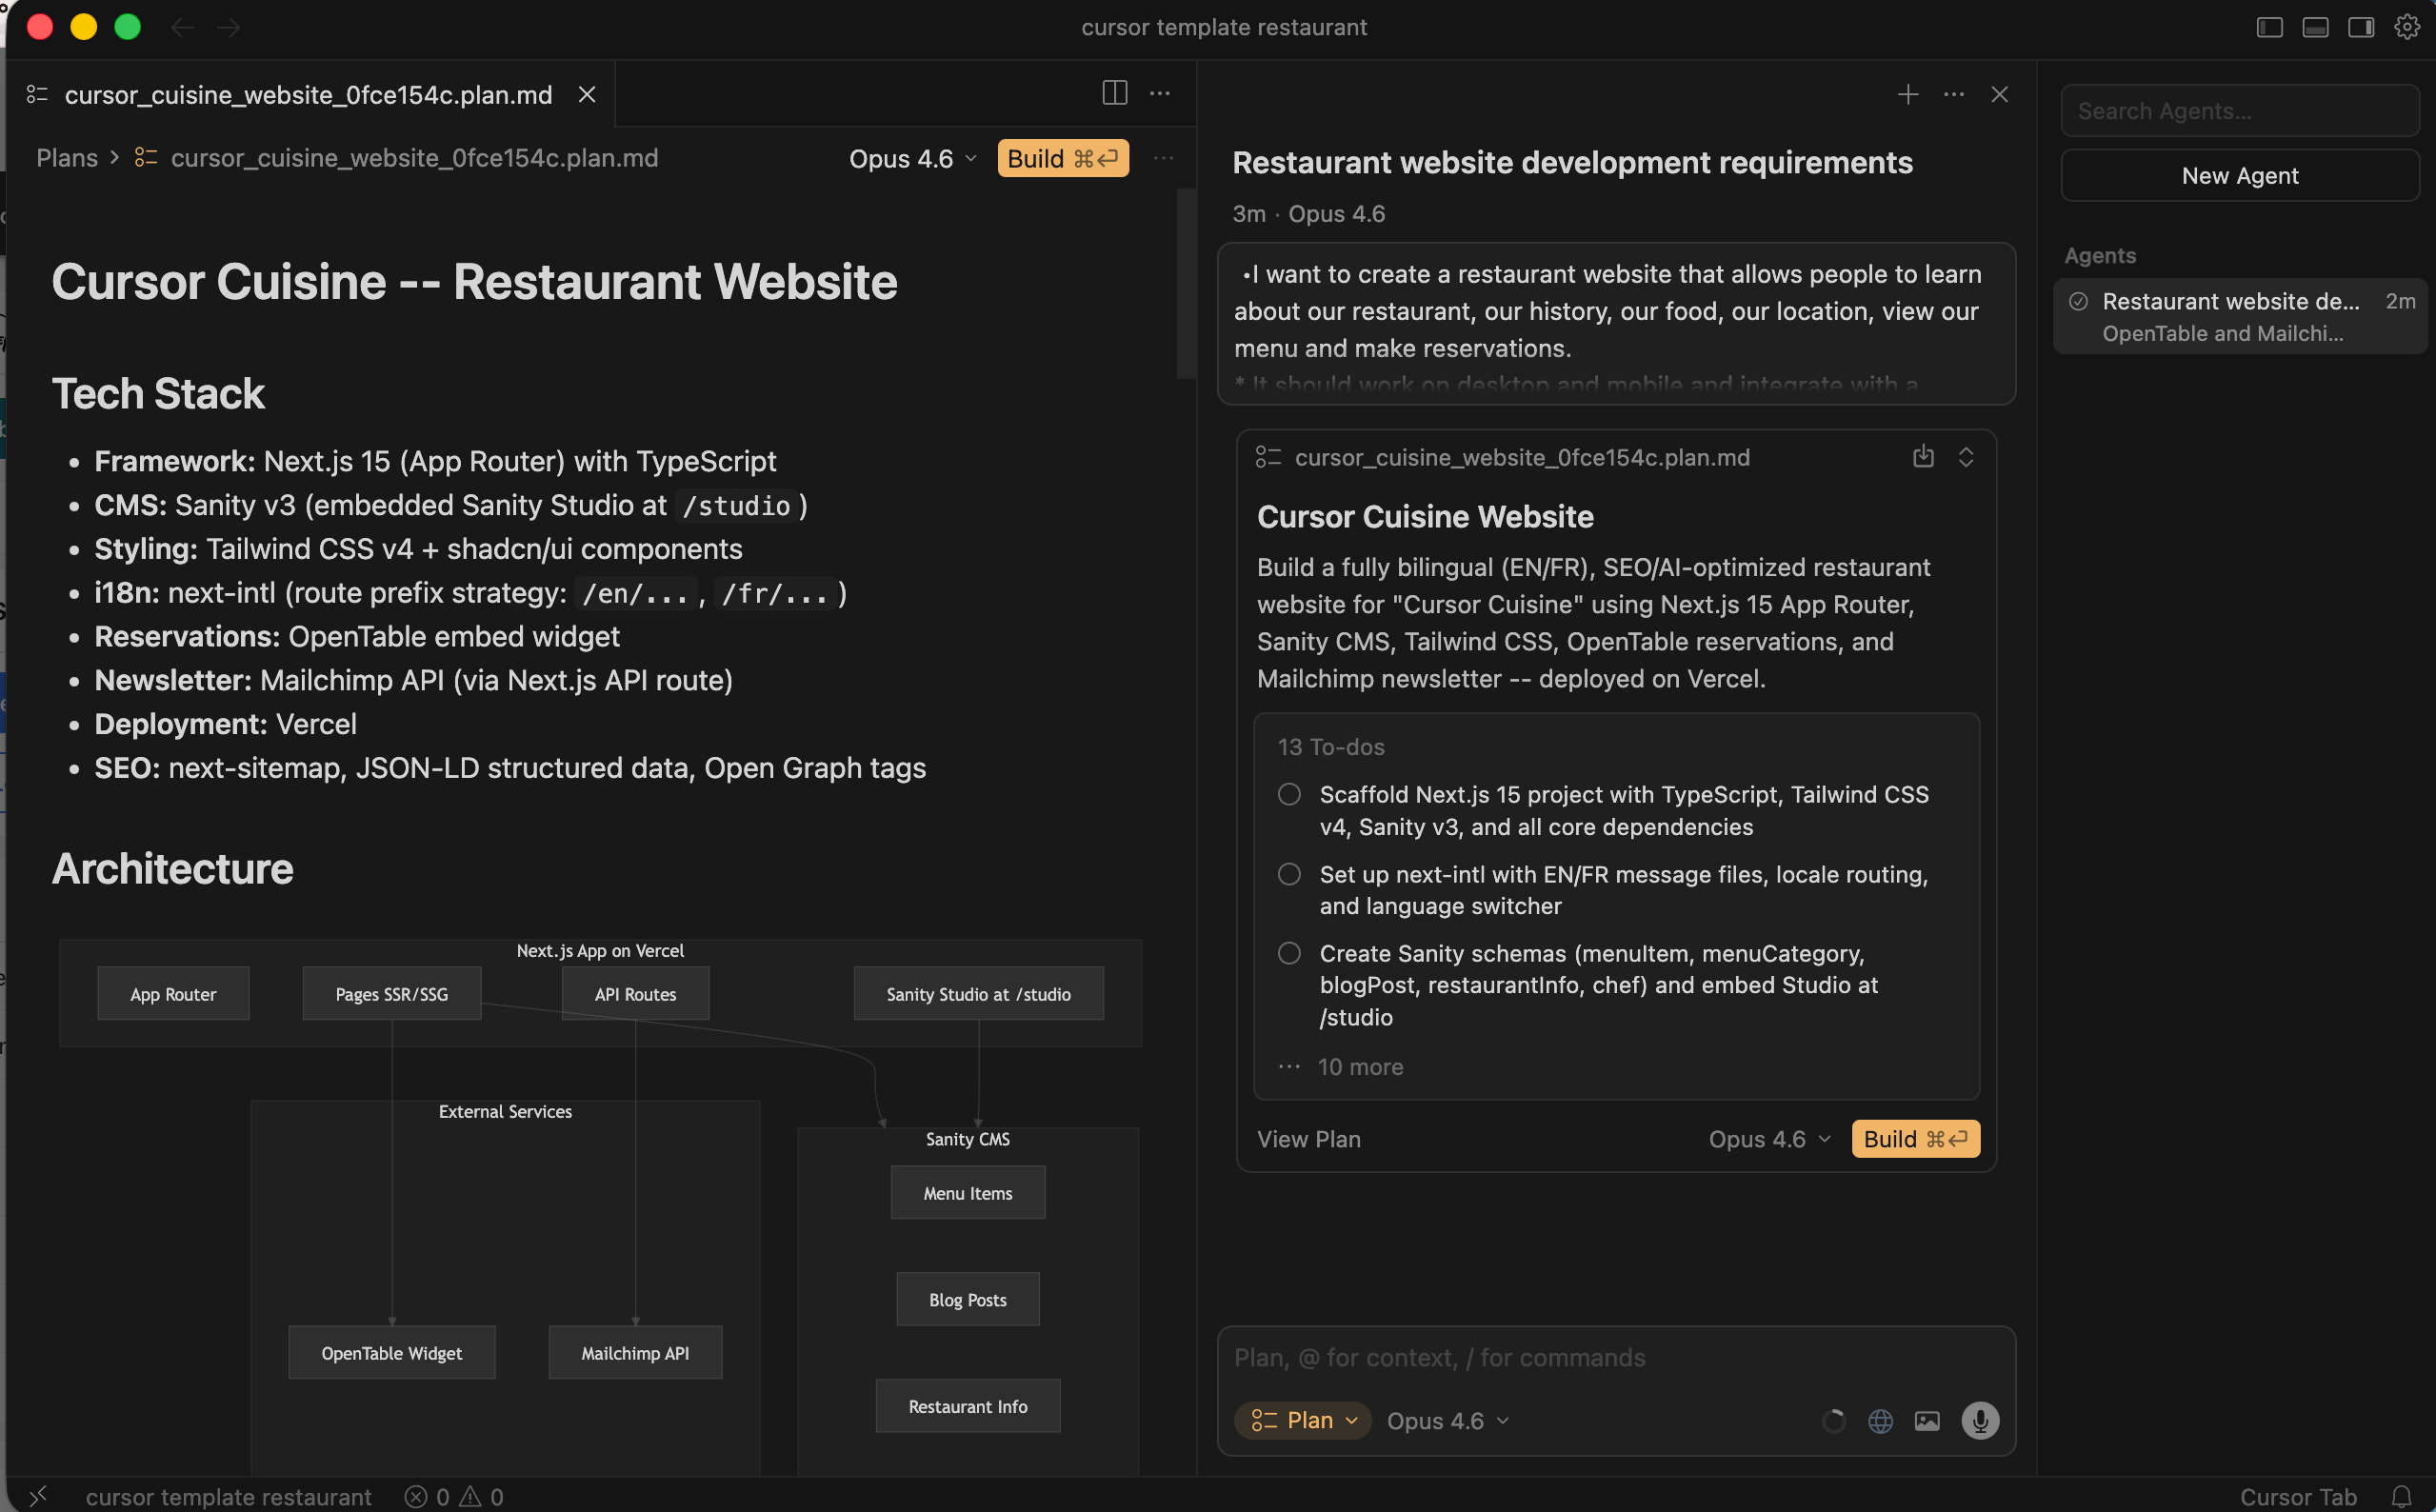
Cursor might switch to “Plan Mode” and ask you clarifying questions (e.g., “Which reservation tool do you want?”). Answer them clearly.
Once the plan is generated, hit “Run” or “Composer” (Command+I) to let it start generating the file structure.
Part 2: Design & Build – Painting with AI
Now comes the fun part. You are going to watch your website appear out of thin air.
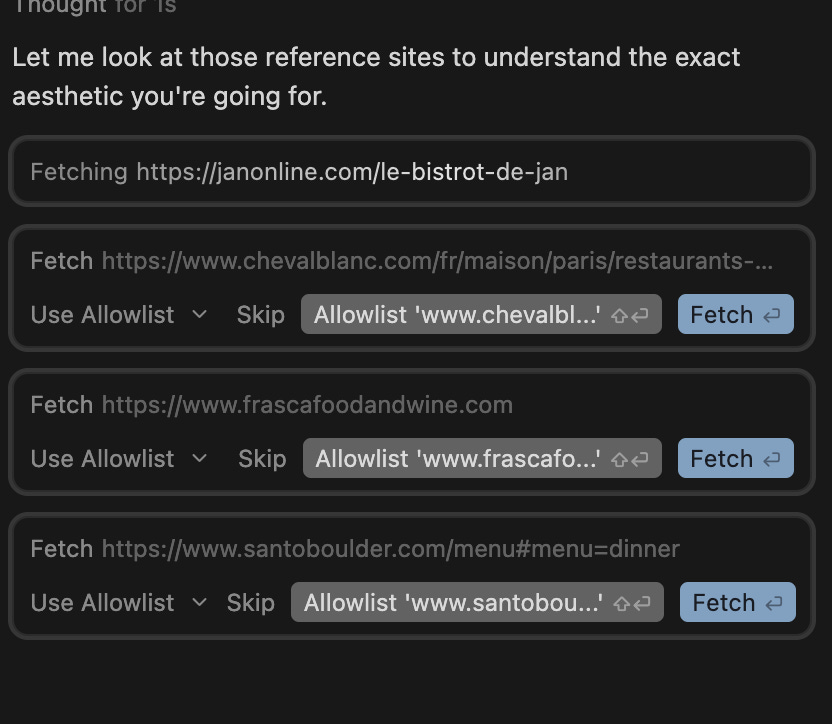
Step 1: Visual References
AI is smart, but it can’t read your mind. It needs visual examples. Search the web for sites you love.
Paste this into Cursor:
“I want the design to be inspired by these websites. Look at their typography and layout (feel free to substitute other sites that you like):
Use large, high-quality imagery. The font should be elegant sans-serif.”
Step 2: The First Build
Cursor will start generating files. You will see code flashing on the screen.
Don’t Panic: If you see red text or “errors” initially, that’s normal.
Action: You may need to click “Accept” or “Save” frequently.
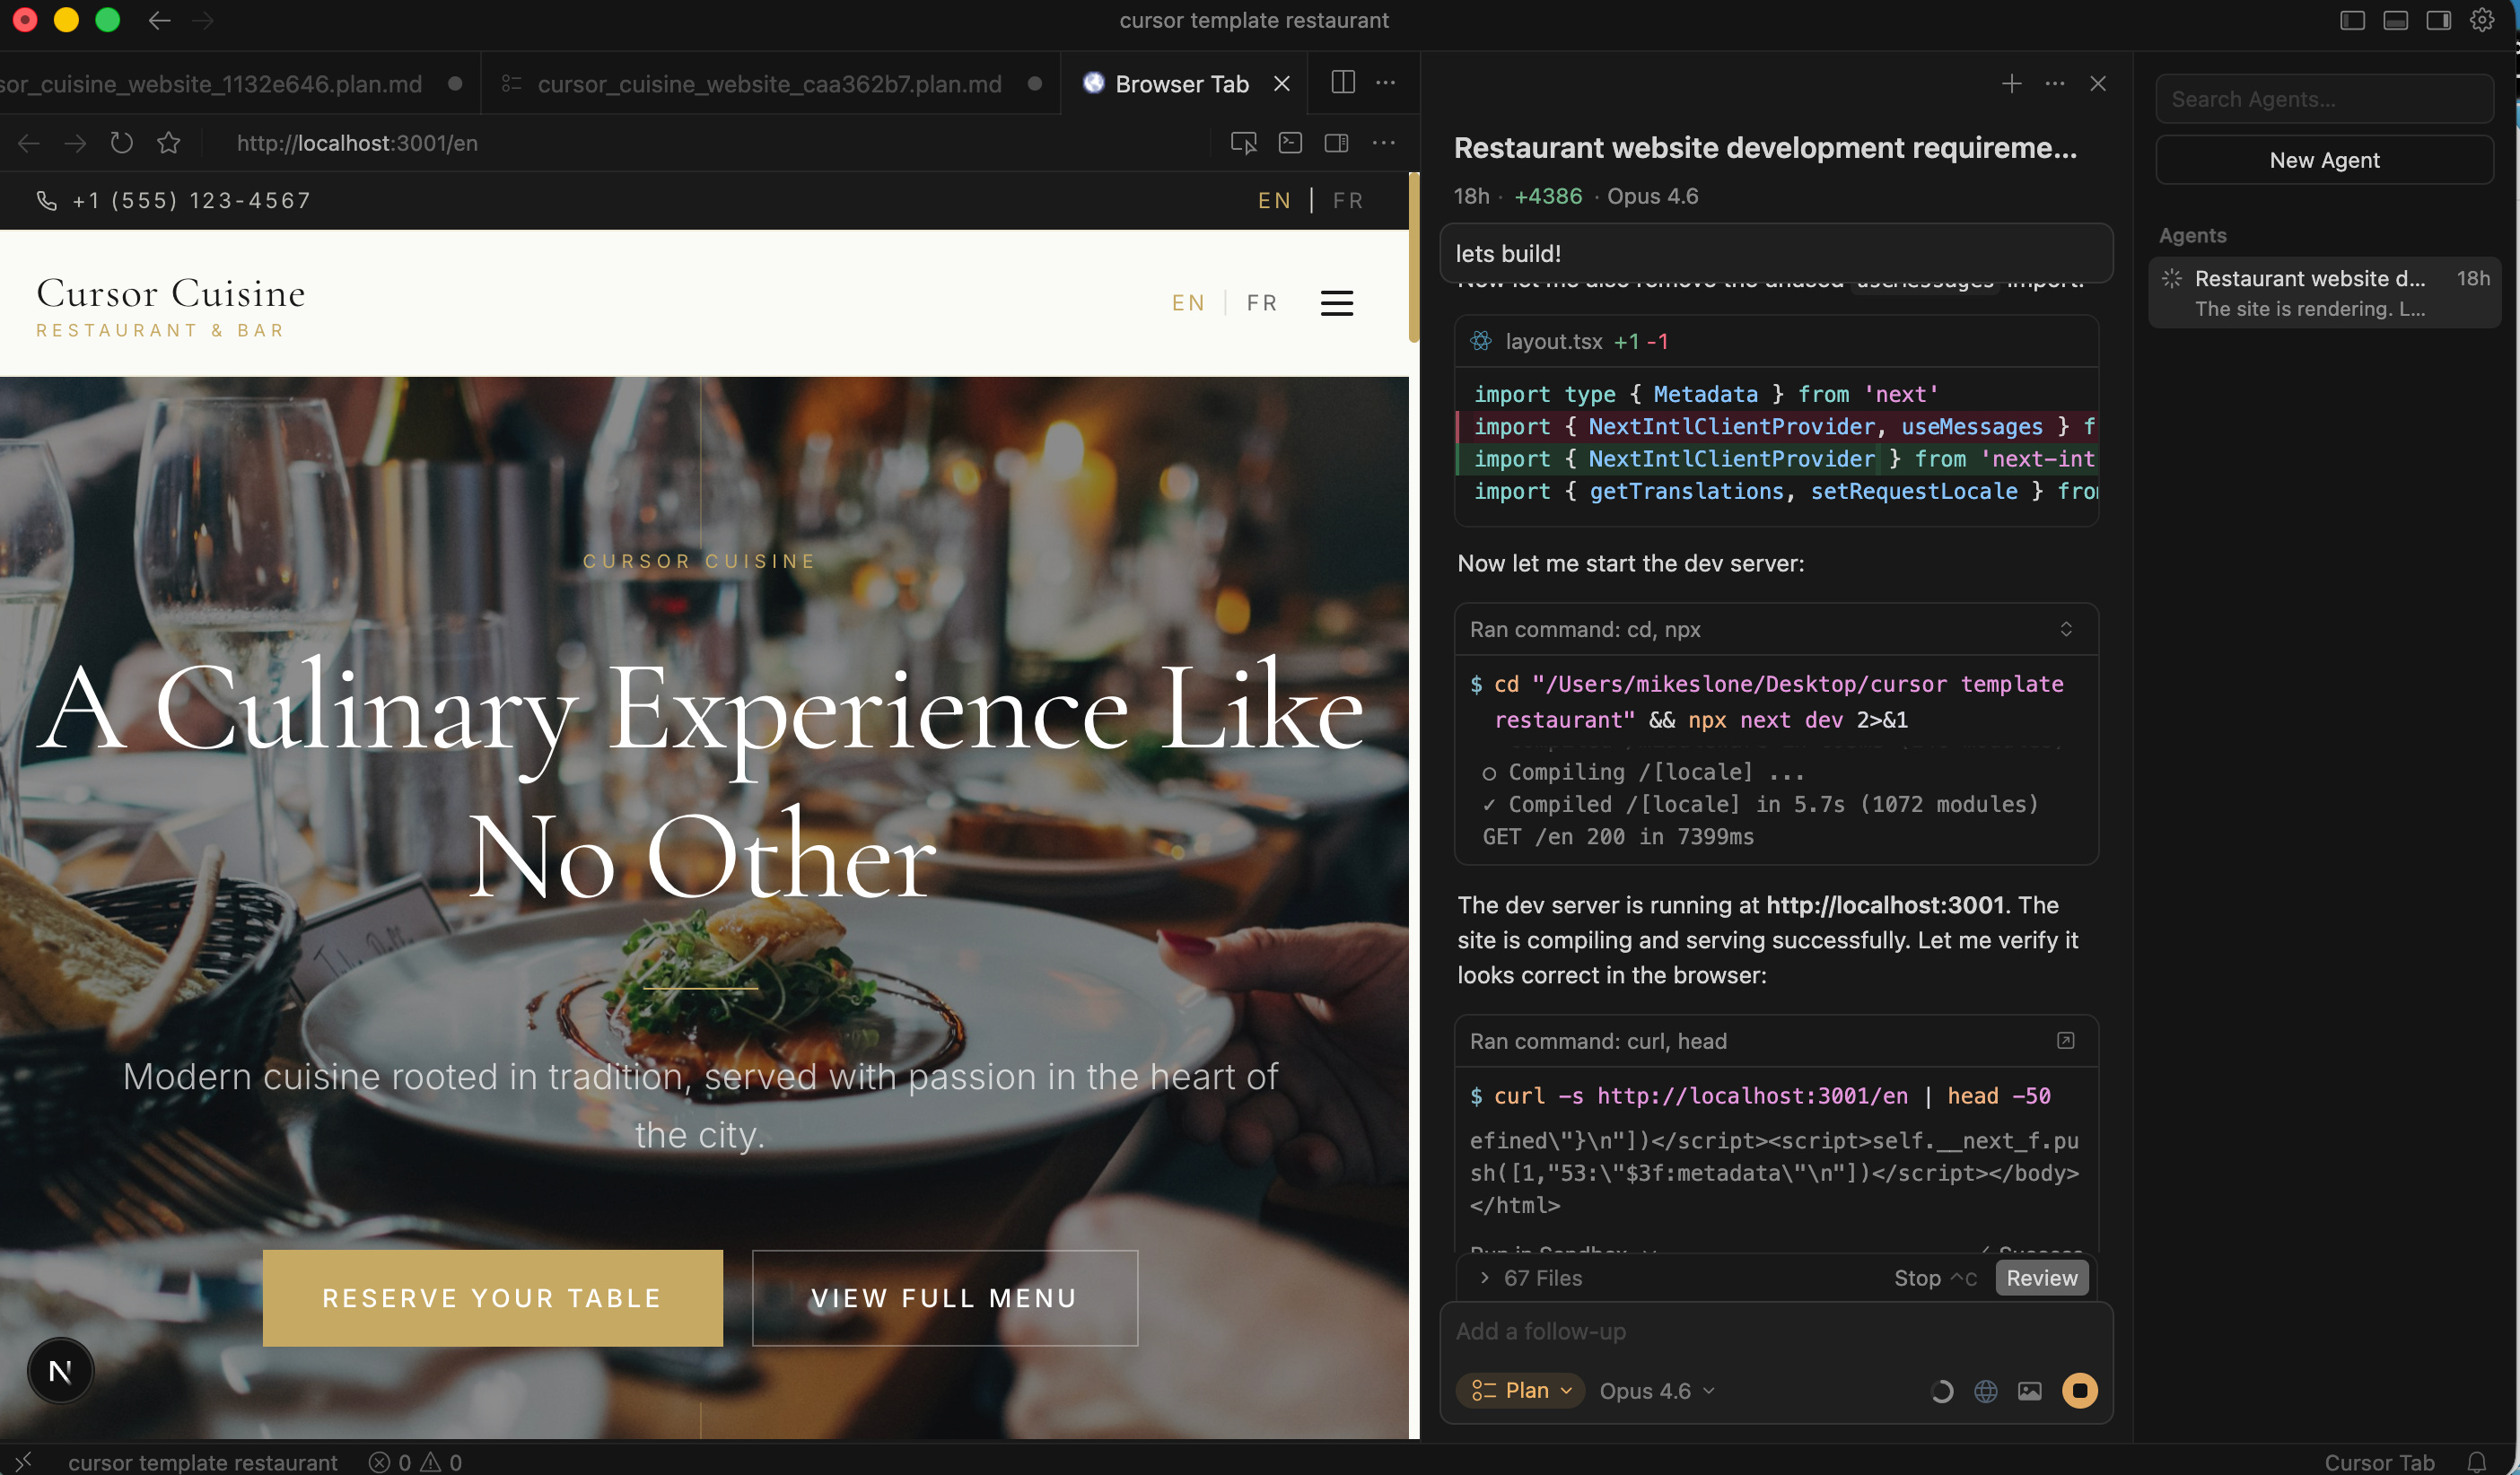
Step 3: Viewing Your Site (Localhost)
Once the initial code is generated, Cursor will usually run a “dev server.”
Look for a link in the terminal that looks like : http://localhost:3000
Command-Click that link. Your browser will open.
Troubleshooting Tip: If the link doesn’t work, tell Cursor: “The local server isn’t working. I’m getting this error...” and paste the error message.
Step 4: Iteration & Revisions (The “Art” of AI)
The first version won’t be perfect. This is where you become the Creative Director.
Example 1: The Newsletter Button
I noticed the “Subscribe” button in the footer was smashed against the side of the screen.
My Prompt: “The subscribe button in the footer is too far right. Add some padding to the right side so it breathes.”
Result: Cursor rewrites the CSS instantly.
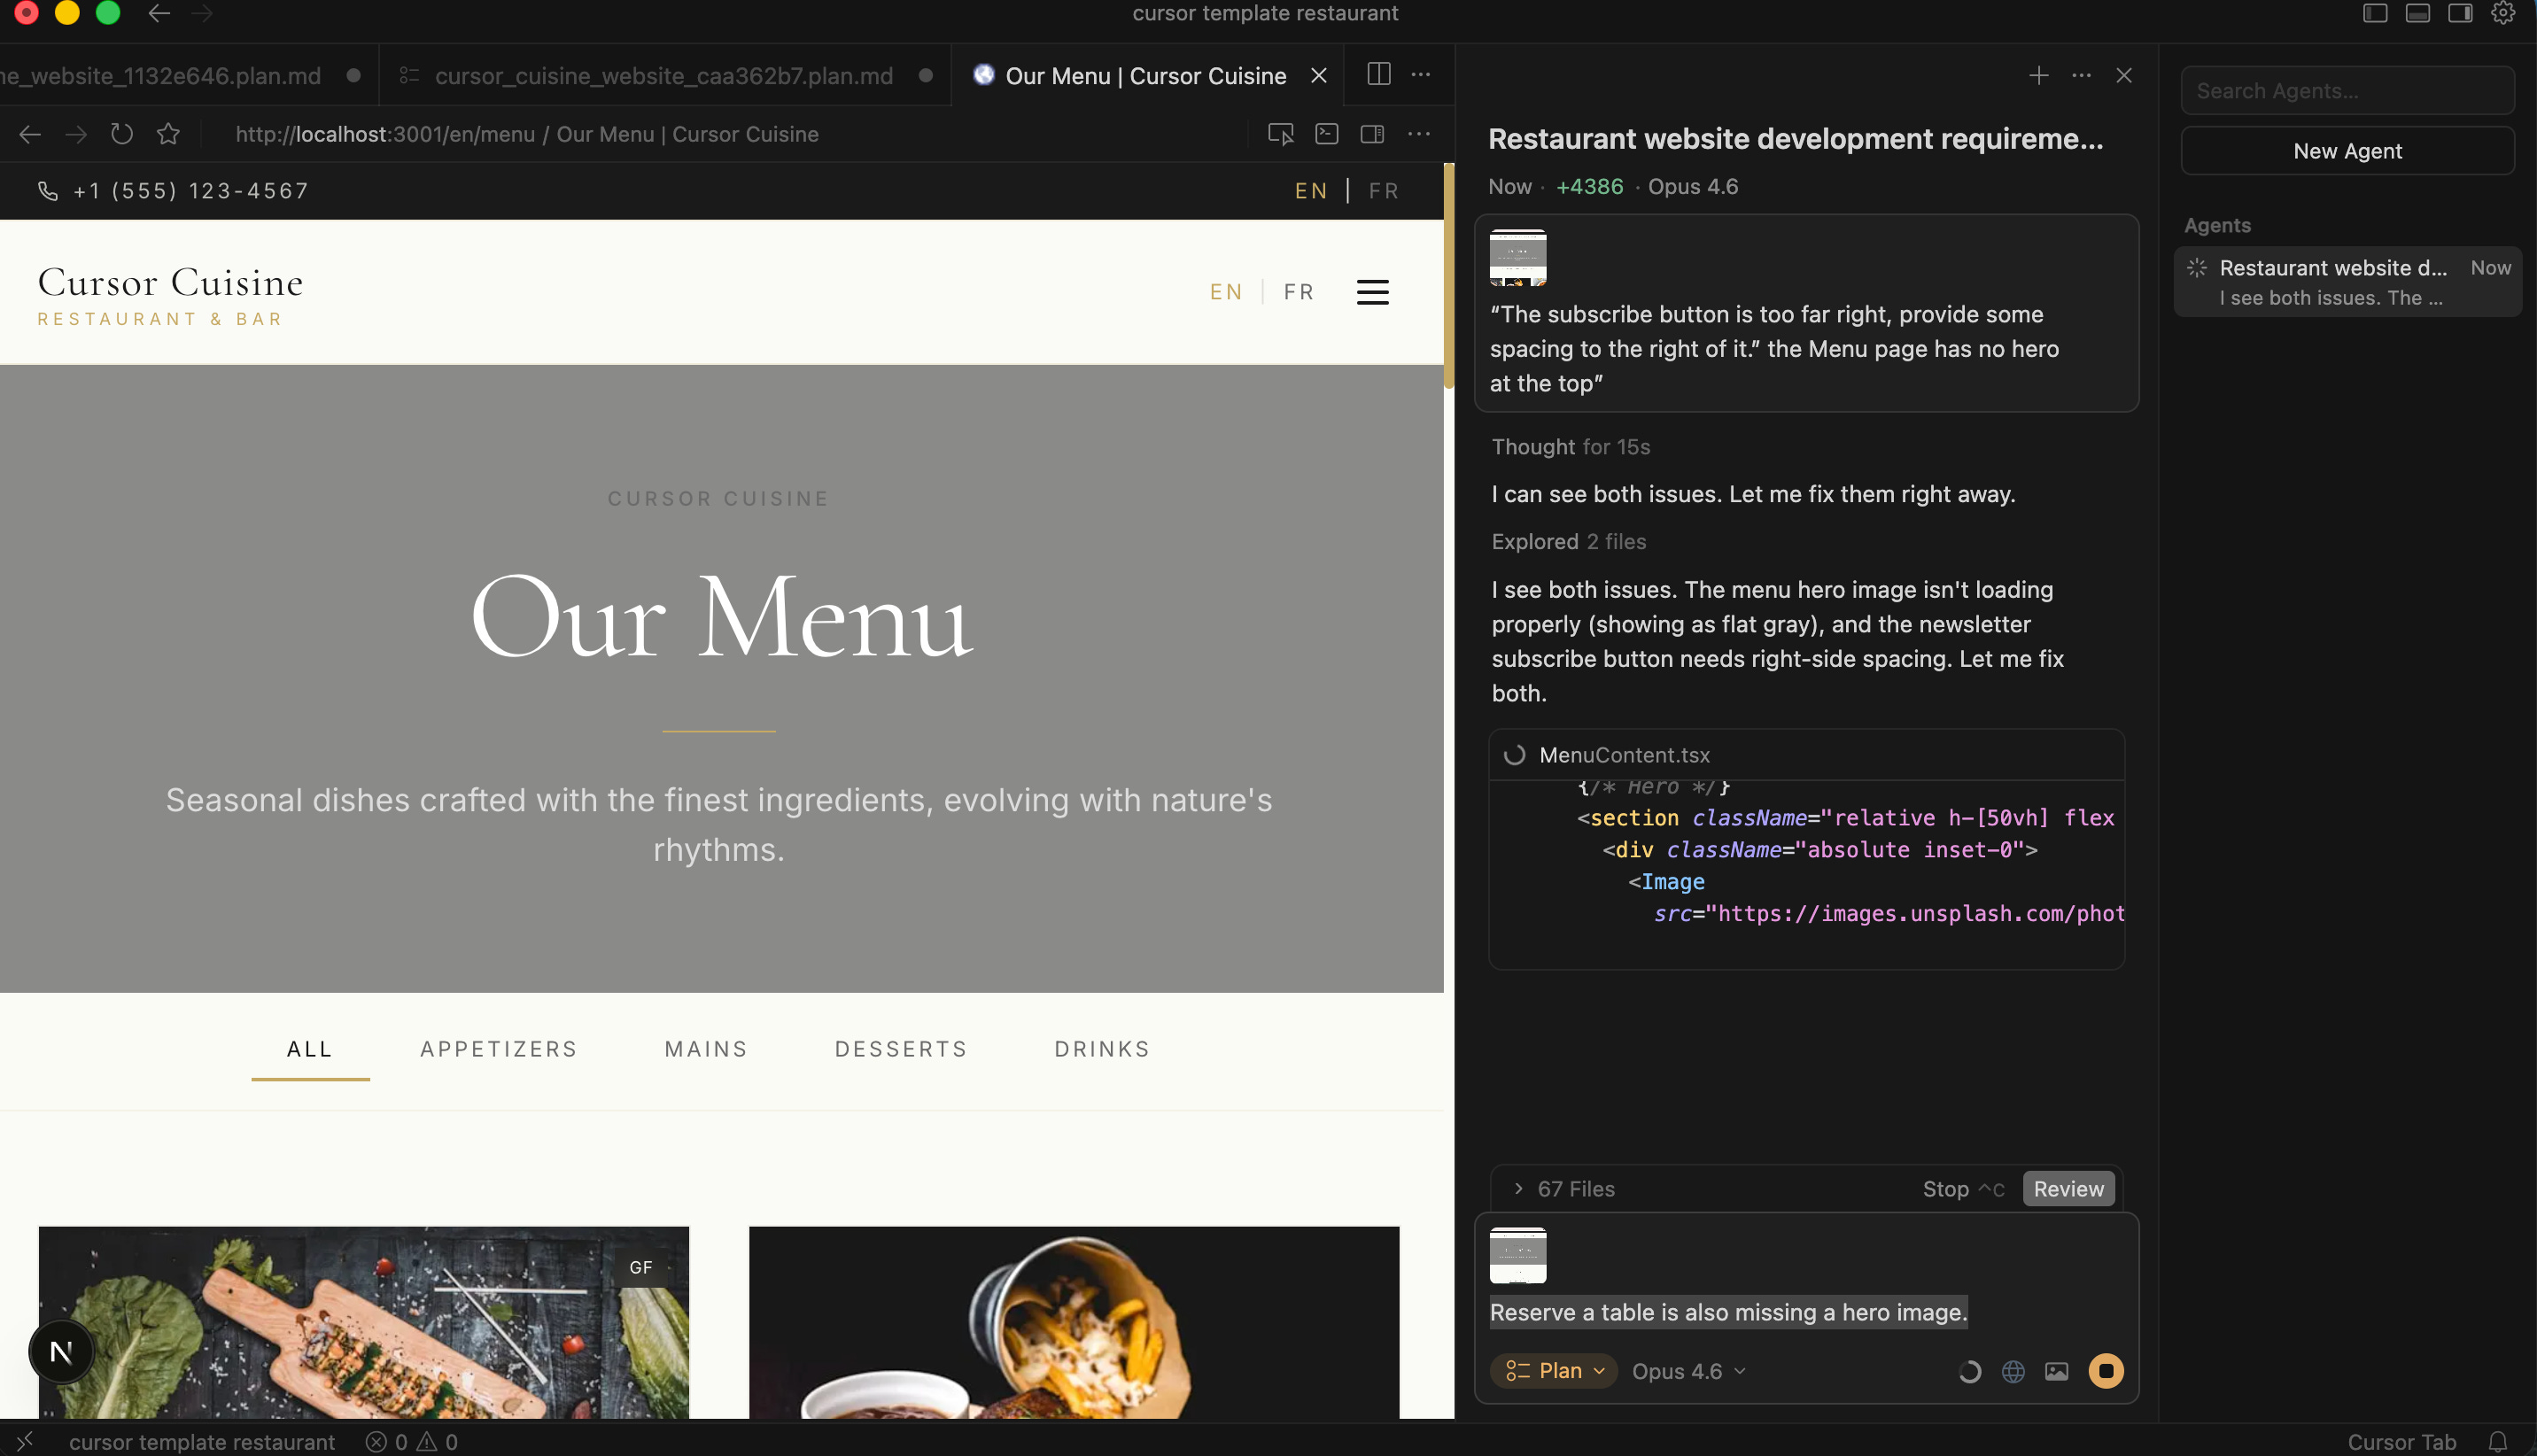
Example 2: Missing Hero Images
My Prompt: “The Menu page looks boring. It has no hero image at the top. Please add a large hero image section to the Menu page, similar to the Home page.”
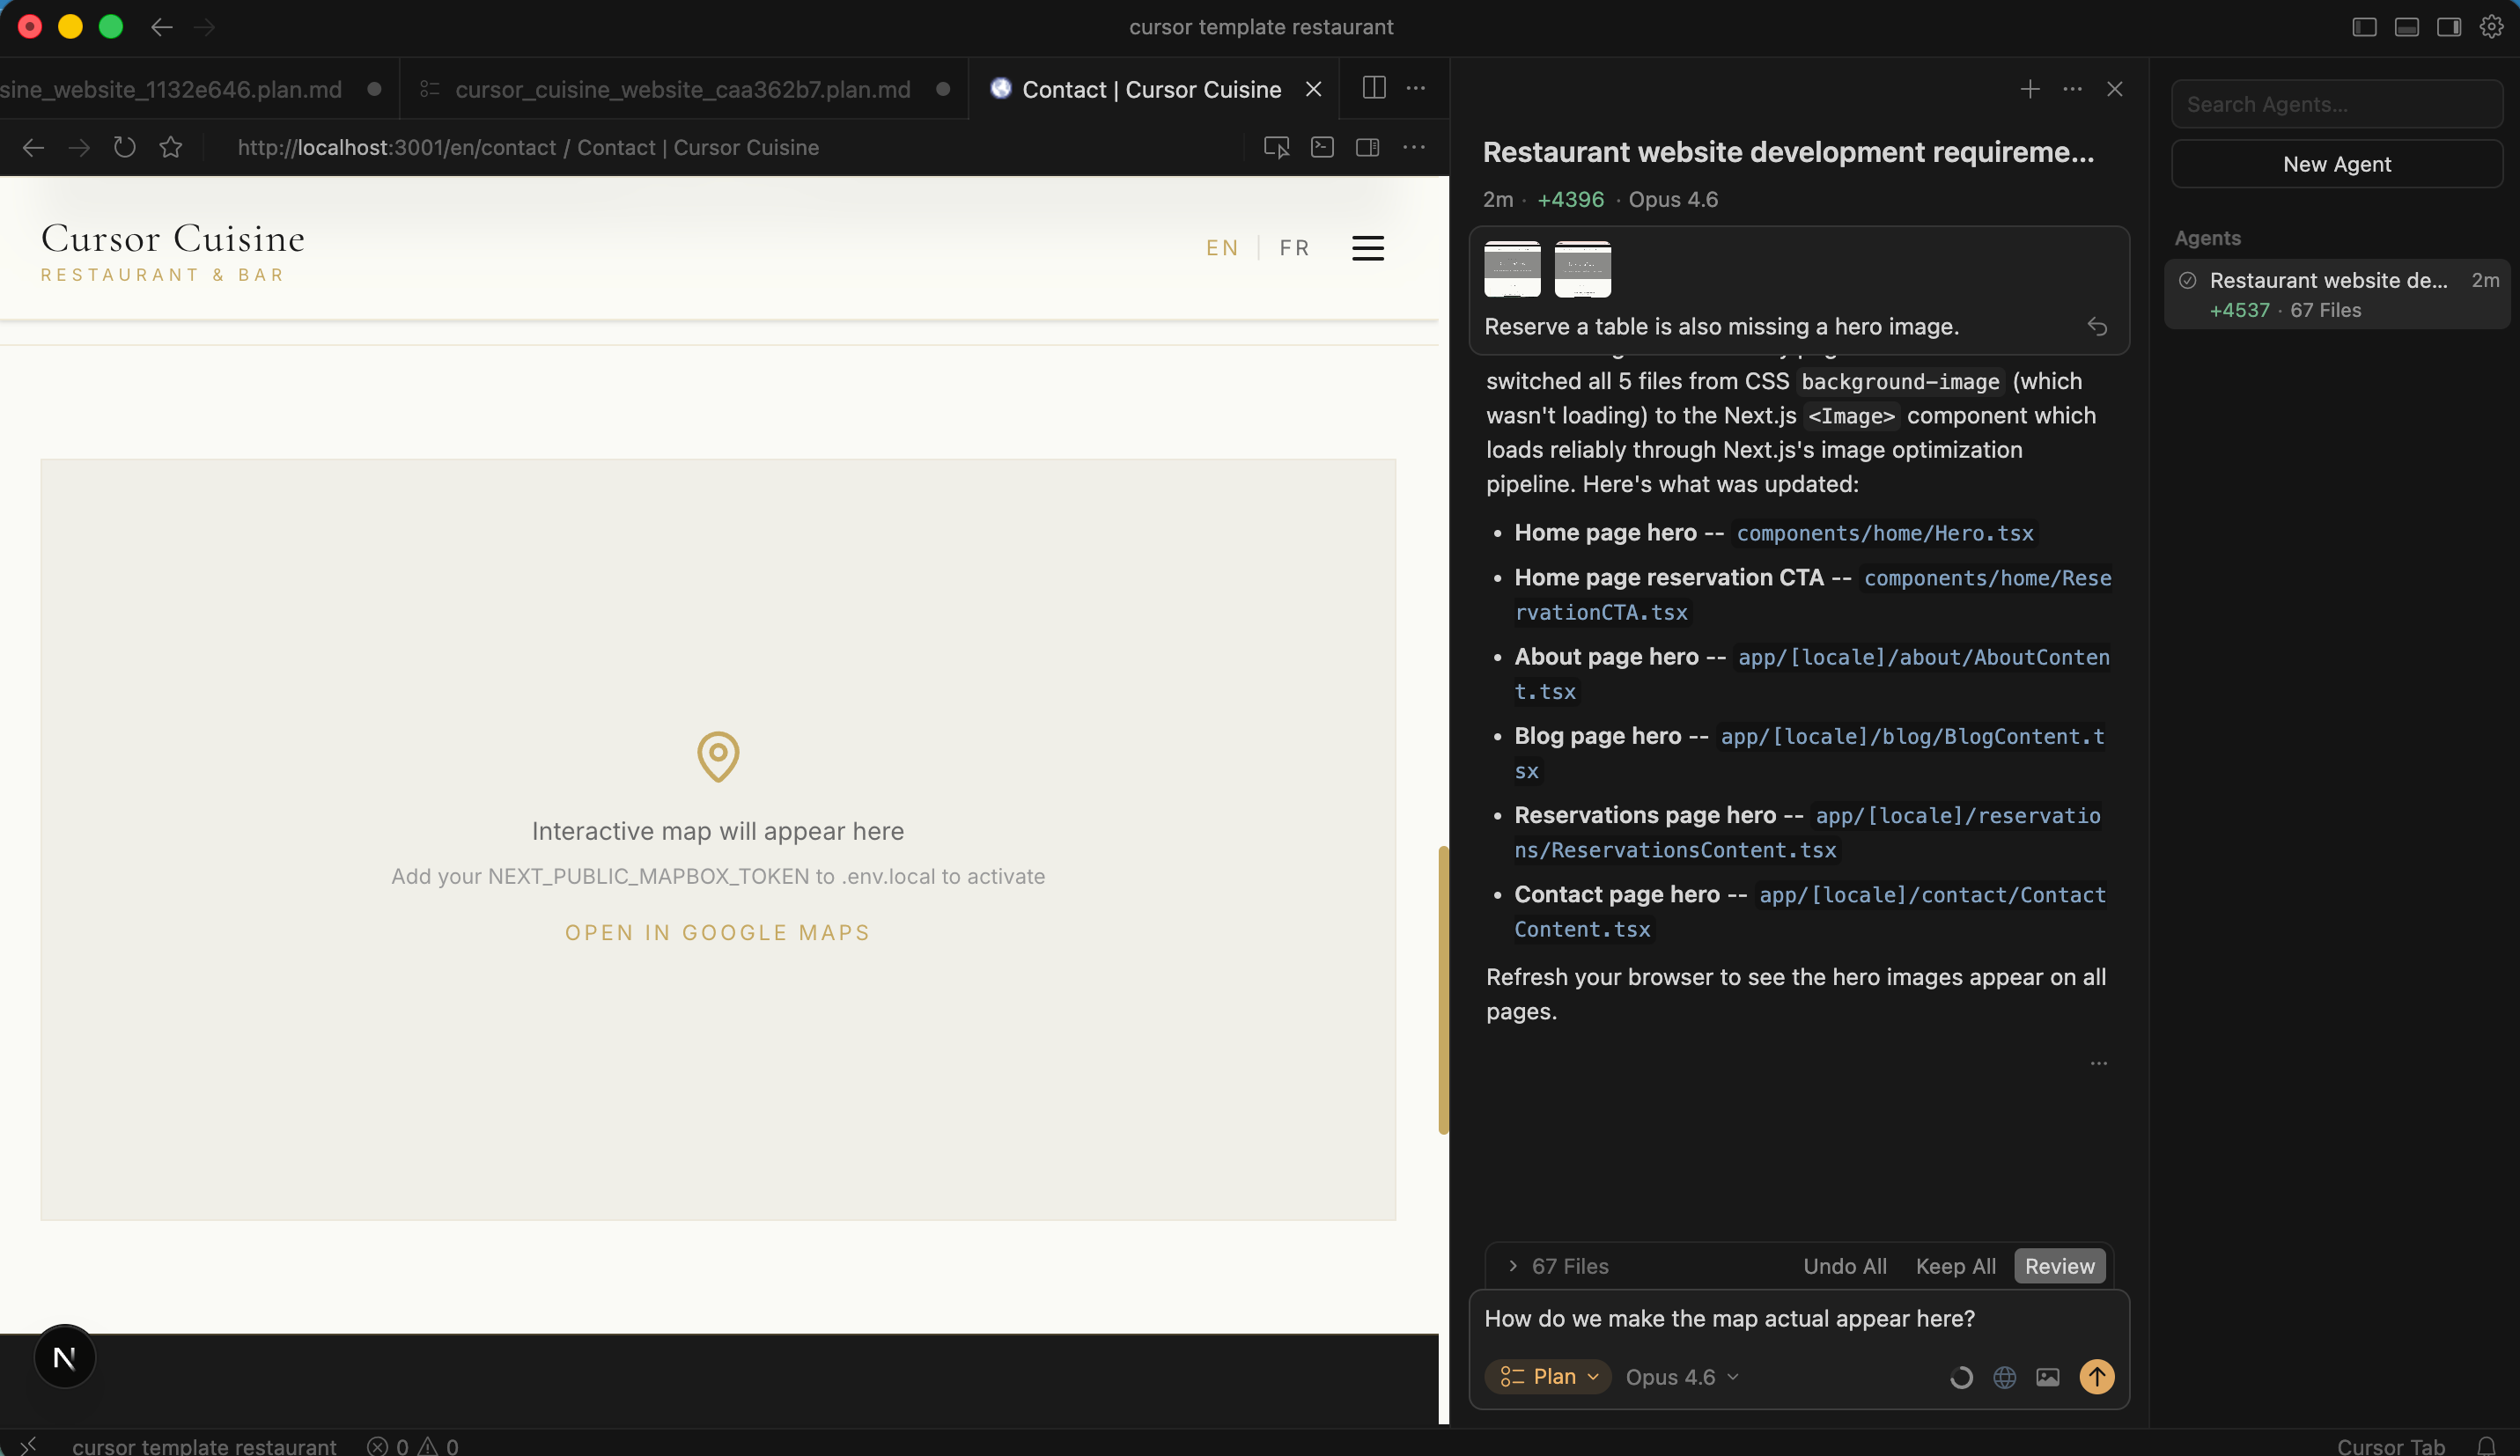
Example 3: The Map
You’ll notice the map is probably blank. Cursor puts a placeholder there because it needs a Mapbox API Token.
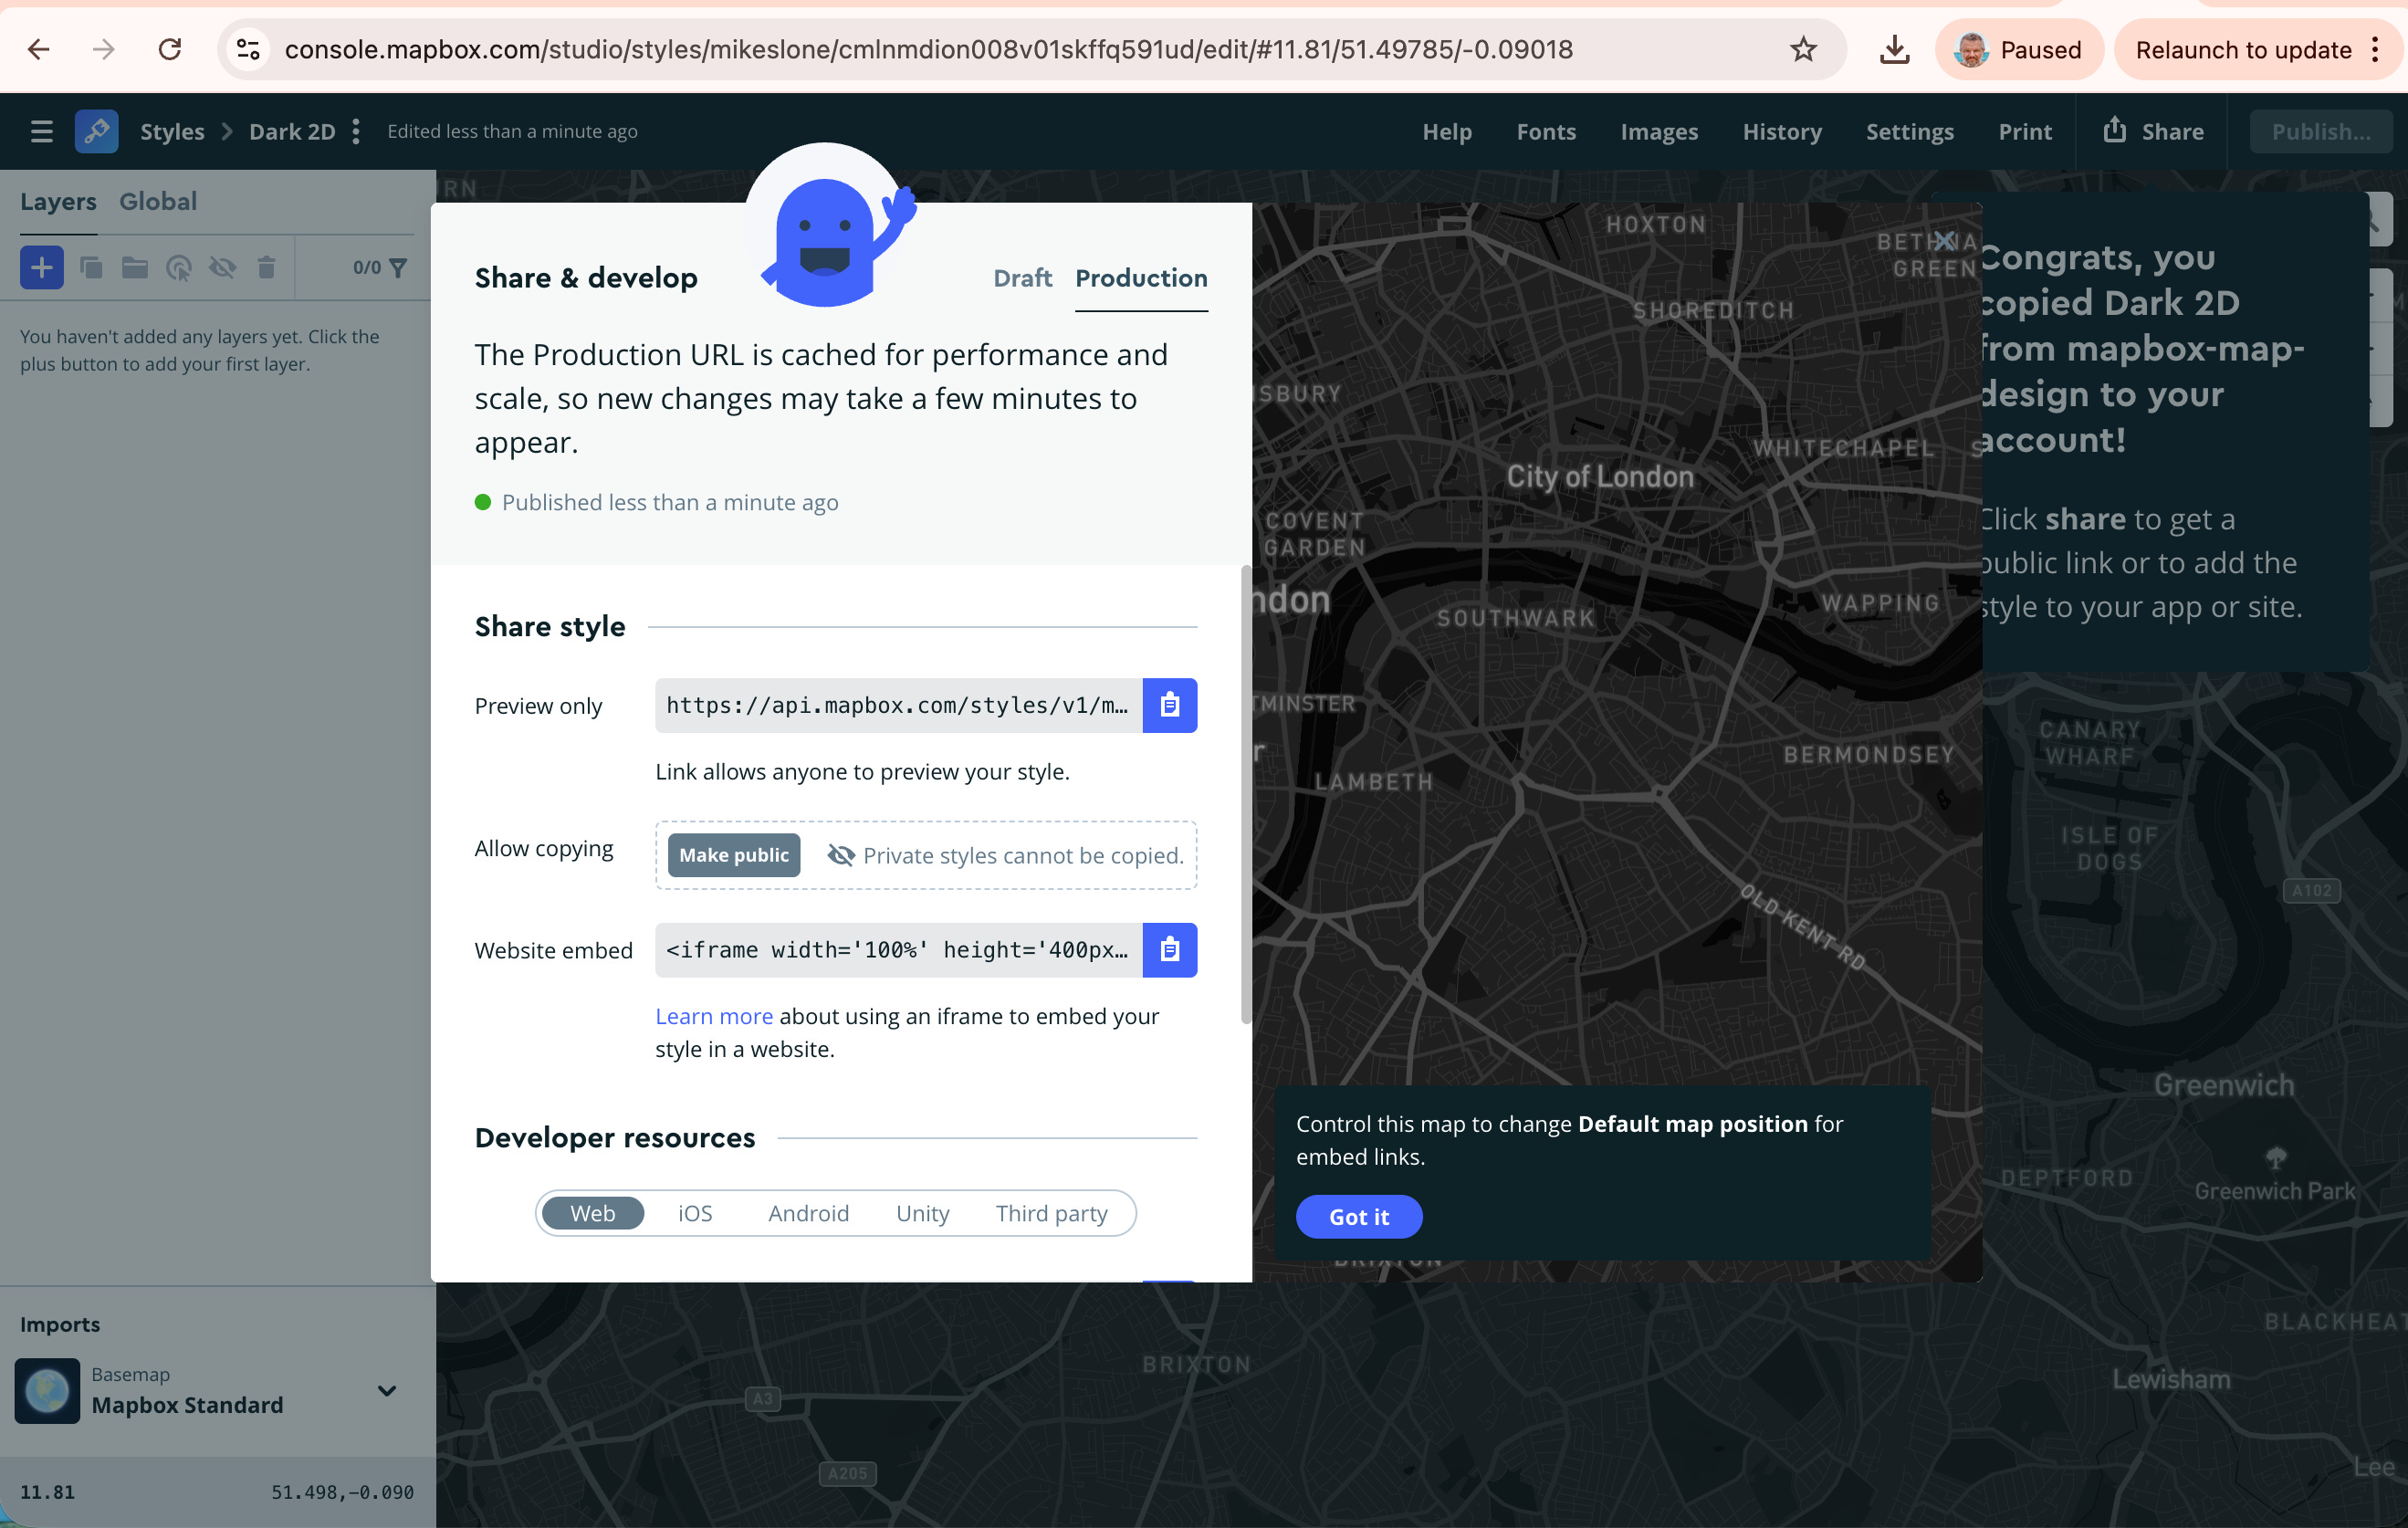
Go to mapbox.com and create a free account.
Go to your Account dashboard and copy the “Default Public Token.”
Go back to Cursor.
Prompt: “Here is my Mapbox token: [PASTE TOKEN]. Please make the map component work and center it on a fake location in New York”
Don’t be afraid to be bossy. If something looks ugly, say “This looks ugly. Make it cleaner.”
Part 3: CMS & Content – Wiring the Brain (Sanity.io)
Right now, your text (like the menu items) is probably “hard-coded” into the website. That means to change a price, you have to ask the AI to rewrite code. That’s annoying.
We want a CMS (Content Management System) so you can log in and change “Steak Frites - $25” to “$30” instantly. We are using Sanity.io.
Step 1: Setup Sanity
Prompt Cursor:
“I want to connect this site to Sanity CMS. Please create a script or guide me on how to move the hardcoded menu data and blog posts into Sanity so I can edit them easily.”
Cursor will likely tell you to:
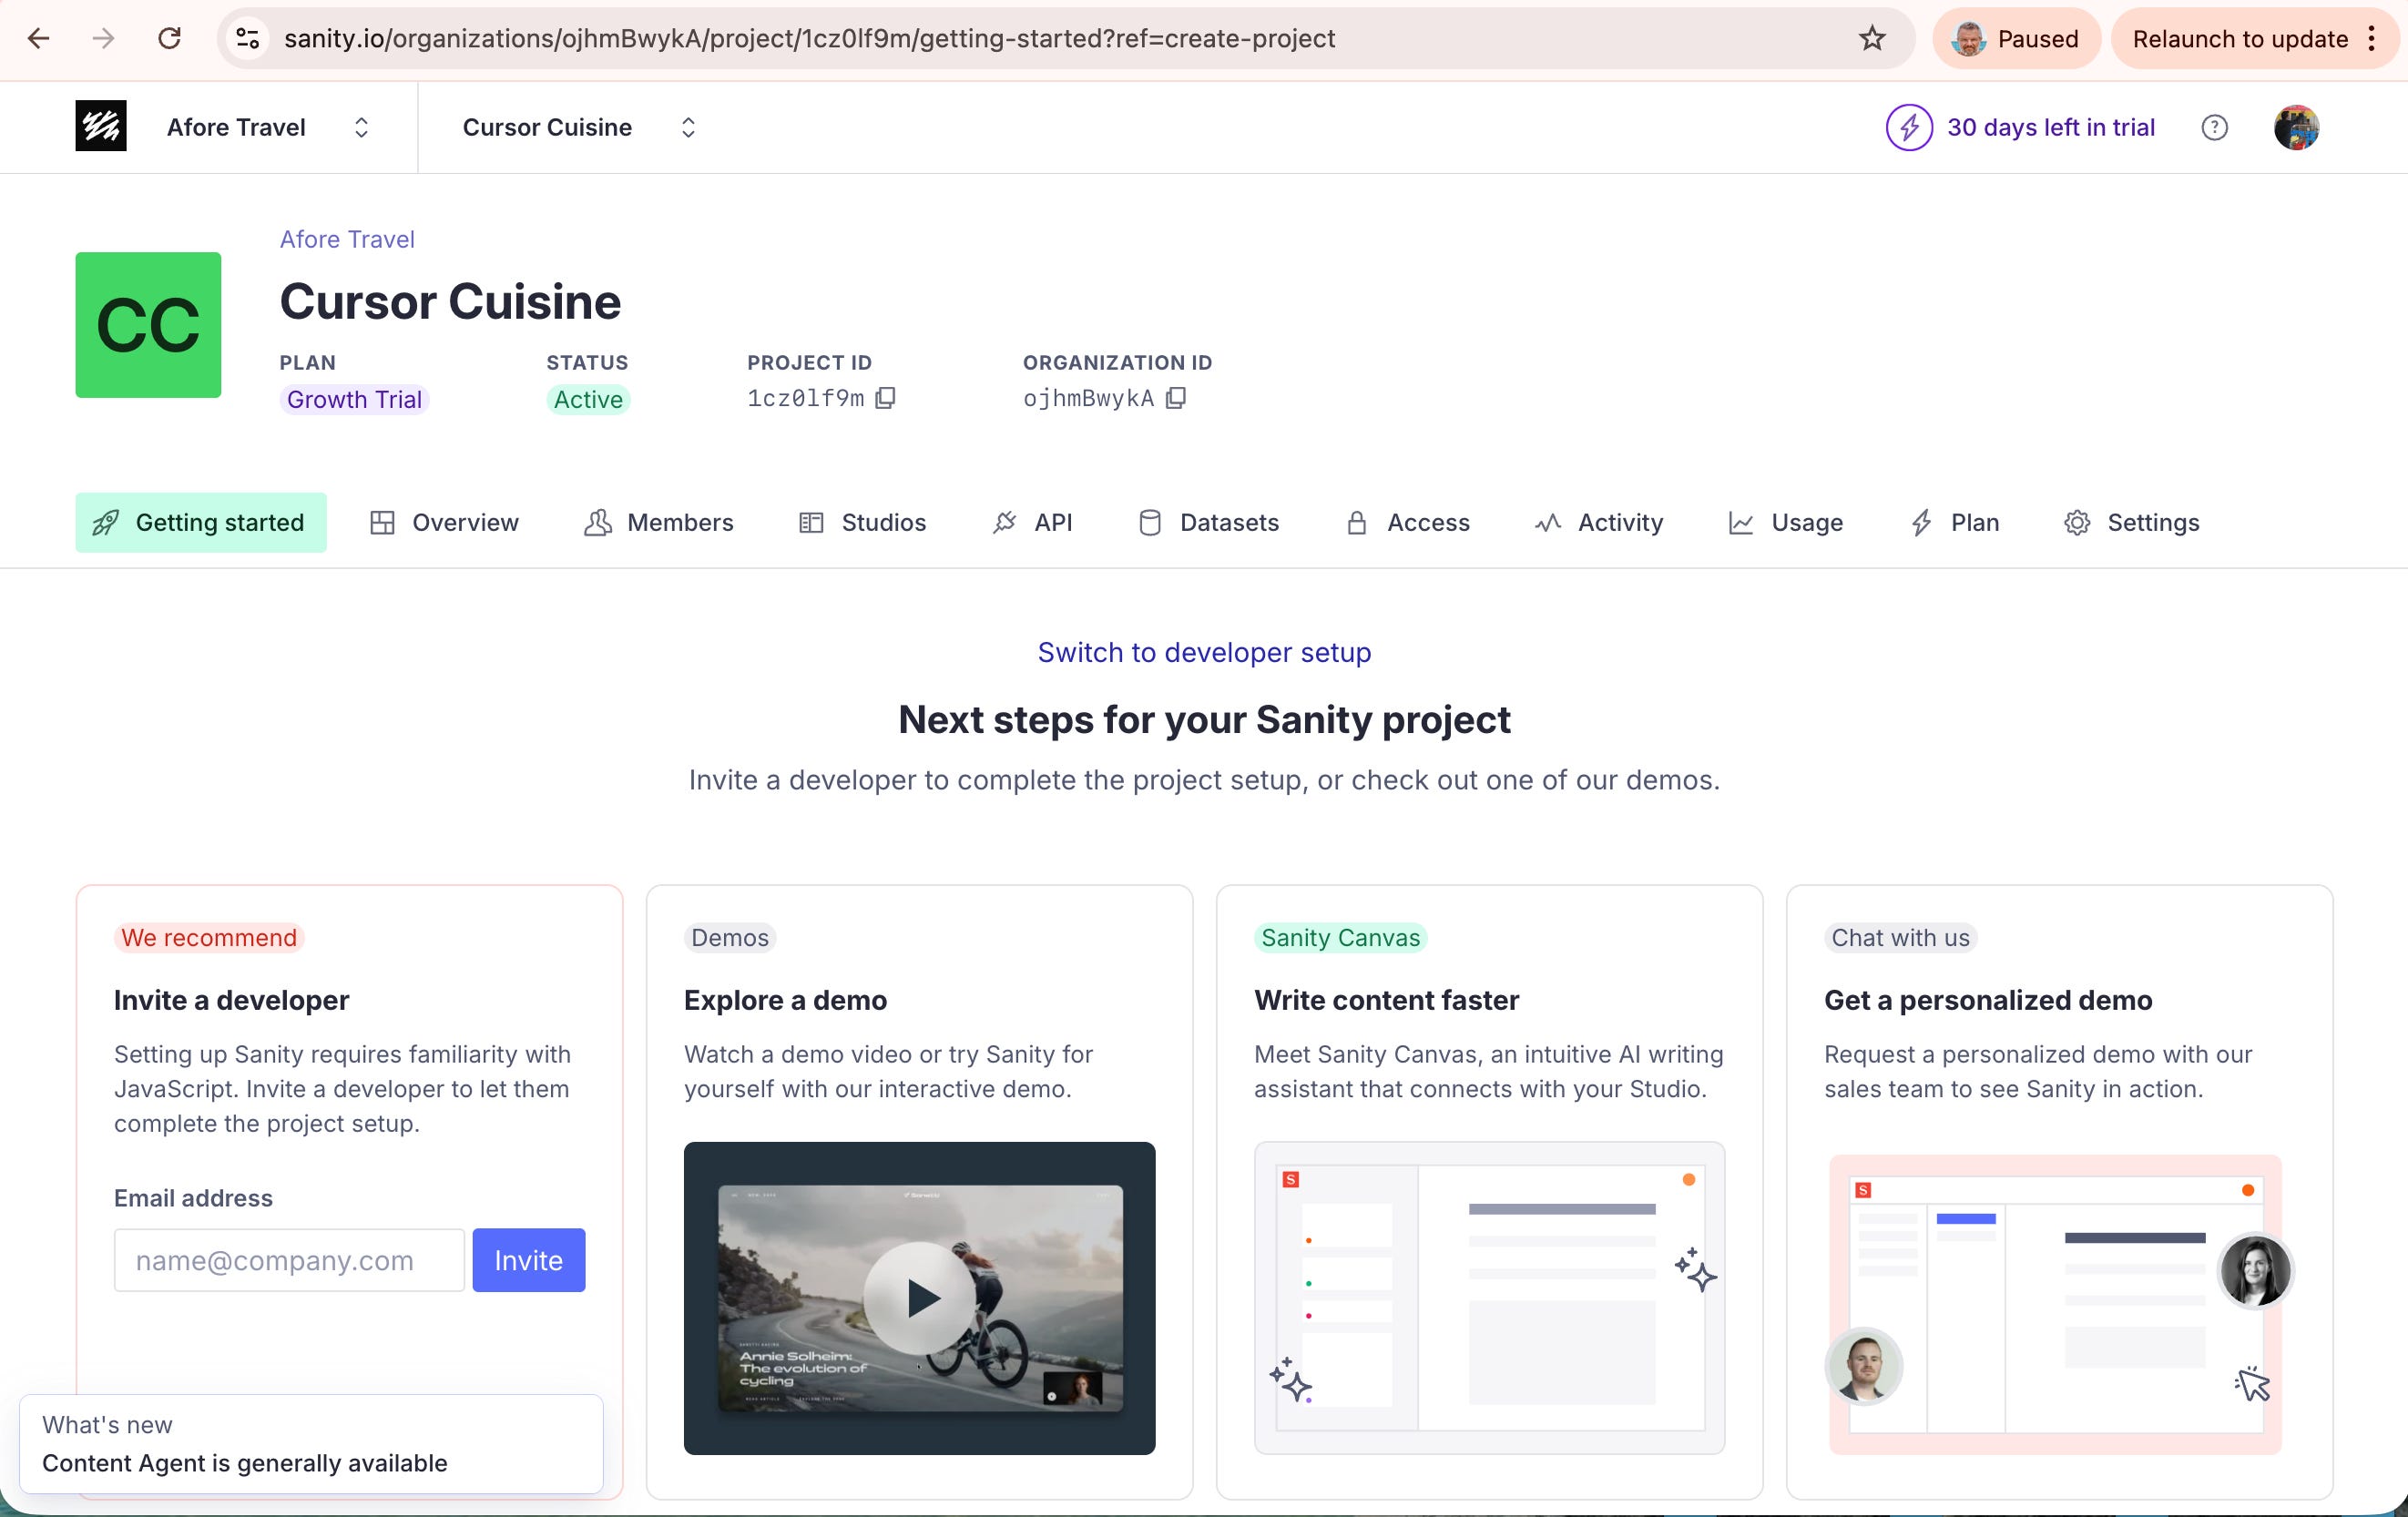
Go to sanity.io and create a free account.
Create a new project (call it “Cursor Cuisine”).
Get your Project ID.
Step 2: The Connection
You will need to create a file called .env.local in your project folder. This is where you keep secrets.
Prompt Cursor: “Help me set up my .env.local file with my Sanity Project ID.”
Cursor will tell you to add a line like:NEXT_PUBLIC_SANITY_PROJECT_ID=your_id_here
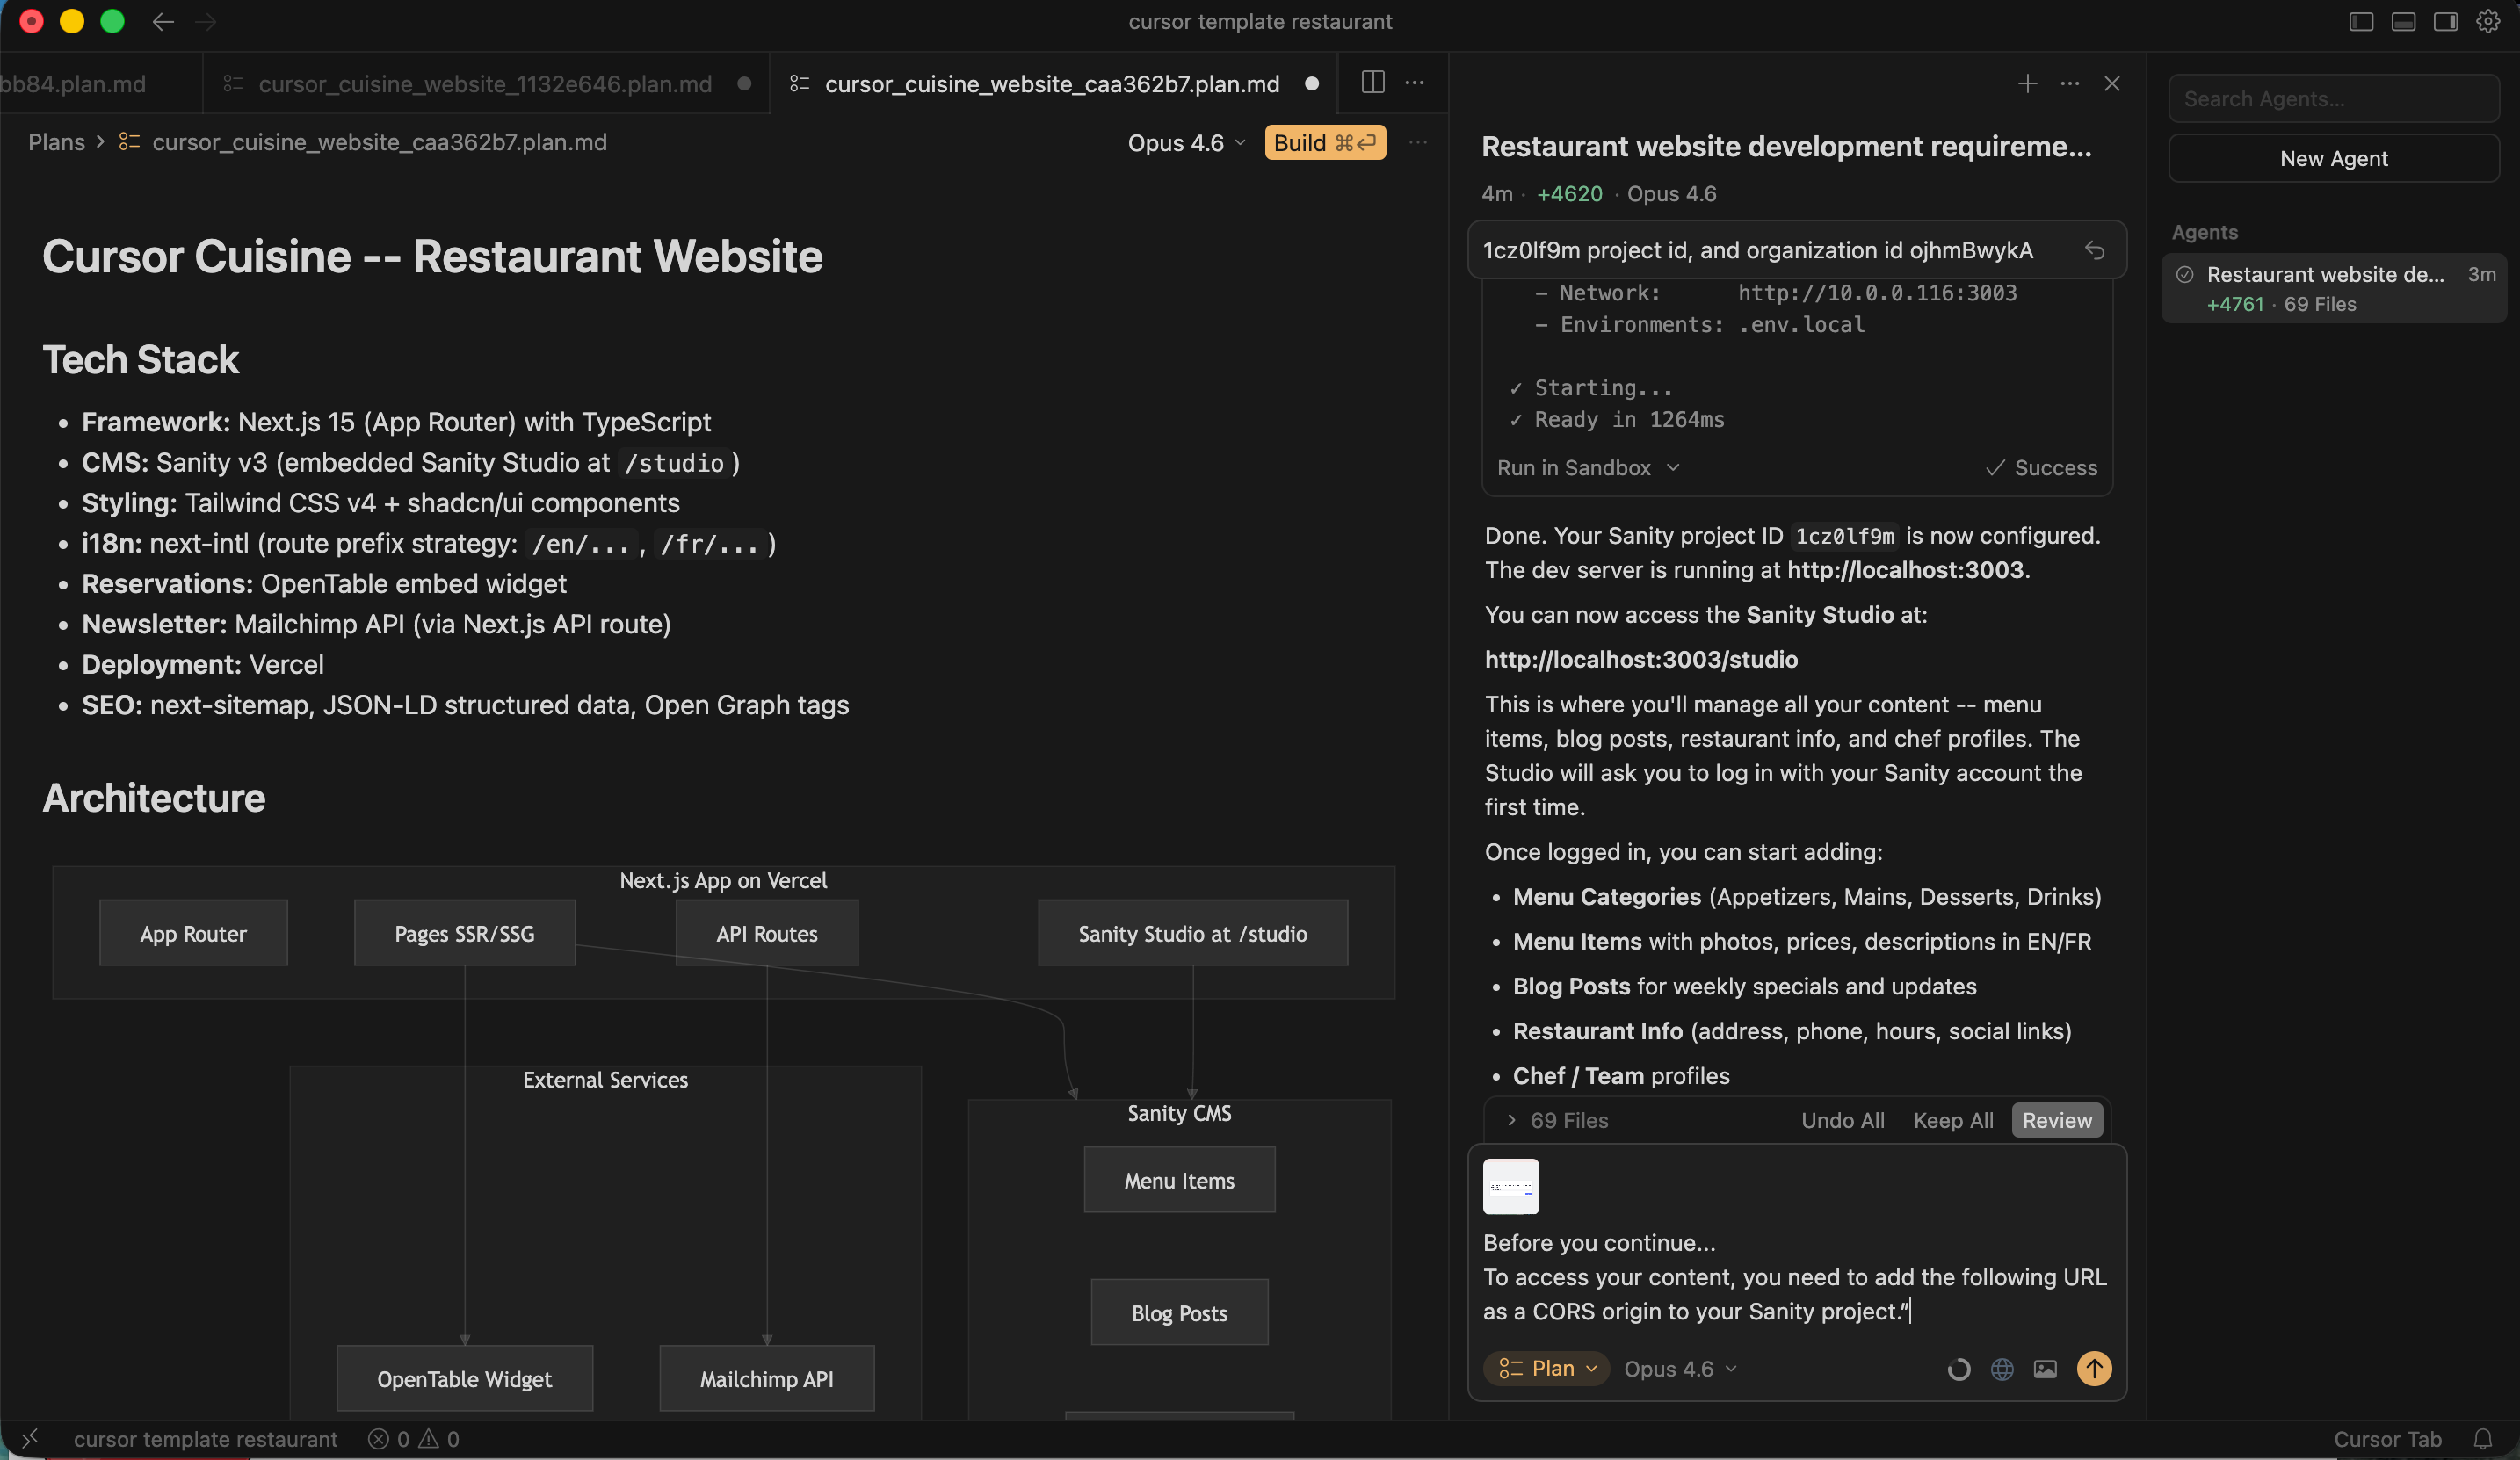
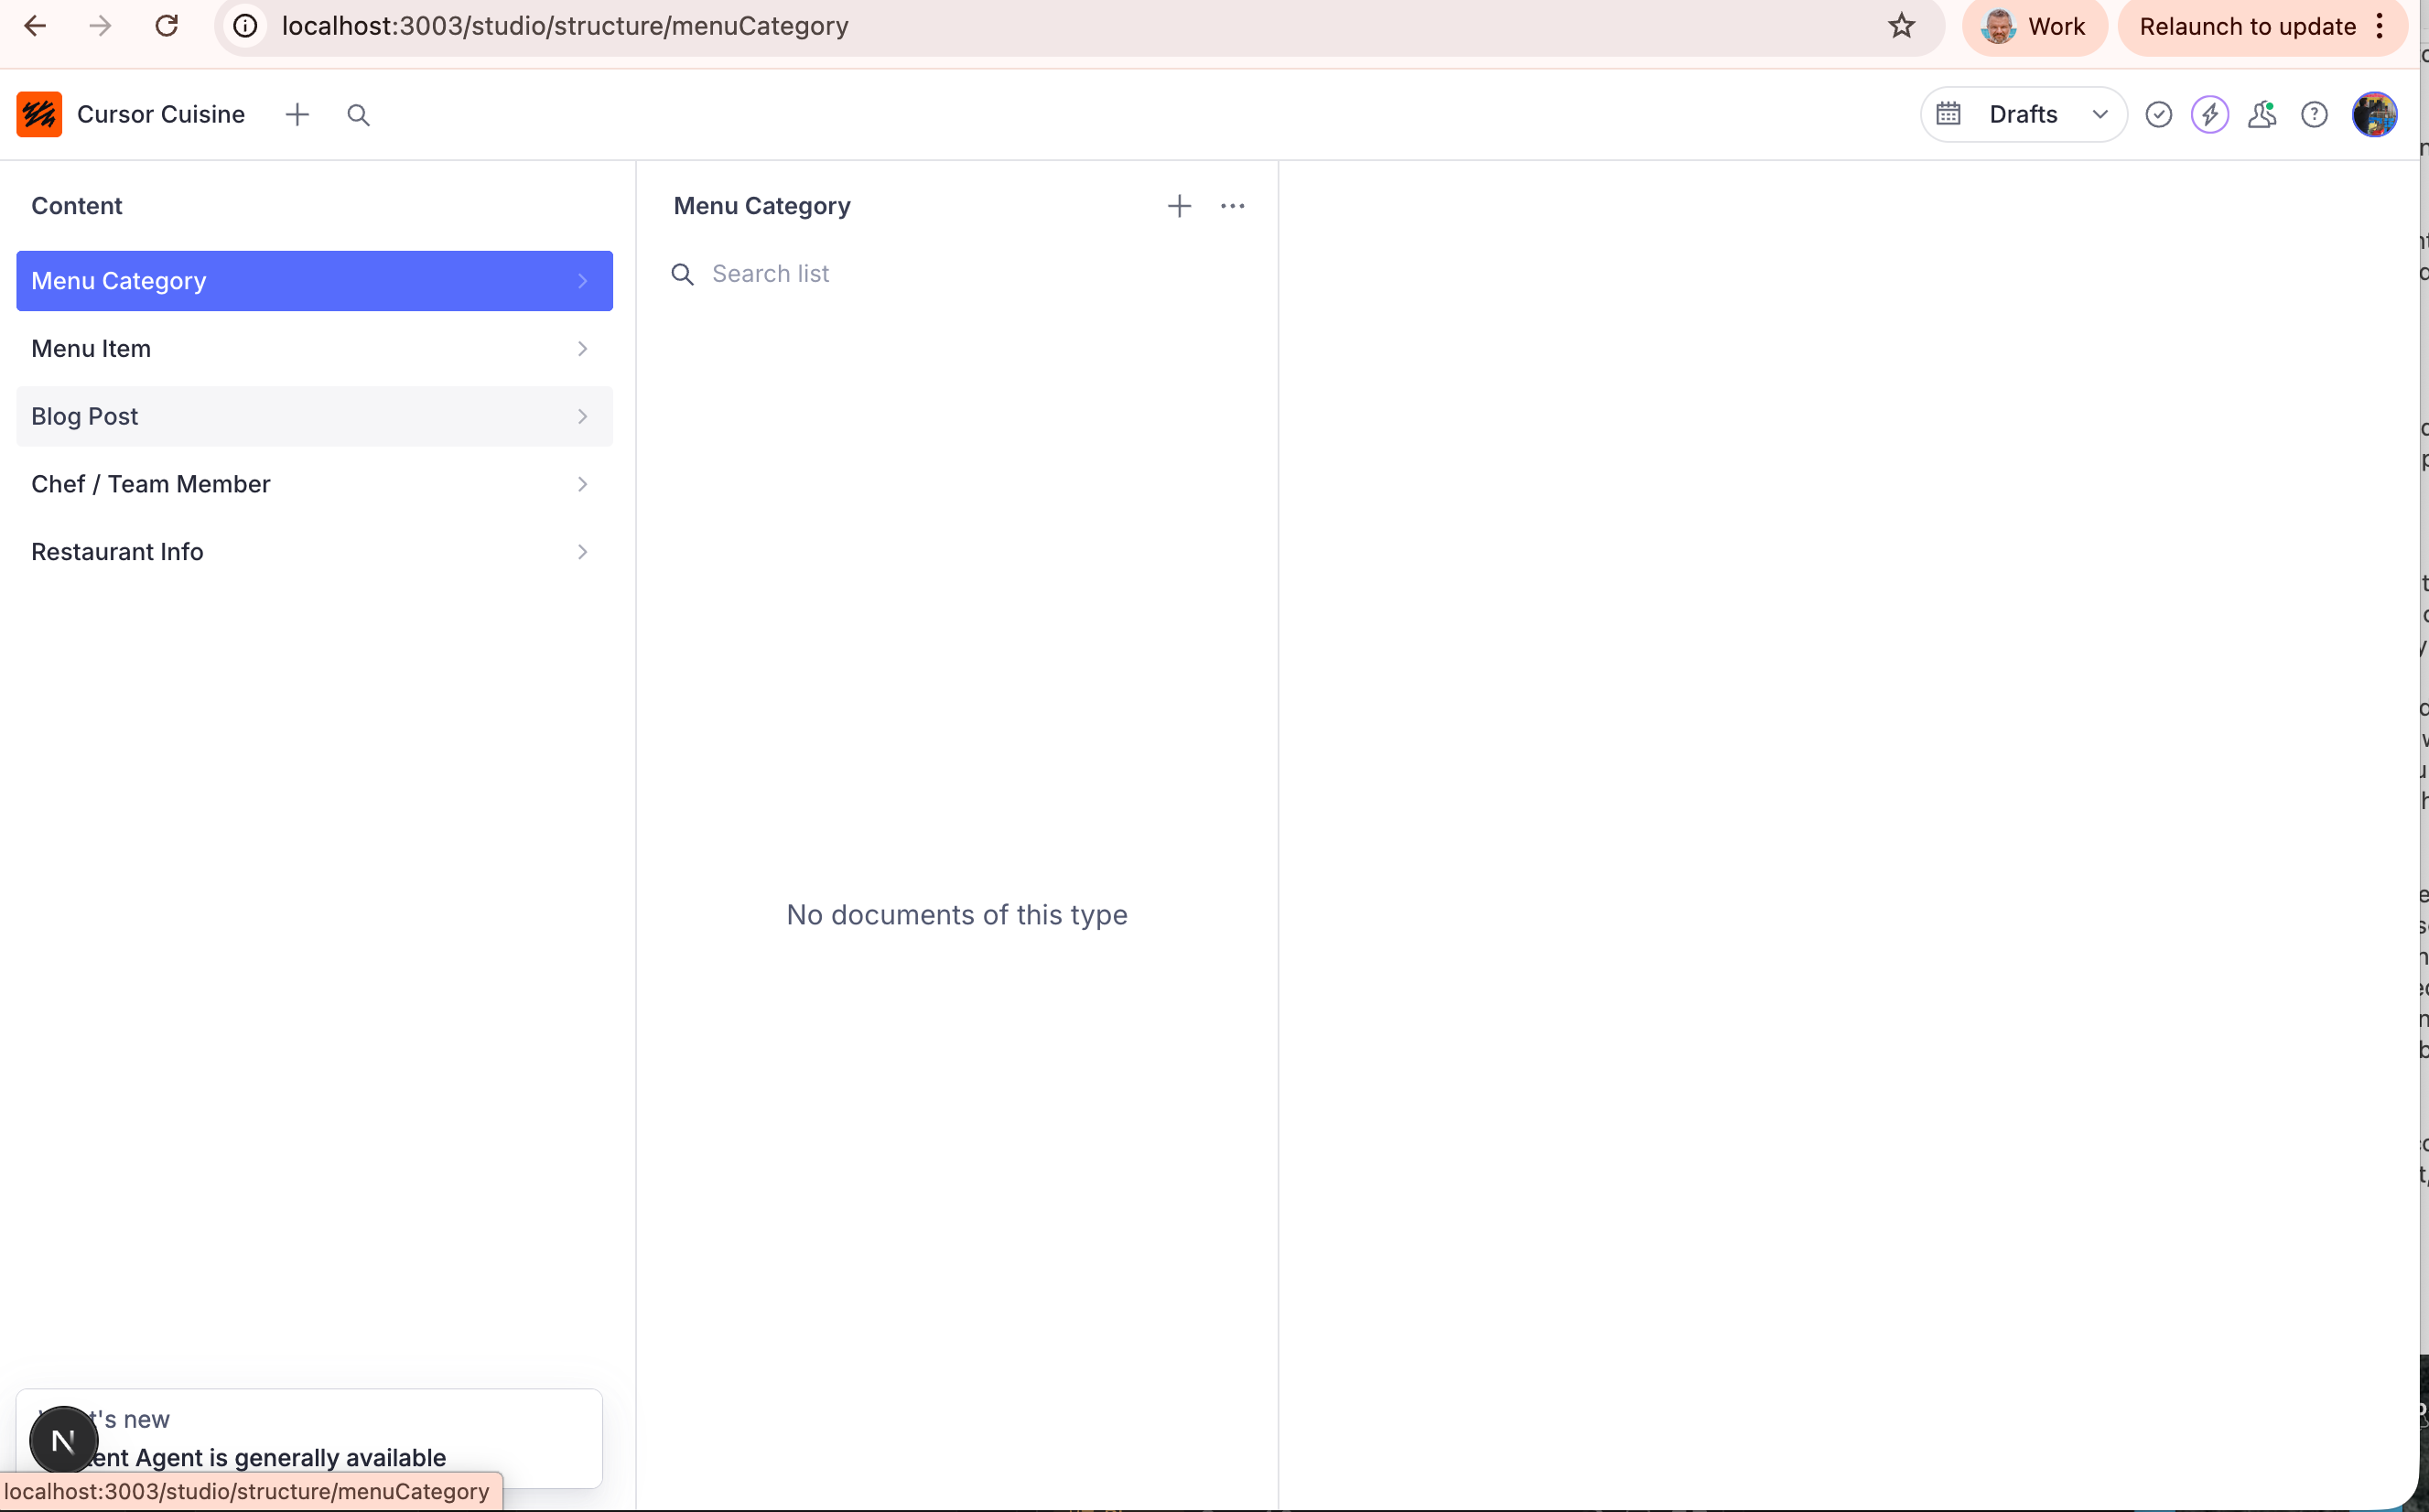
Step 3: The Sanity Studio
Cursor will help you install “Sanity Studio,” which is the editor interface. It usually runs on a different port, like
http://localhost:3003
Go there. You should see a login screen. Log in with your Sanity account.
The CORS Error:
You might see a big red warning saying “CORS Error.”
Don’t Panic! This just means Sanity is blocking your computer from talking to it for security.
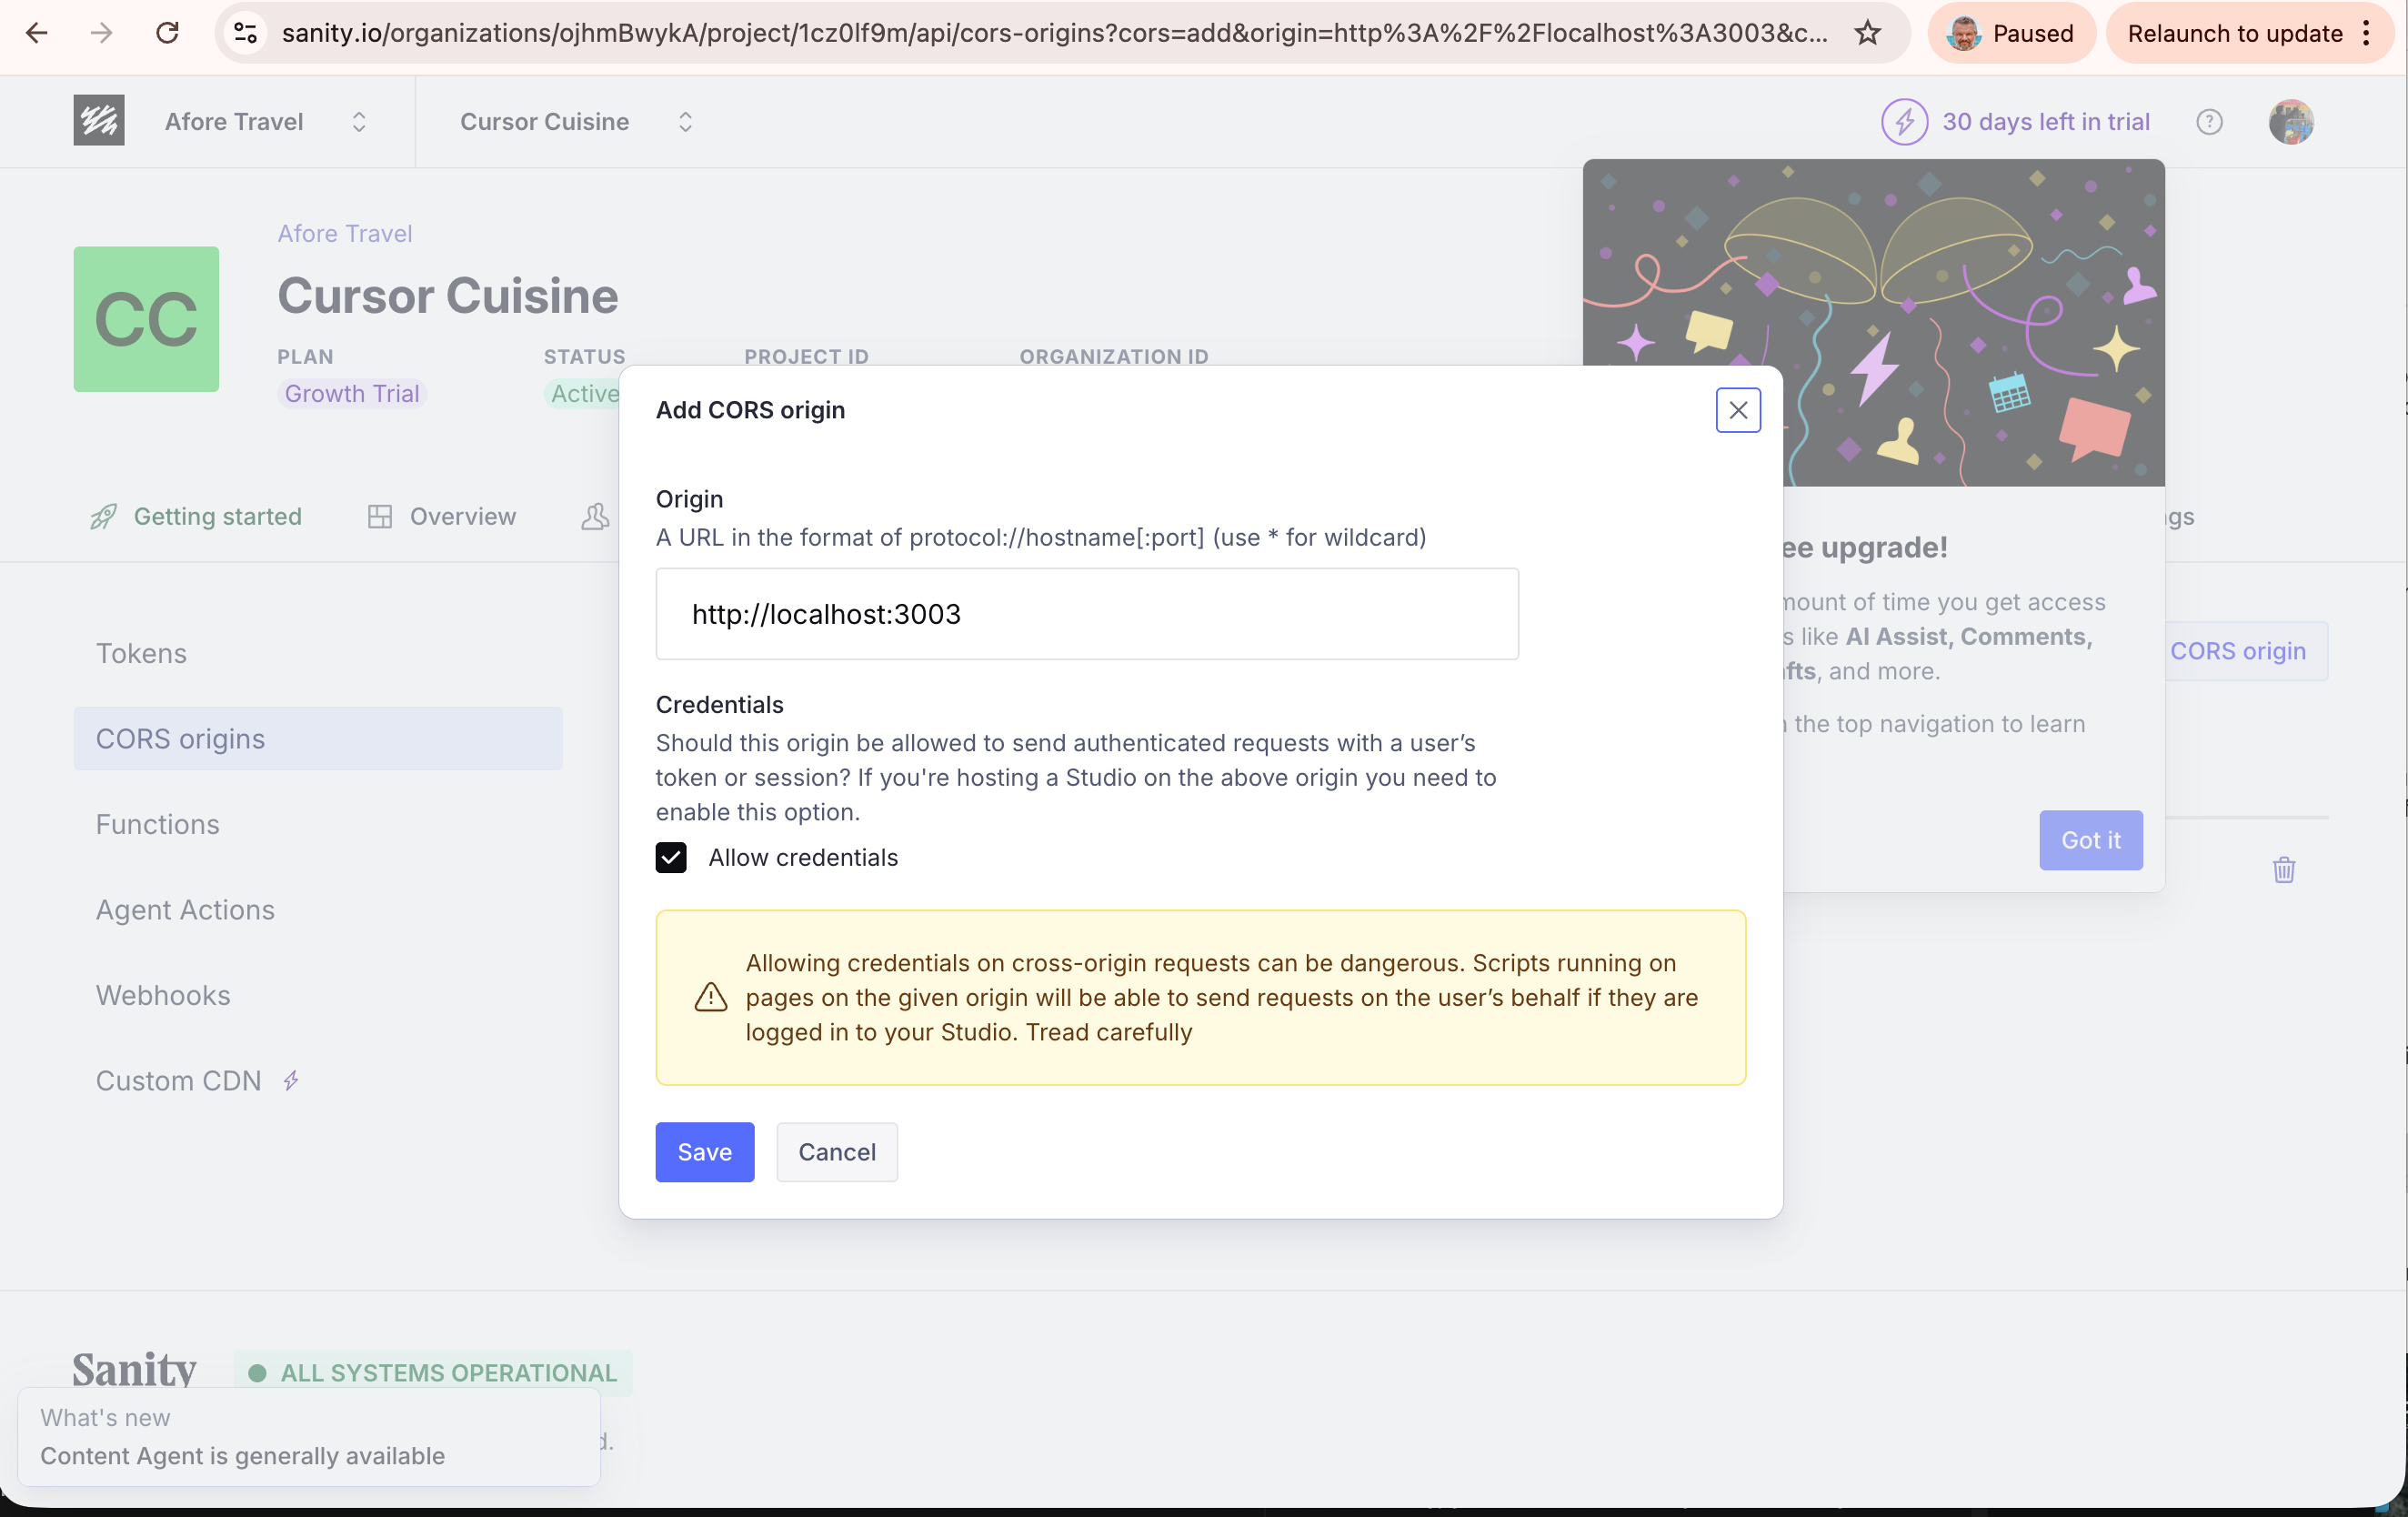
Fix: Copy the URL showing the error (e.g., http://localhost:3000)
Go to your Sanity Dashboard in your browser (manage.sanity.io).
Go to API > CORS Origins.
Click Add CORS Origin. Paste your localhost URL. Check “Allow credentials.
Step 4: Seeding Content (The Magic Trick)
Your CMS is currently empty. You don’t want to type all those menu items in by hand.
Prompt Cursor:
I have set up Sanity. Please write a ‘seed script’ to take all the fake menu items and blog posts you created for the website and upload them into my Sanity database automatically.
Cursor will ask for a Write Token.
Go to Sanity Dashboard > API > Tokens.
Create a token with Editor permissions.
Paste that token into Cursor.
Watch the magic. Cursor will run a script, and suddenly, your Sanity Studio will be full of content!
Step 5: Wiring the Front End
Now, tell Cursor:
“Update the website code to fetch data from Sanity instead of using the hardcoded text. If I change a price in Sanity, it should update on the website.”
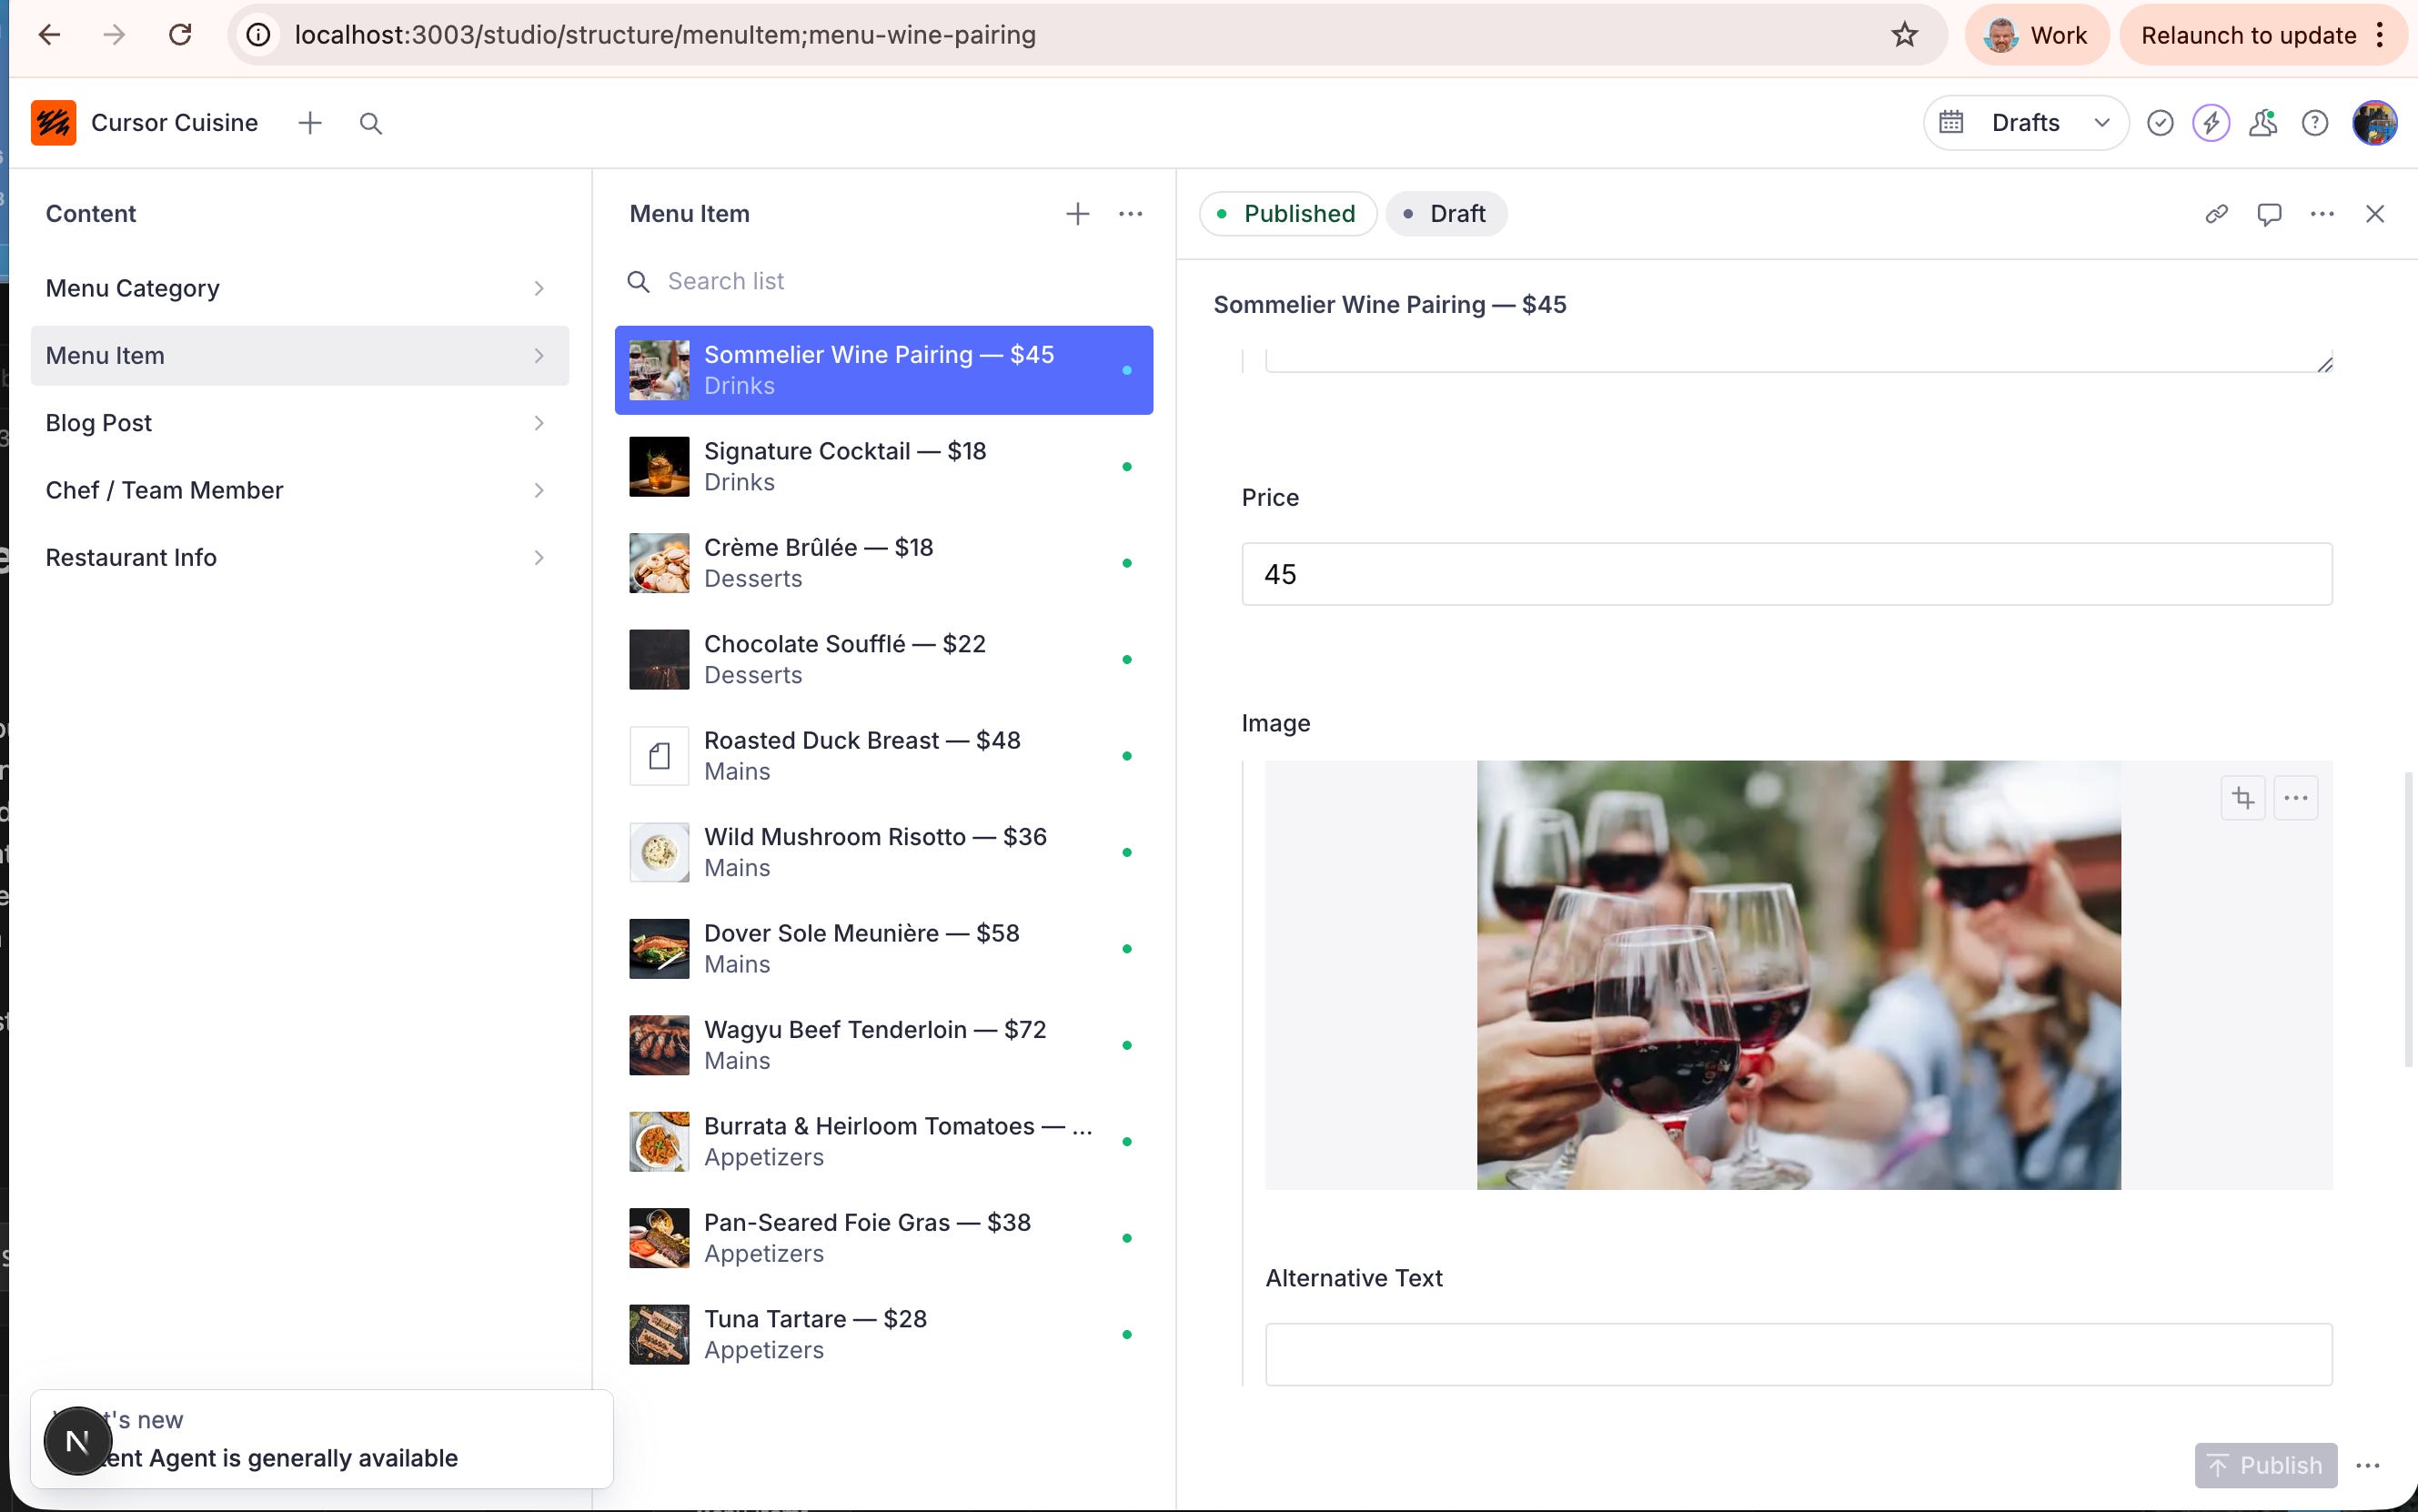
Test it: Go to Sanity, change the price of the “Wine Pairing” from $45 to $75. Hit Publish. Refresh your local website. Did it change? Success!
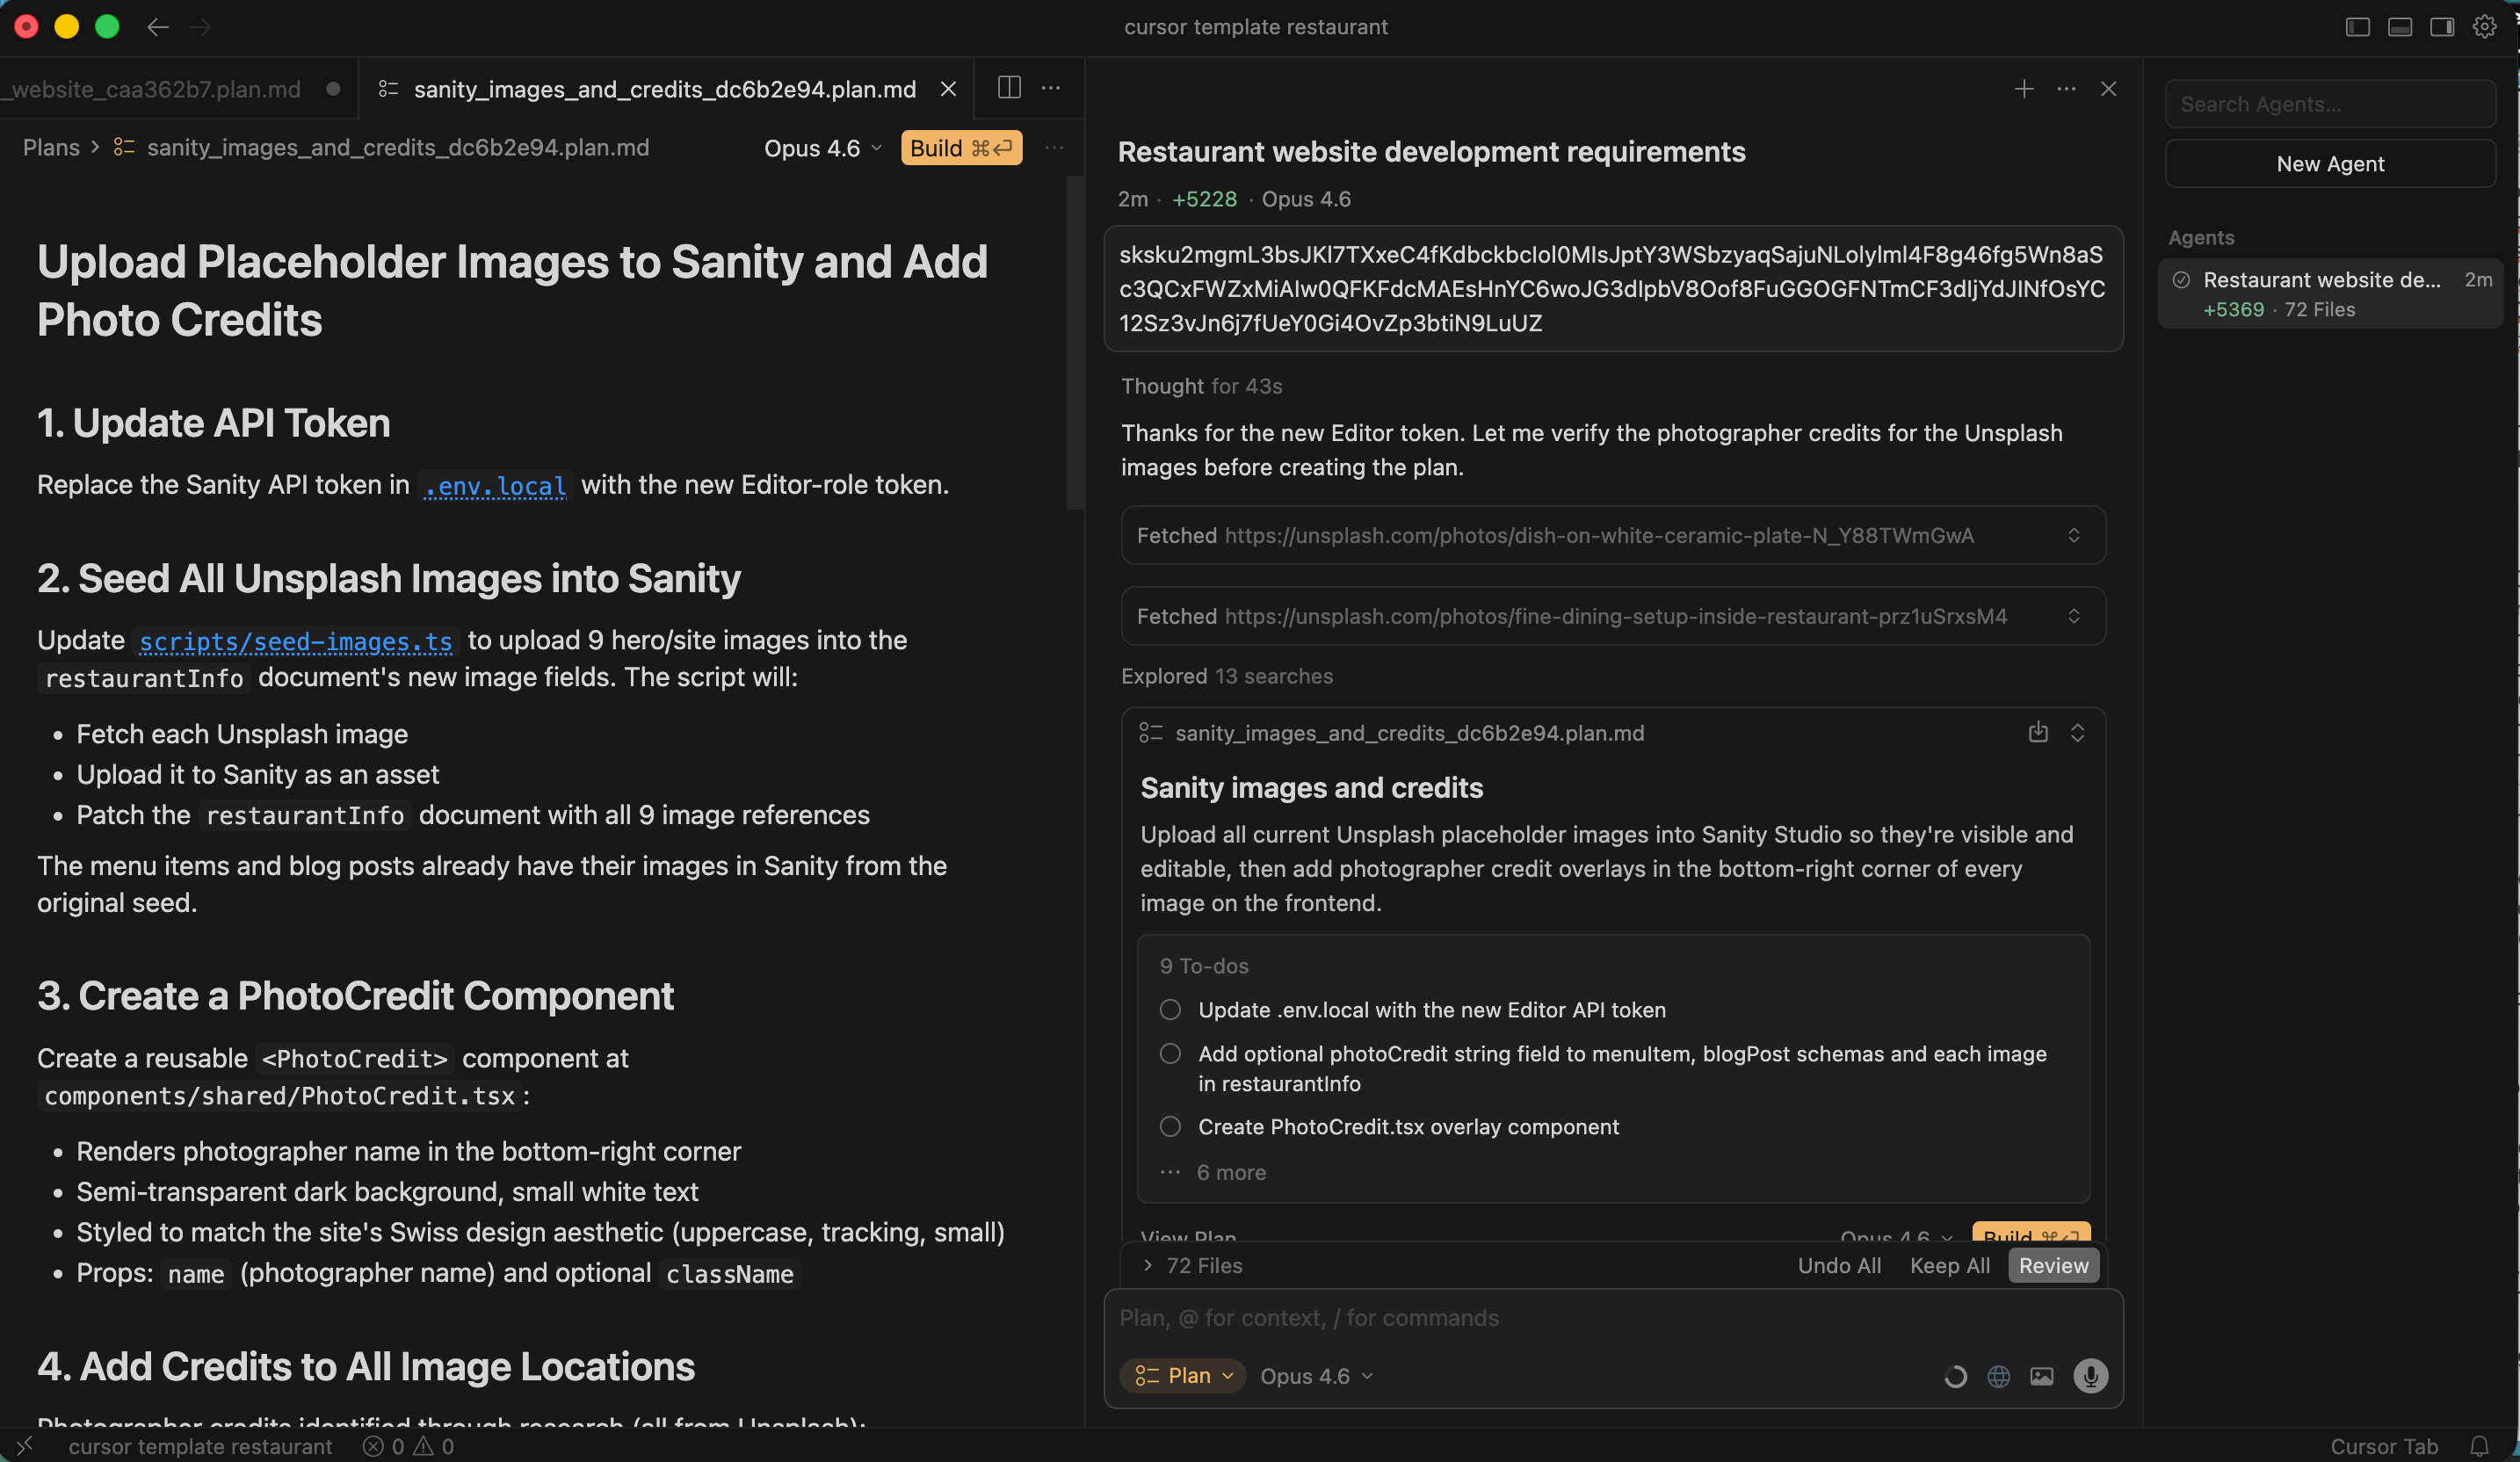
Warning regarding Images:
Cursor often uses random Unsplash images. Sometimes it forgets to wire these up to the CMS.
Prompt: “Make sure all images (Hero images, menu photos) are editable in Sanity too. And please add a field for ‘Photographer Credit’ so we don’t get sued.”
Part 4: Deploy Live – Going Global
Right now, the site only lives on your laptop. Let’s push it to the internet.
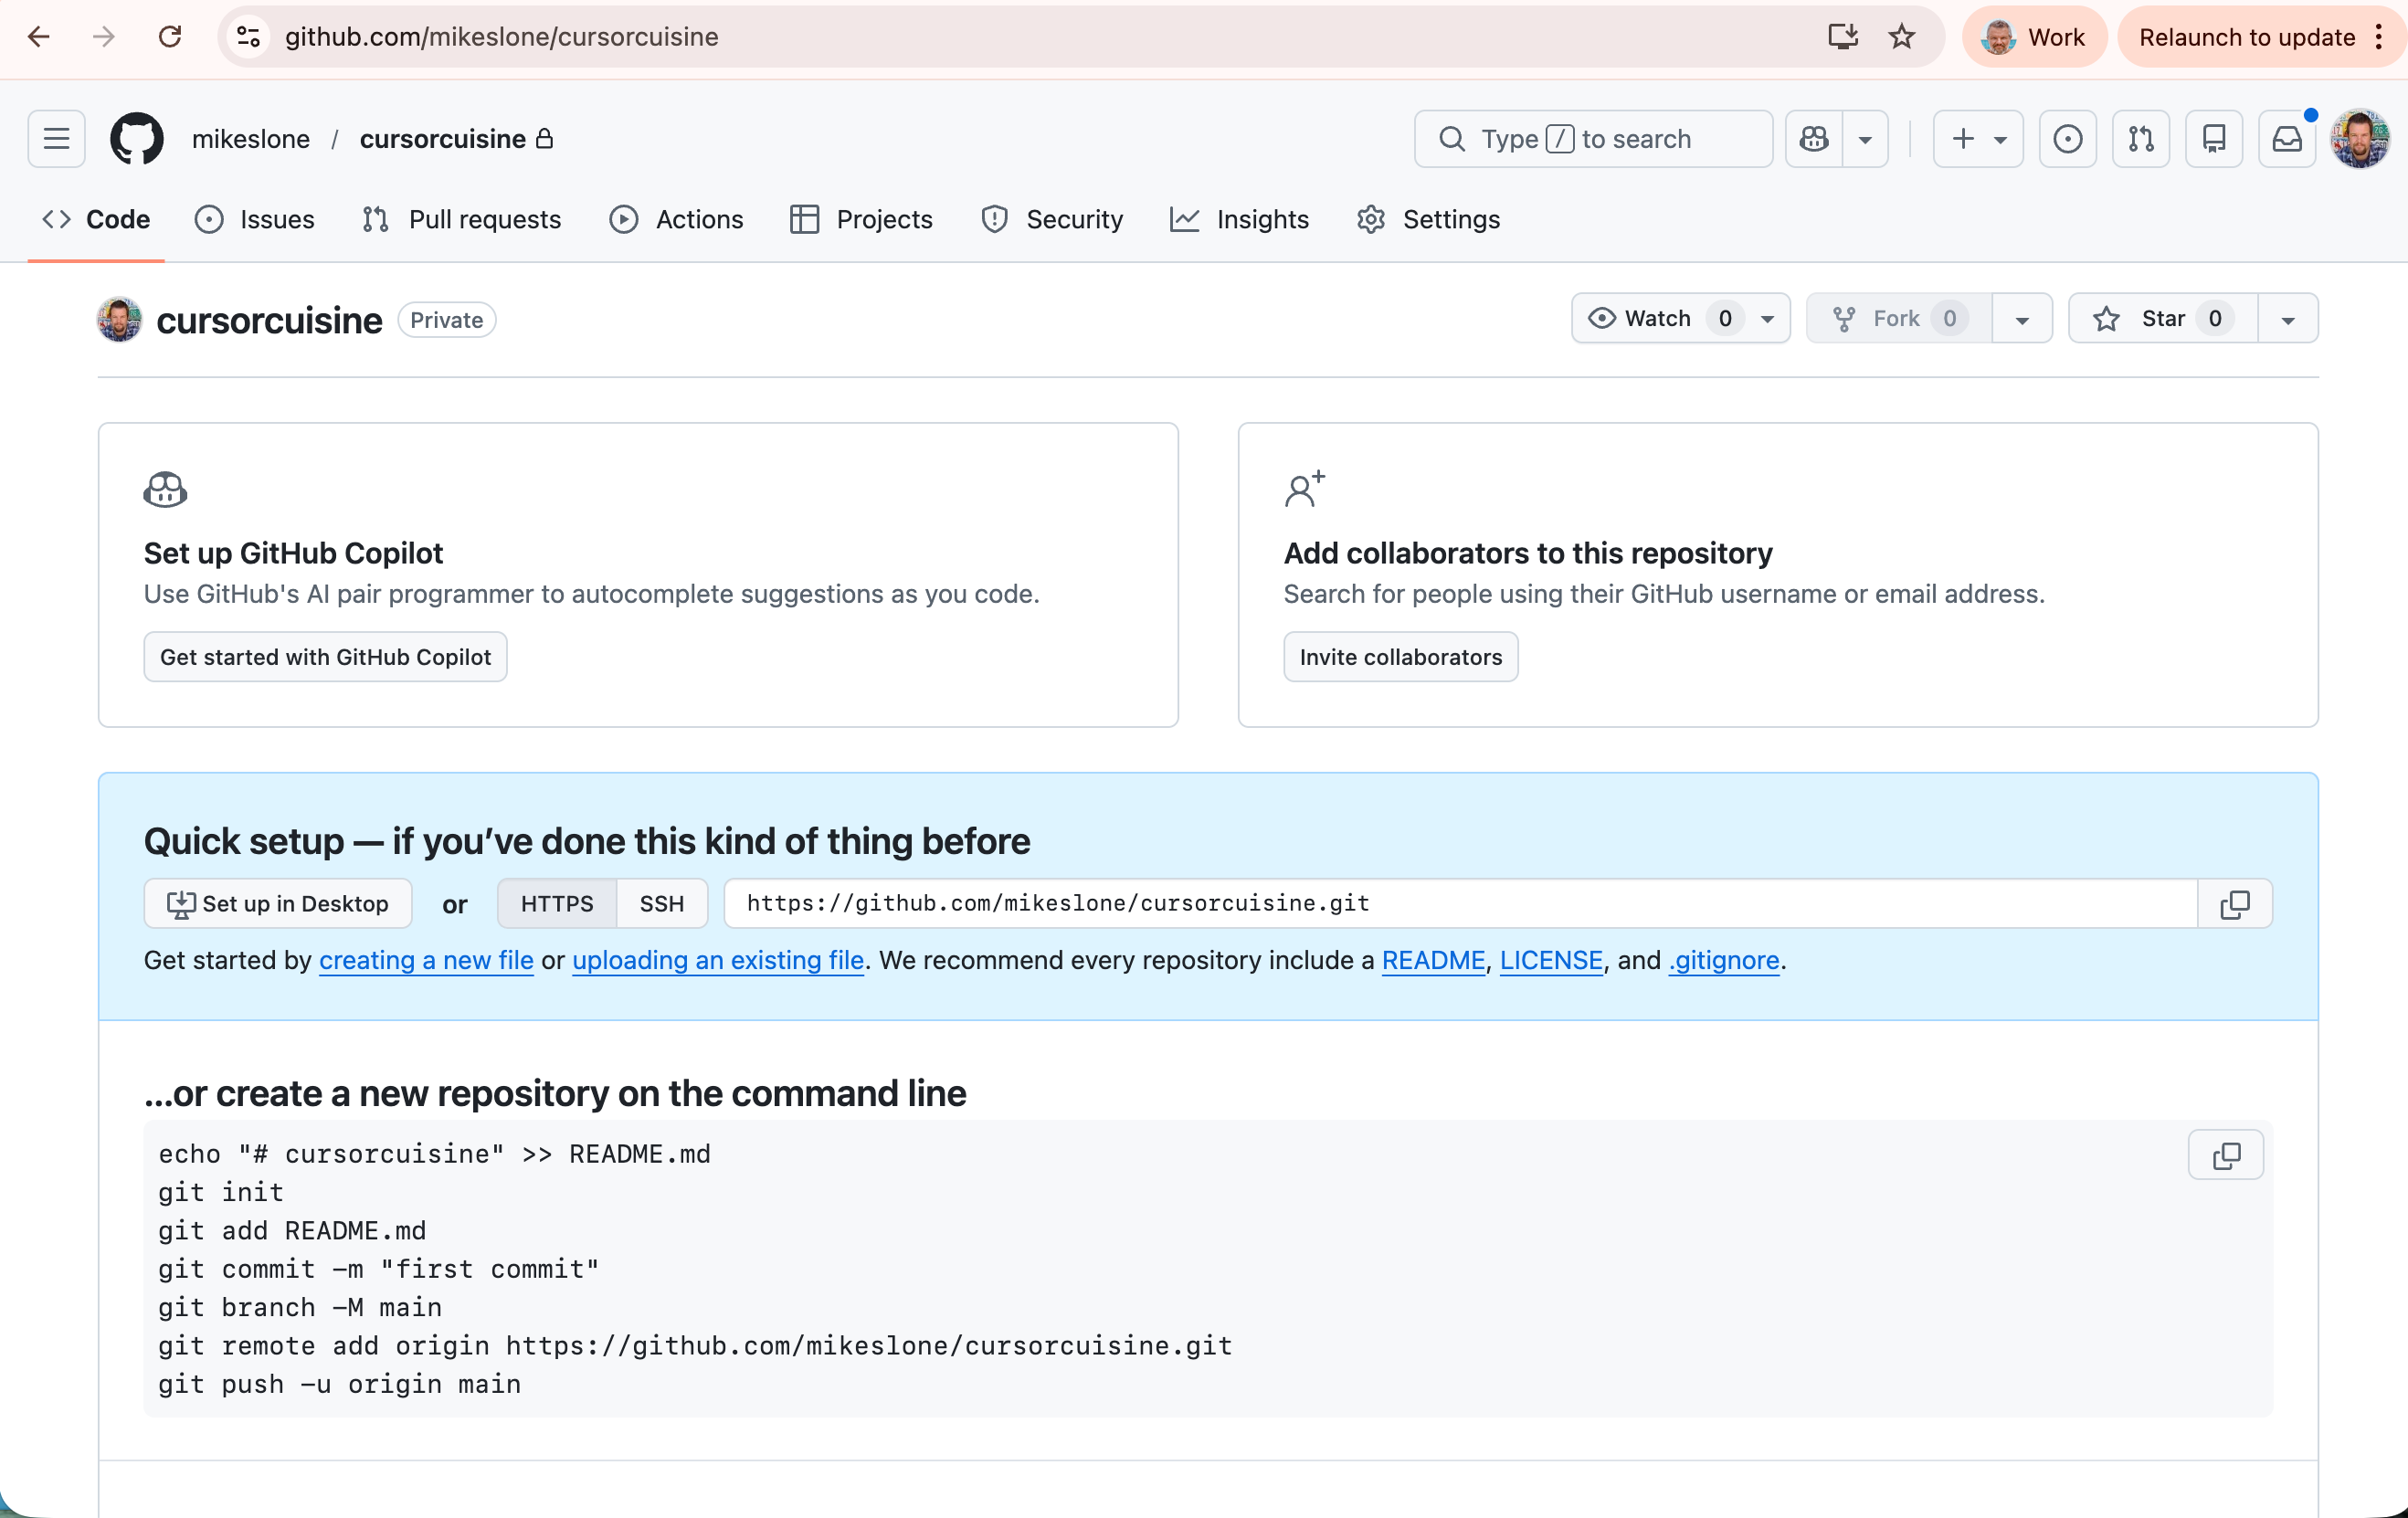
Step 1: GitHub
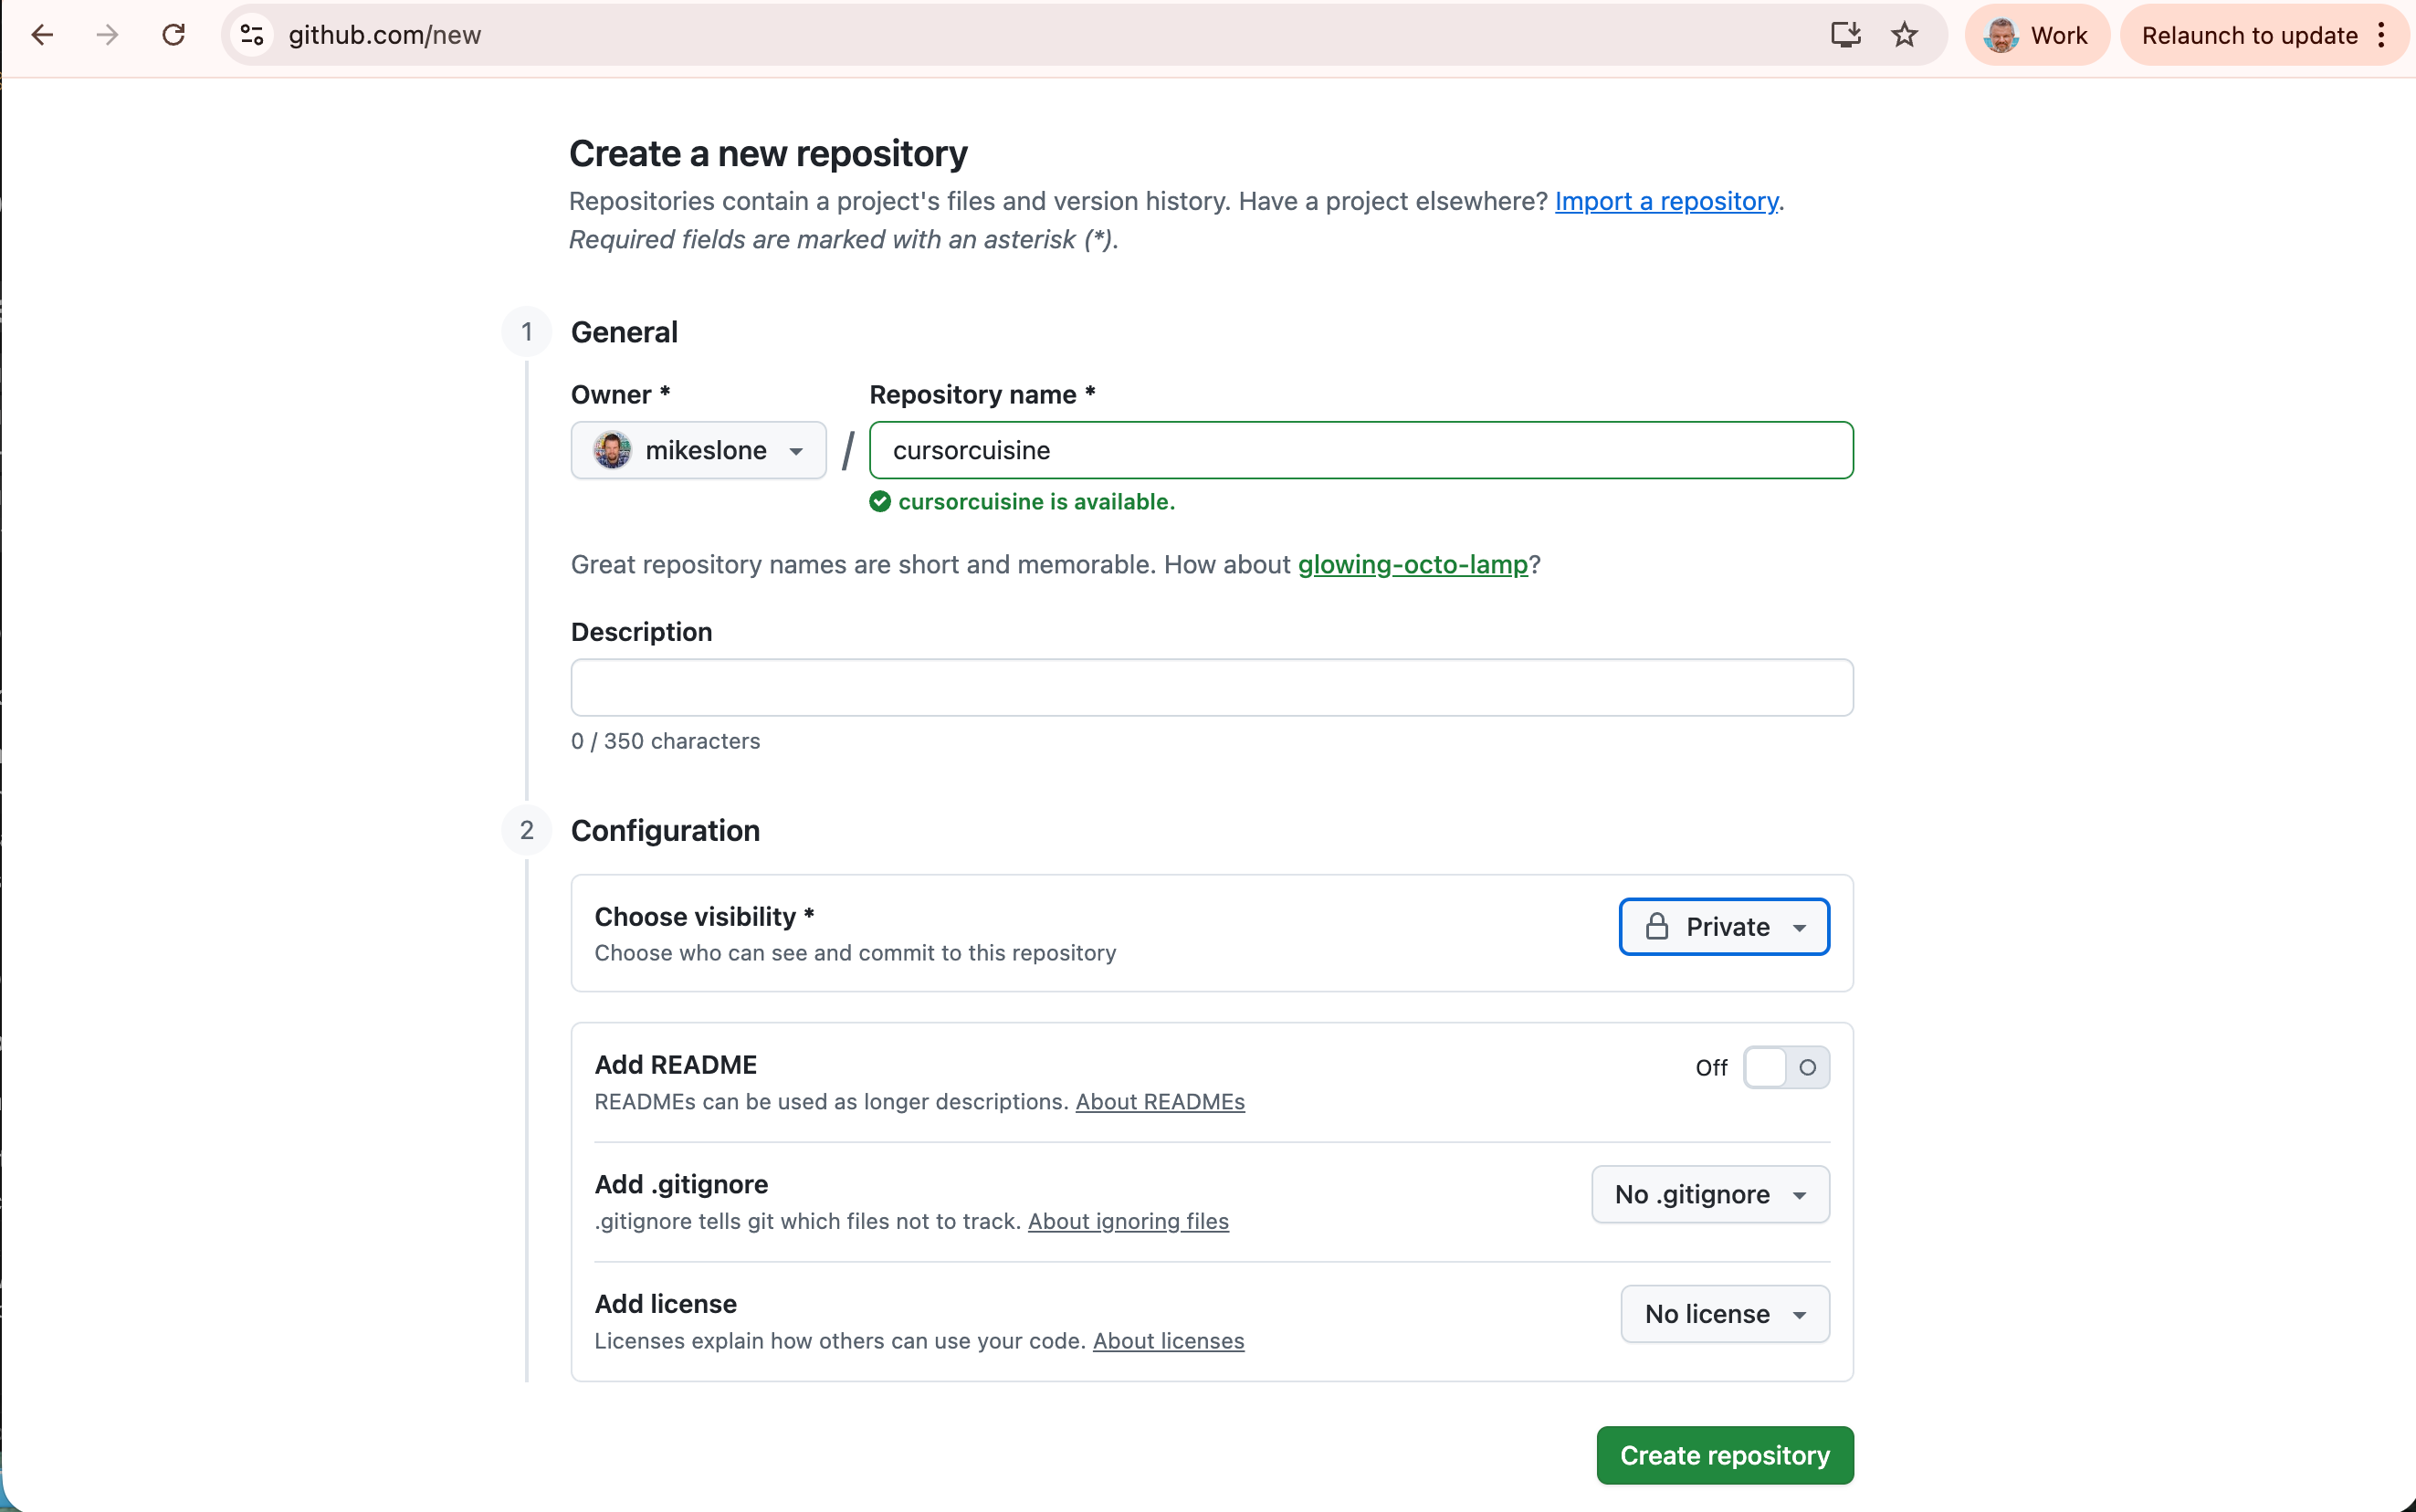
Go to github.com and create an account.
Create a New Repository. Name it
cursor-cuisine. Make it Private.Prompt Cursor: “Initialize a git repository and push this code to my new GitHub repo: [PASTE YOUR GITHUB URL].”
Cursor will run the commands to upload your code to the cloud.
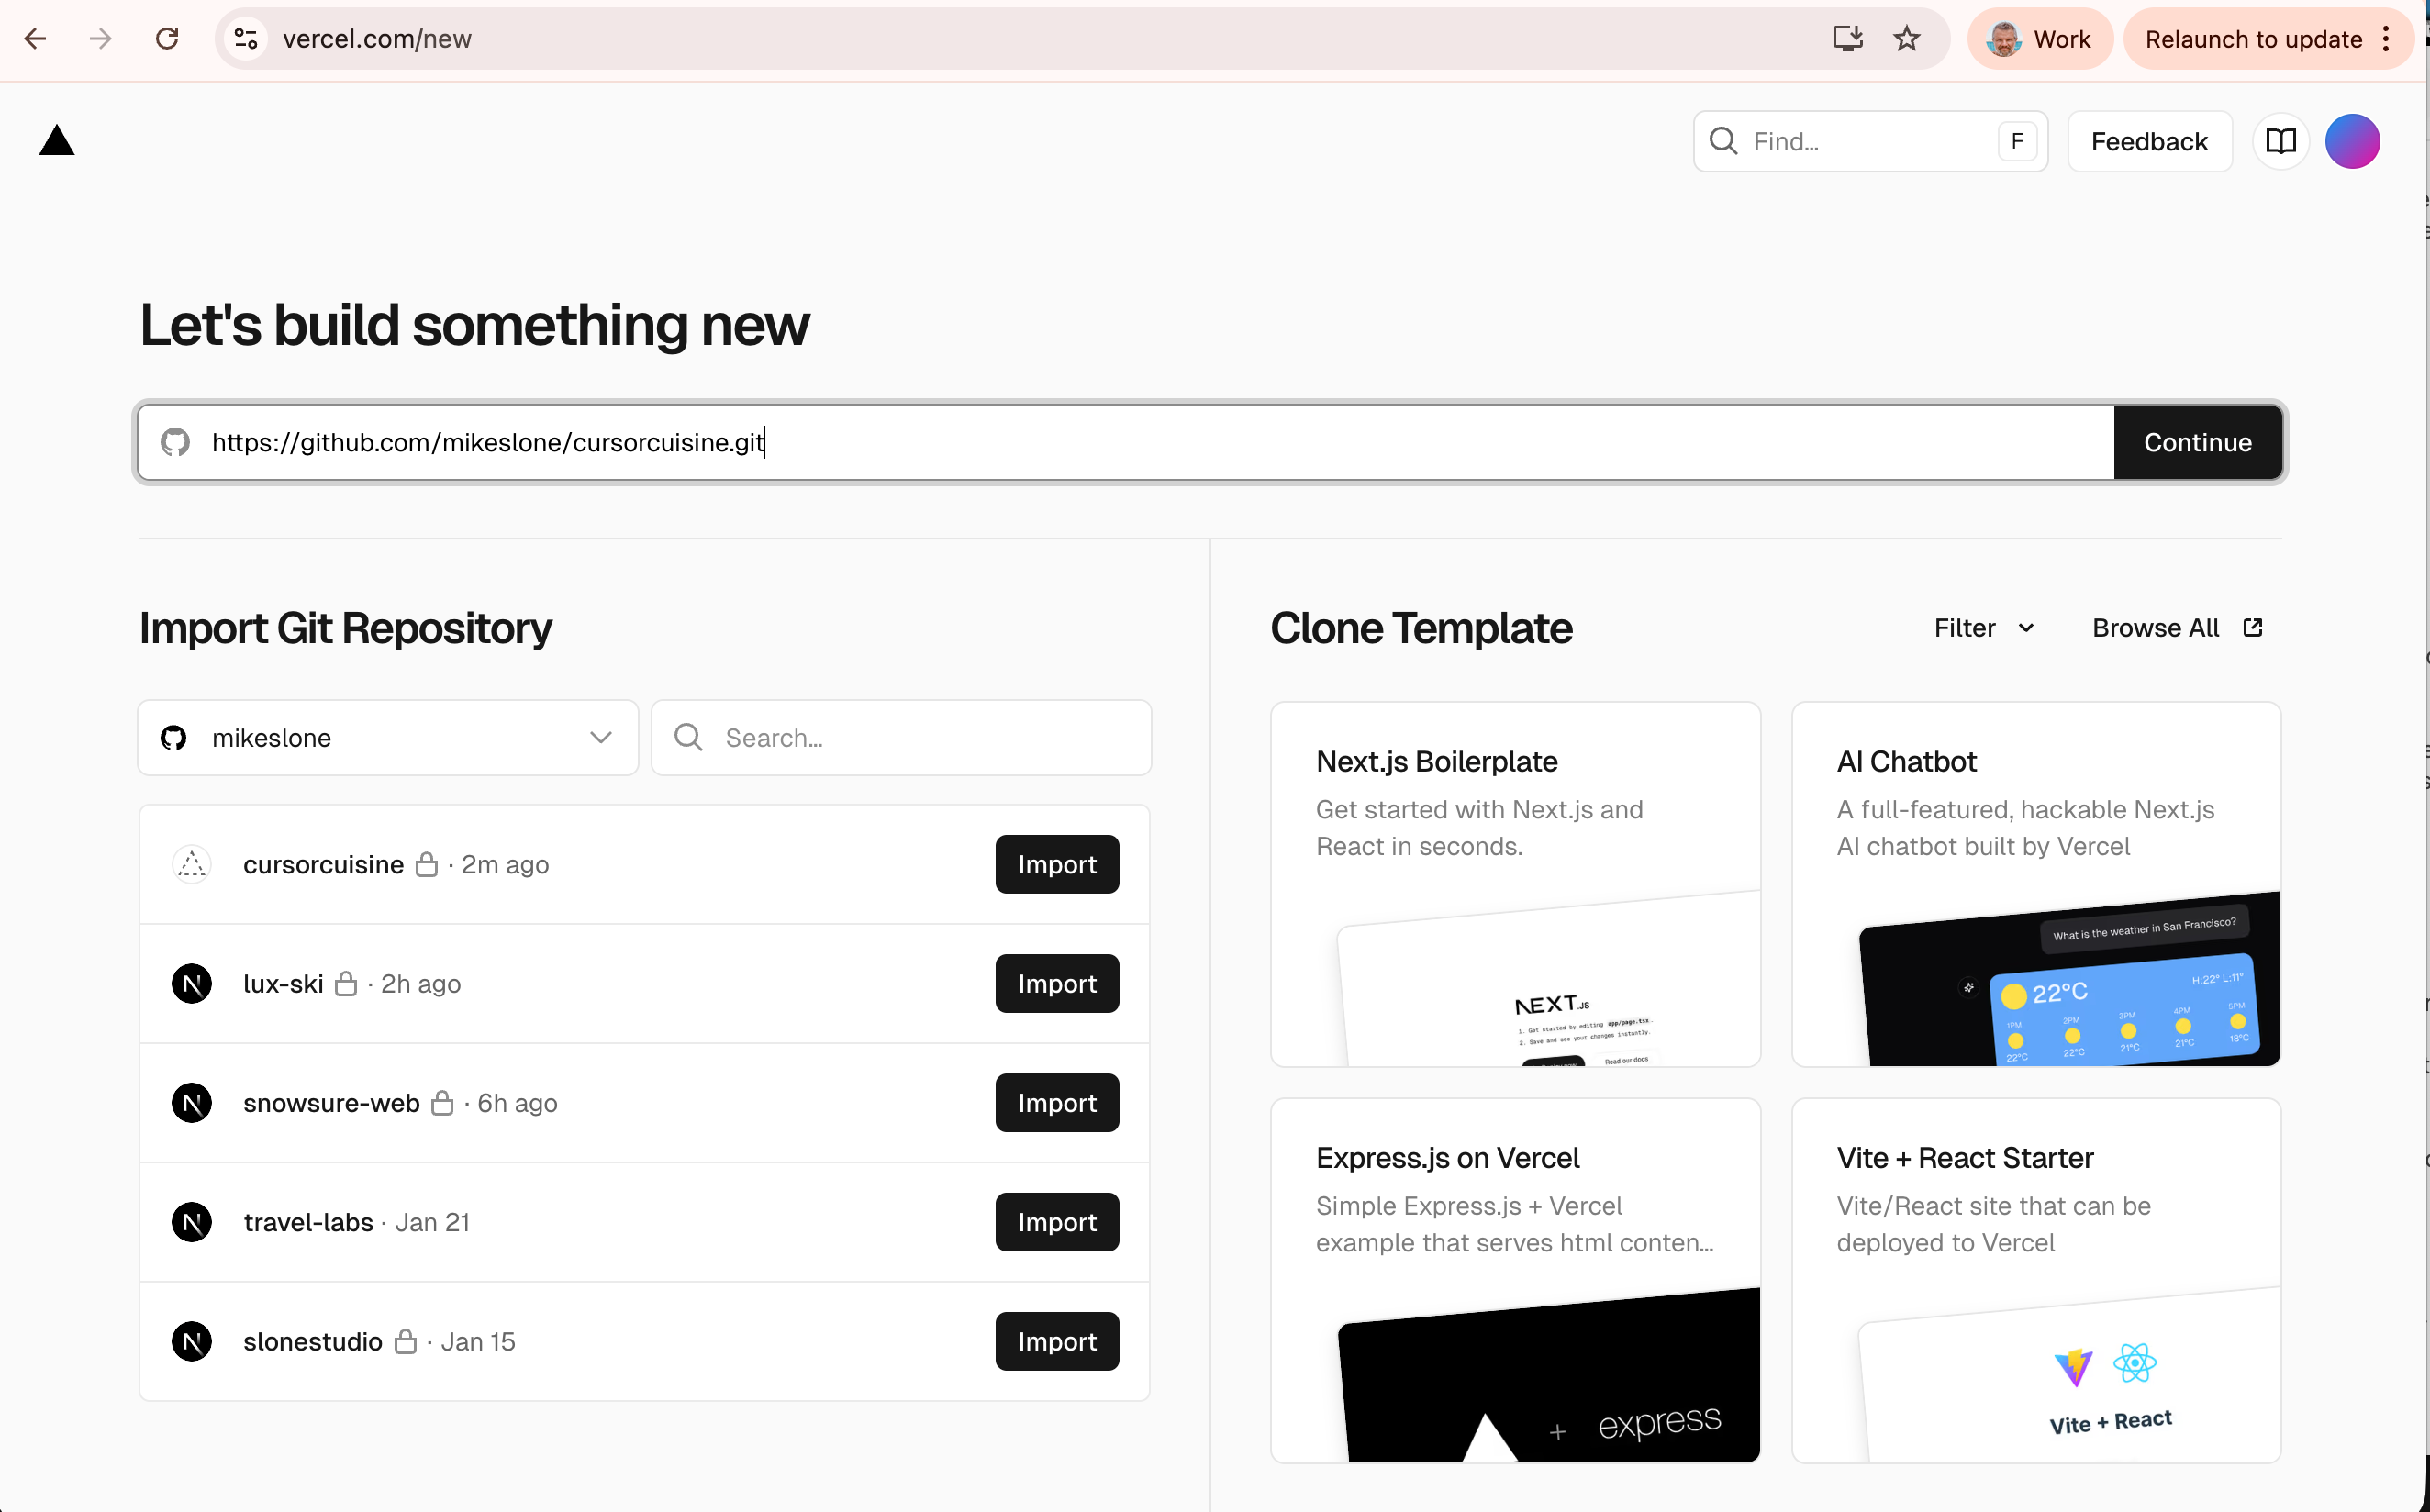
Step 2: Vercel Hosting
Go to vercel.com and sign up using your GitHub account.
Click “Add New Project”.
Select your
cursor-cuisinerepository from the list.
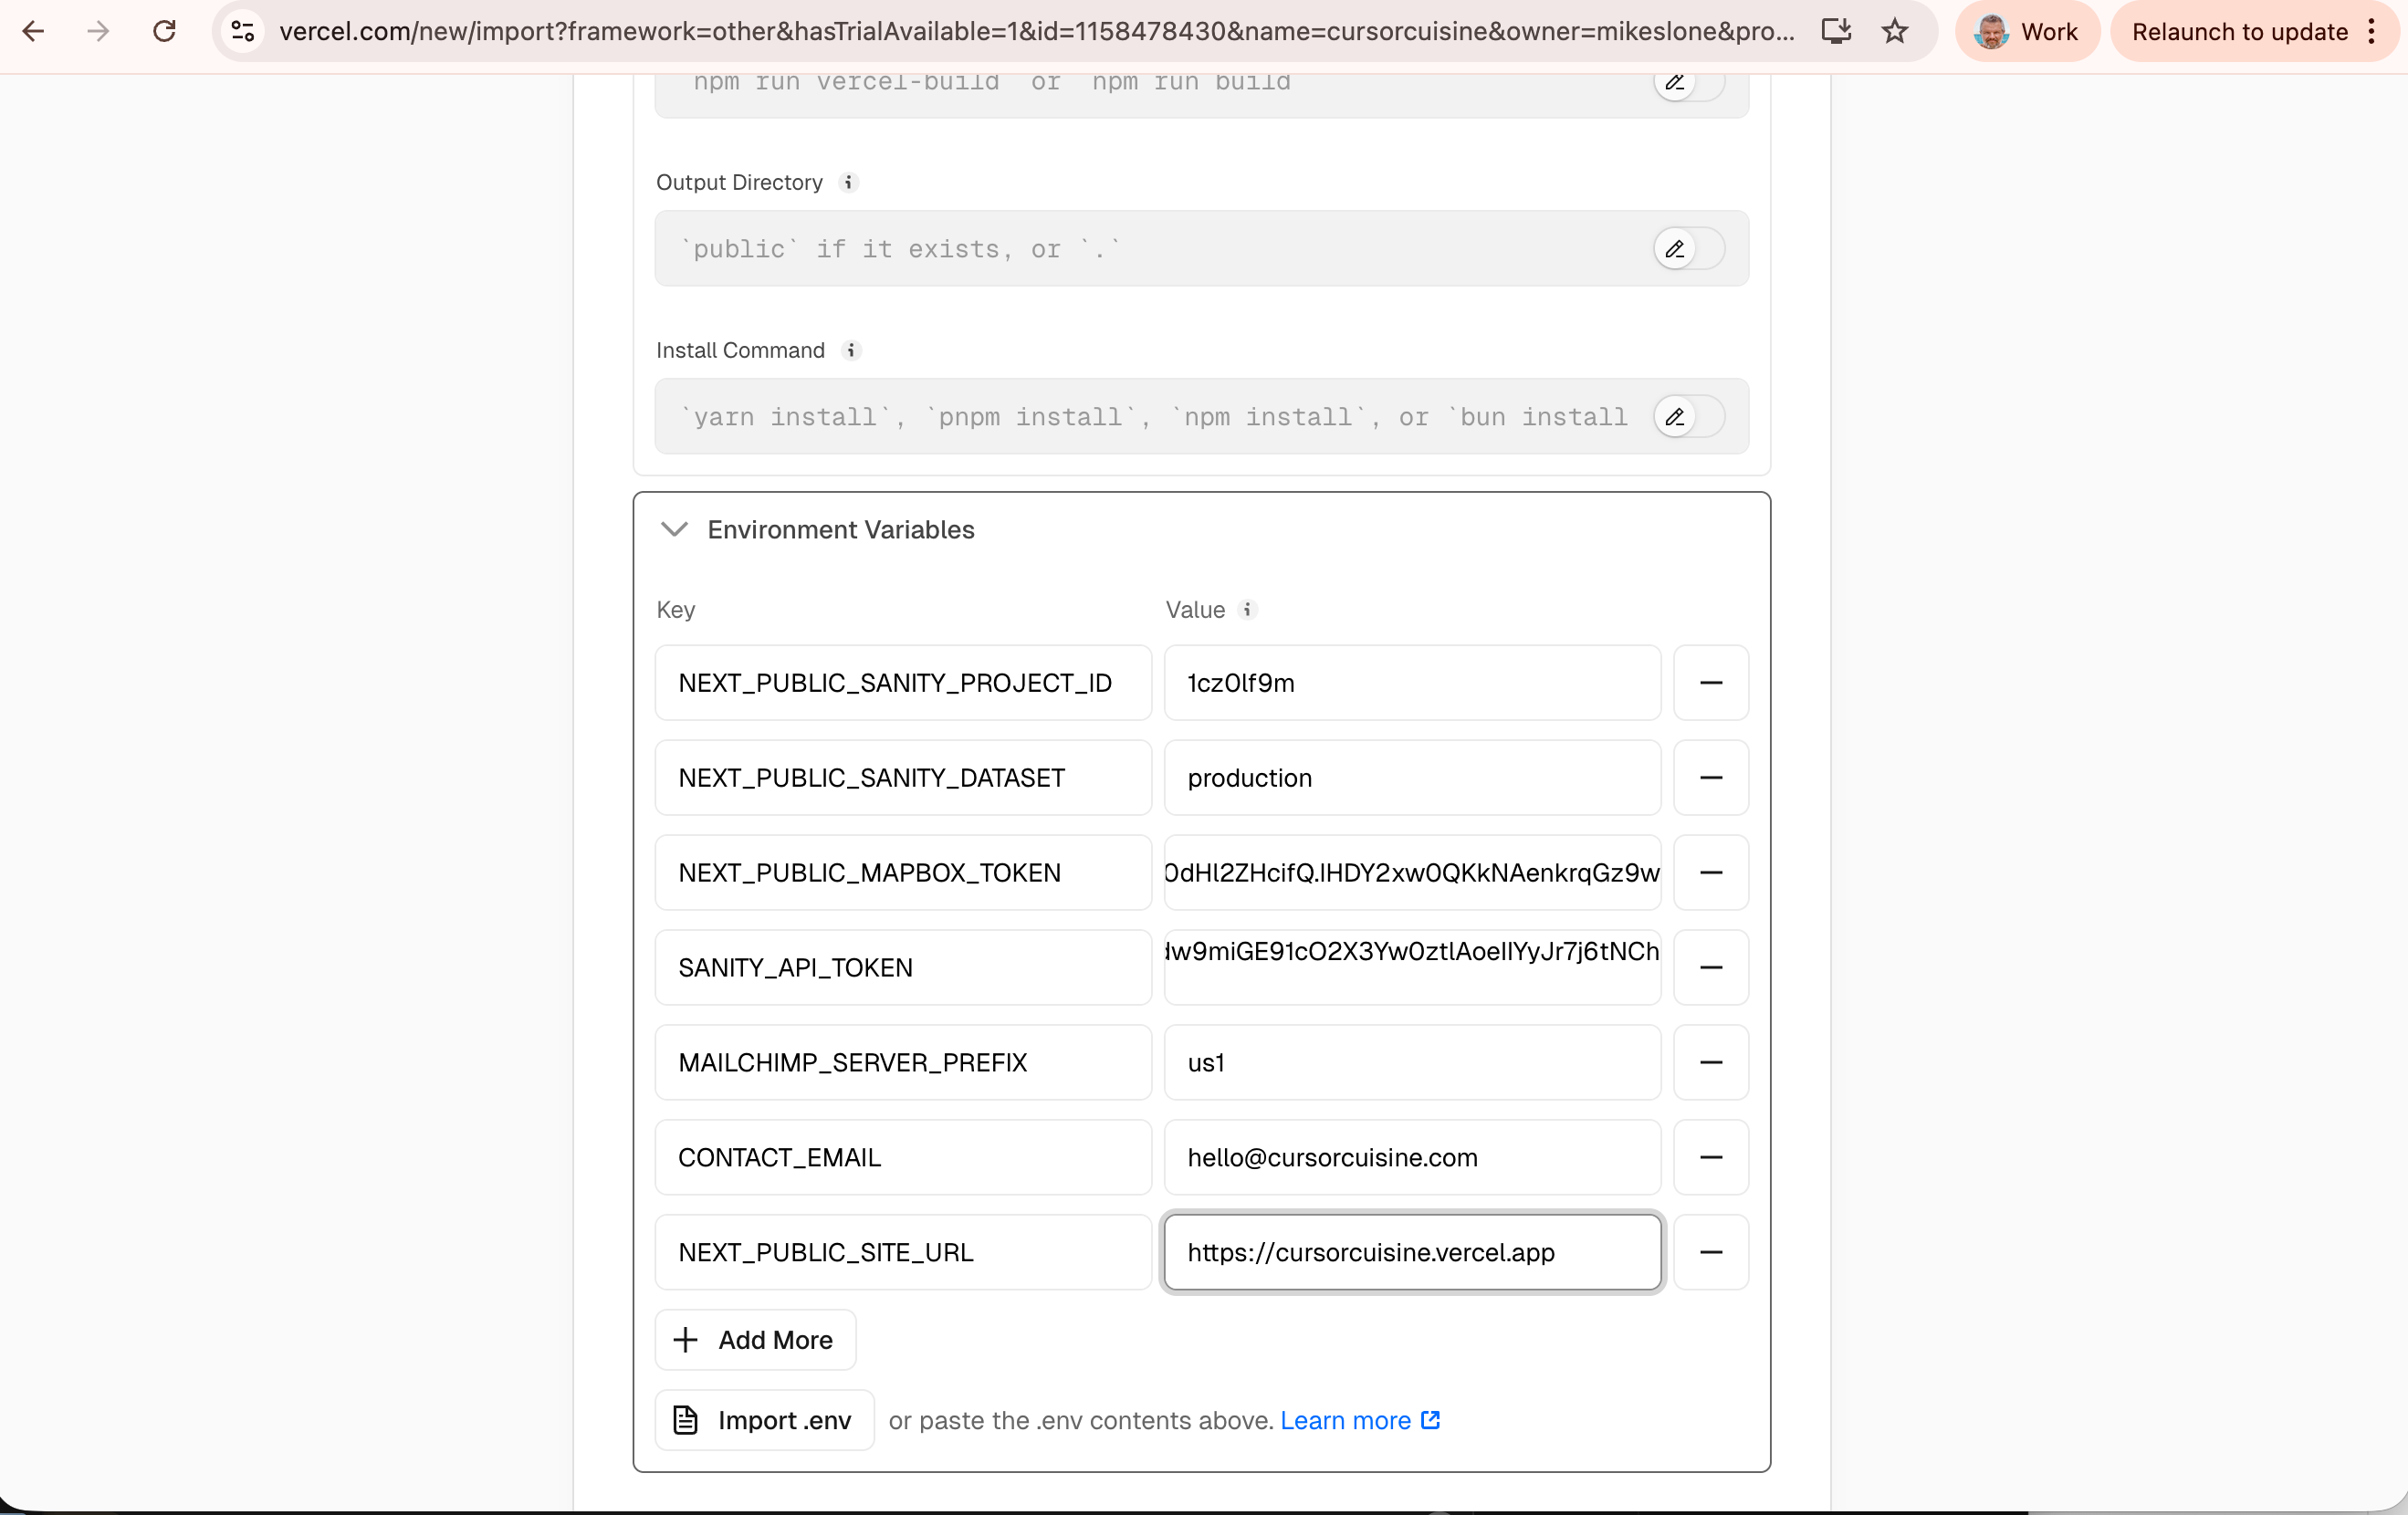
Step 3: Environment Variables (Crucial!)
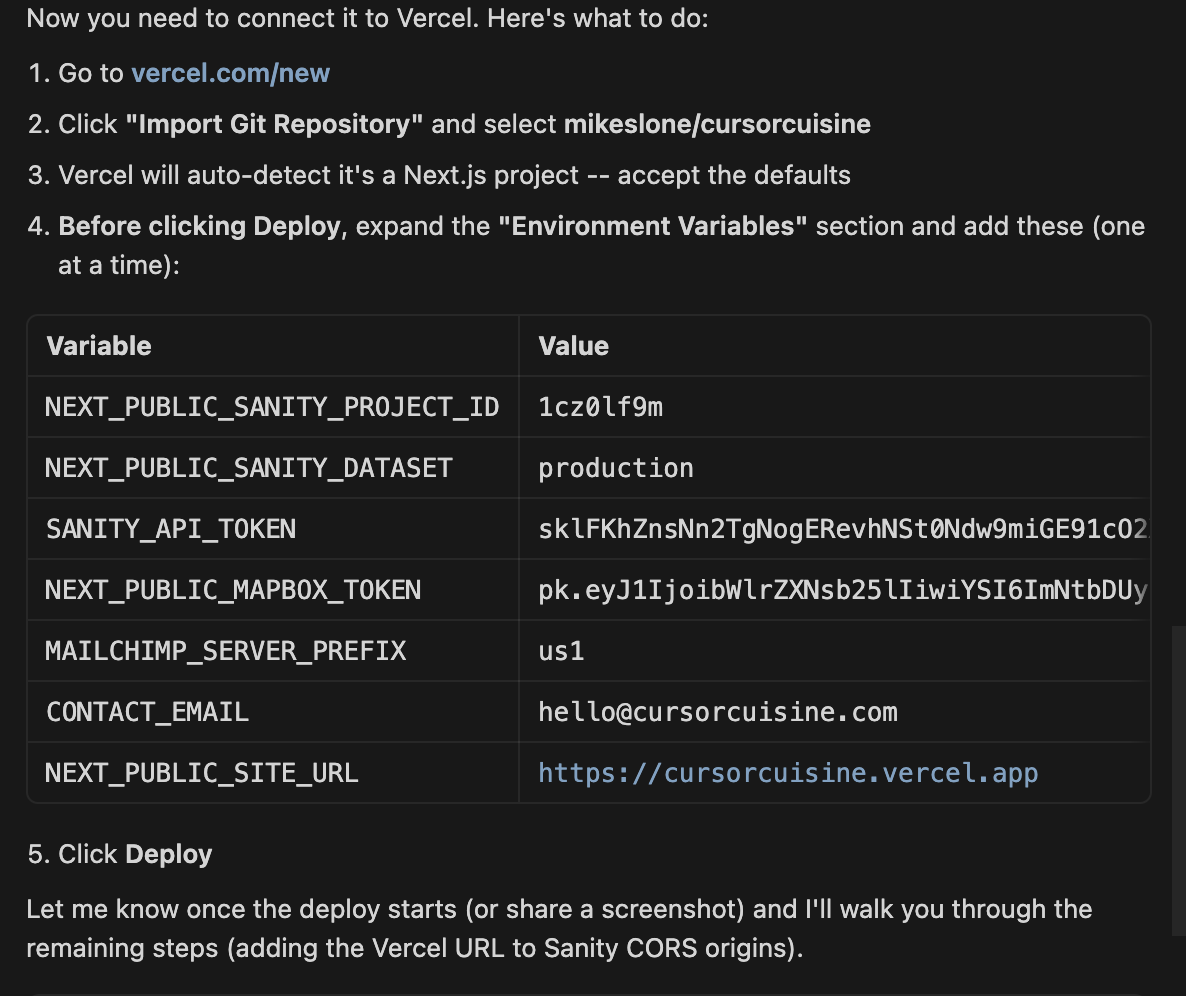
Before you hit “Deploy,” look for a section called Environment Variables.
Remember that .env.local file? Vercel doesn’t know about it for security reasons. You must manually copy-paste your keys here.
NEXT_PUBLIC_SANITY_PROJECT_IDNEXT_PUBLIC_MAPBOX_TOKENAny other keys Cursor told you to create.
Hit DEPLOY.
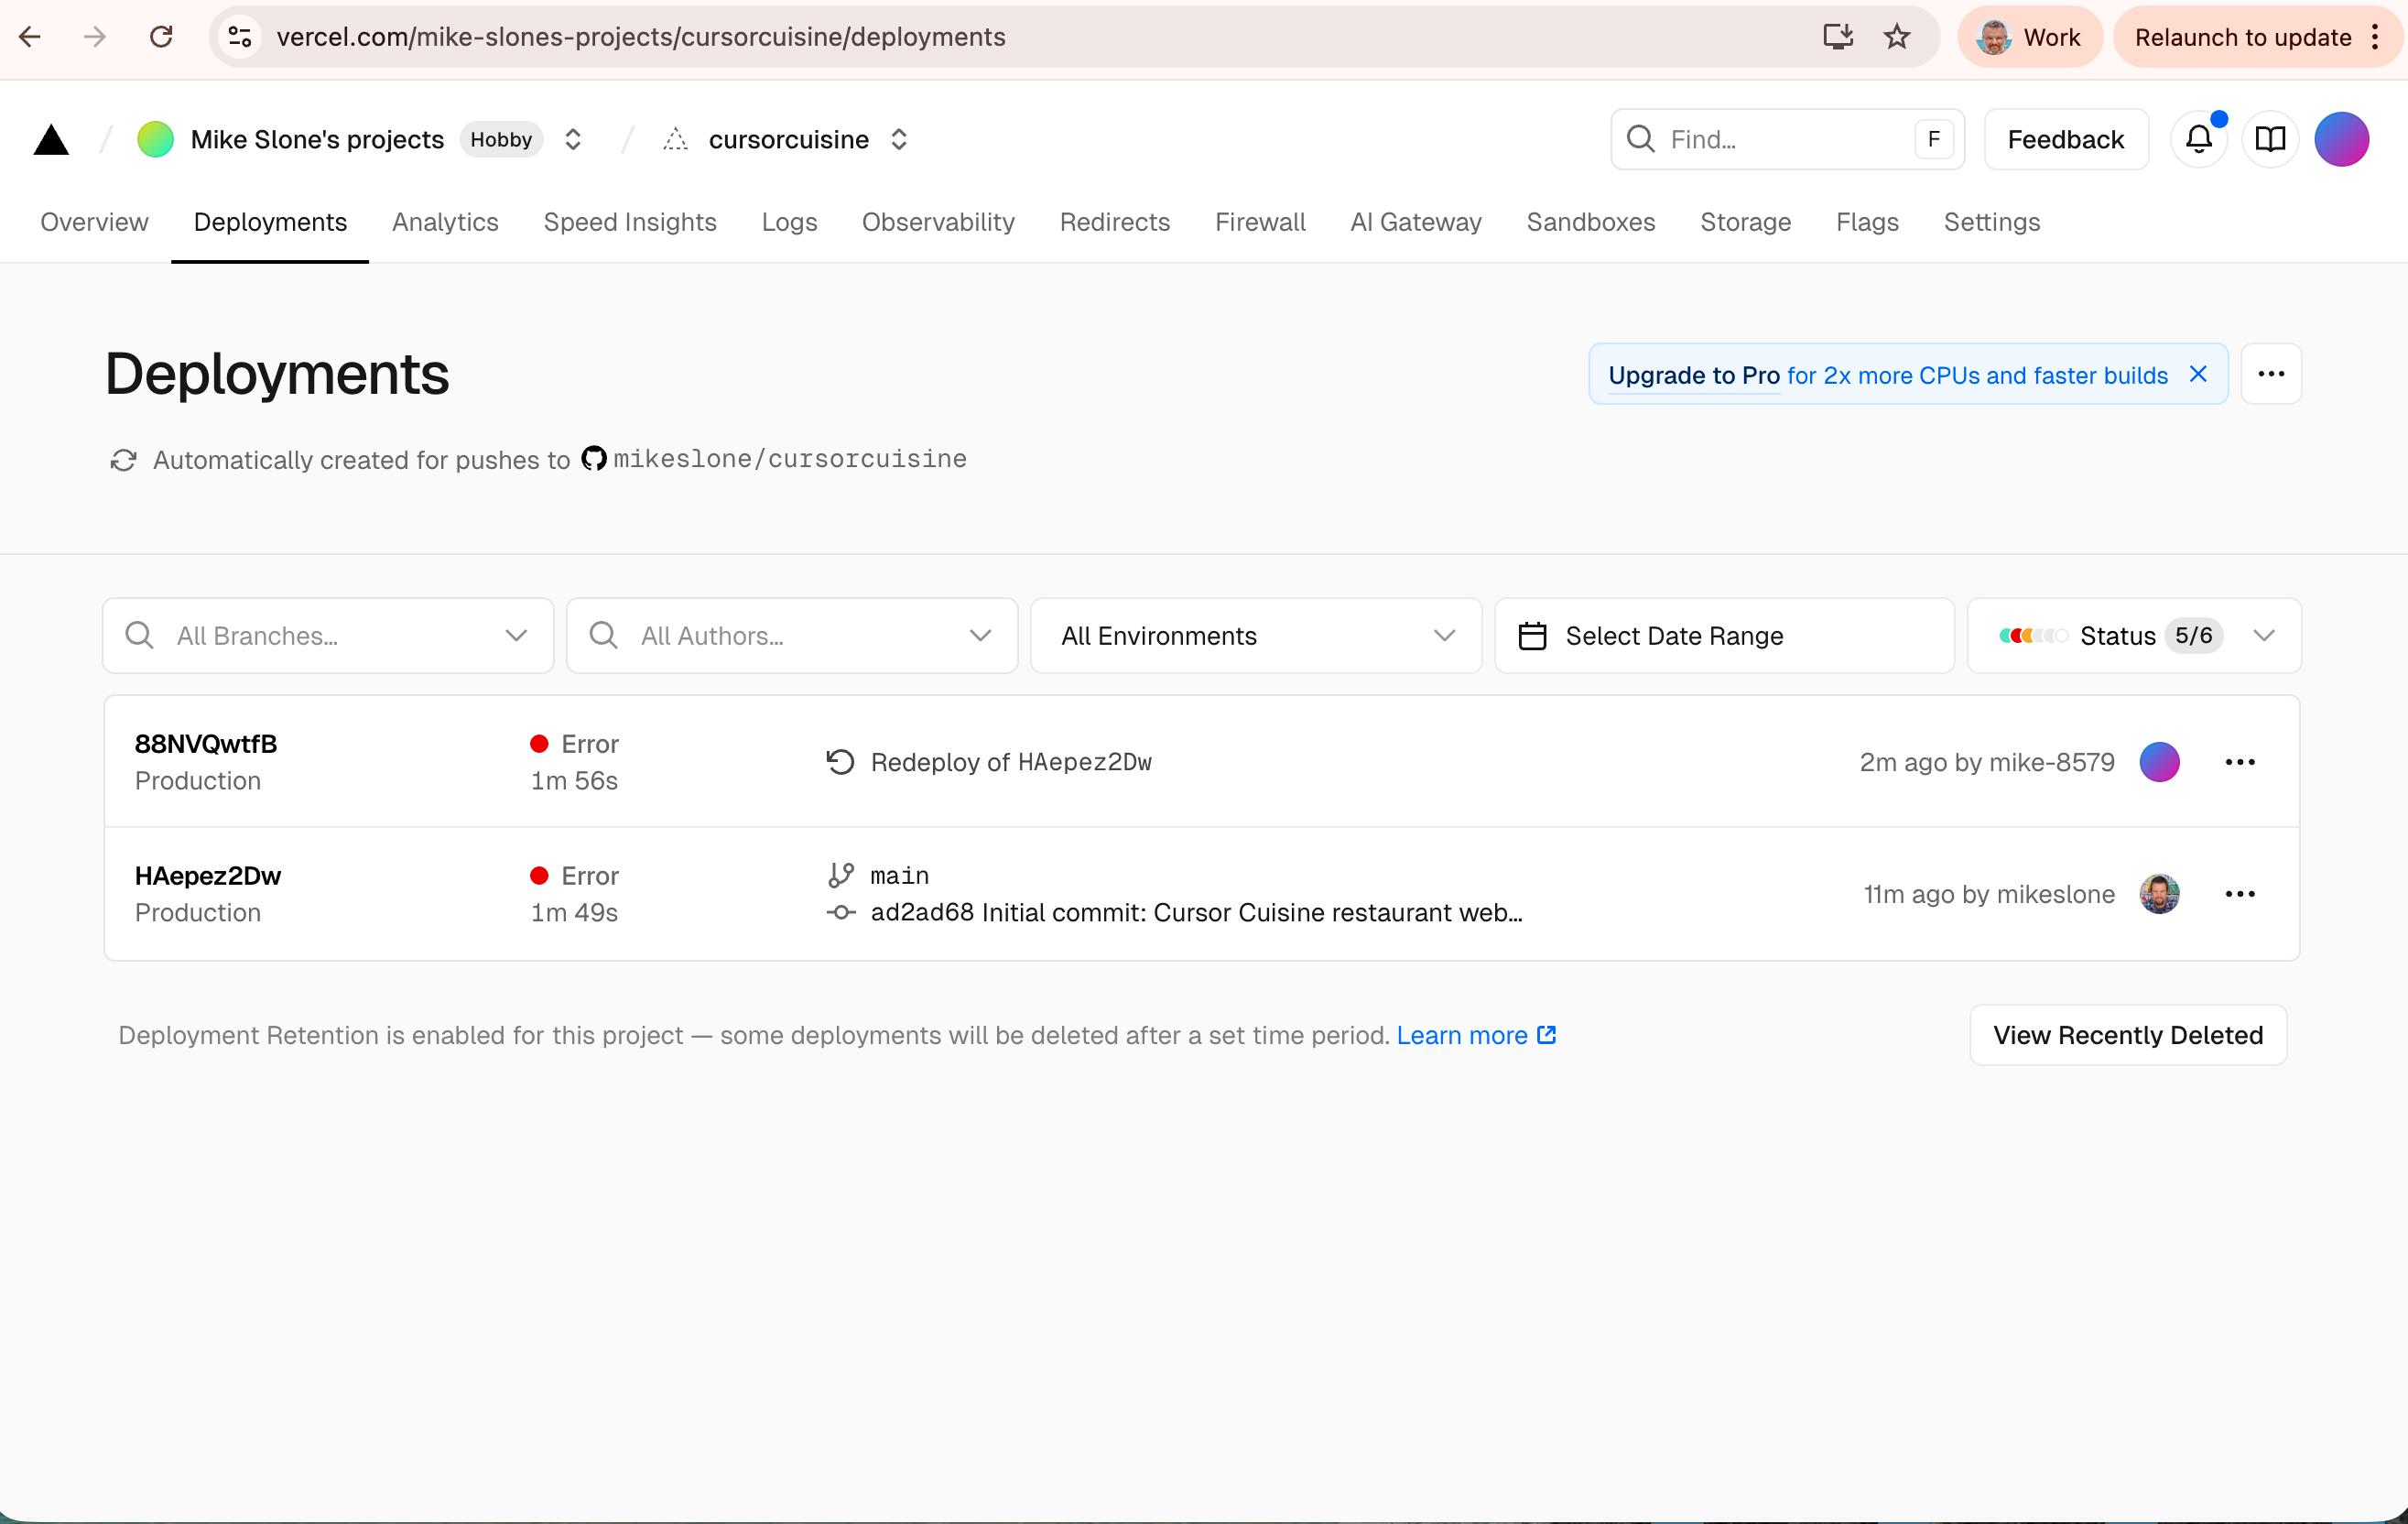
Step 4: Deployment Errors (It Will Happen)
It is very common for the build to fail the first time. You might see a red “Error.”
Click the error log.
Copy the text.
Paste into Cursor: “I got this error when deploying to Vercel: [PASTE LOG]. Fix it.”
Cursor will fix the code. Push the changes to GitHub again (
git push), and Vercel will automatically try again.
Step 5: Domain Name (GoDaddy)
Note: This is optional. You can use the free .vercel.app domain if you want.
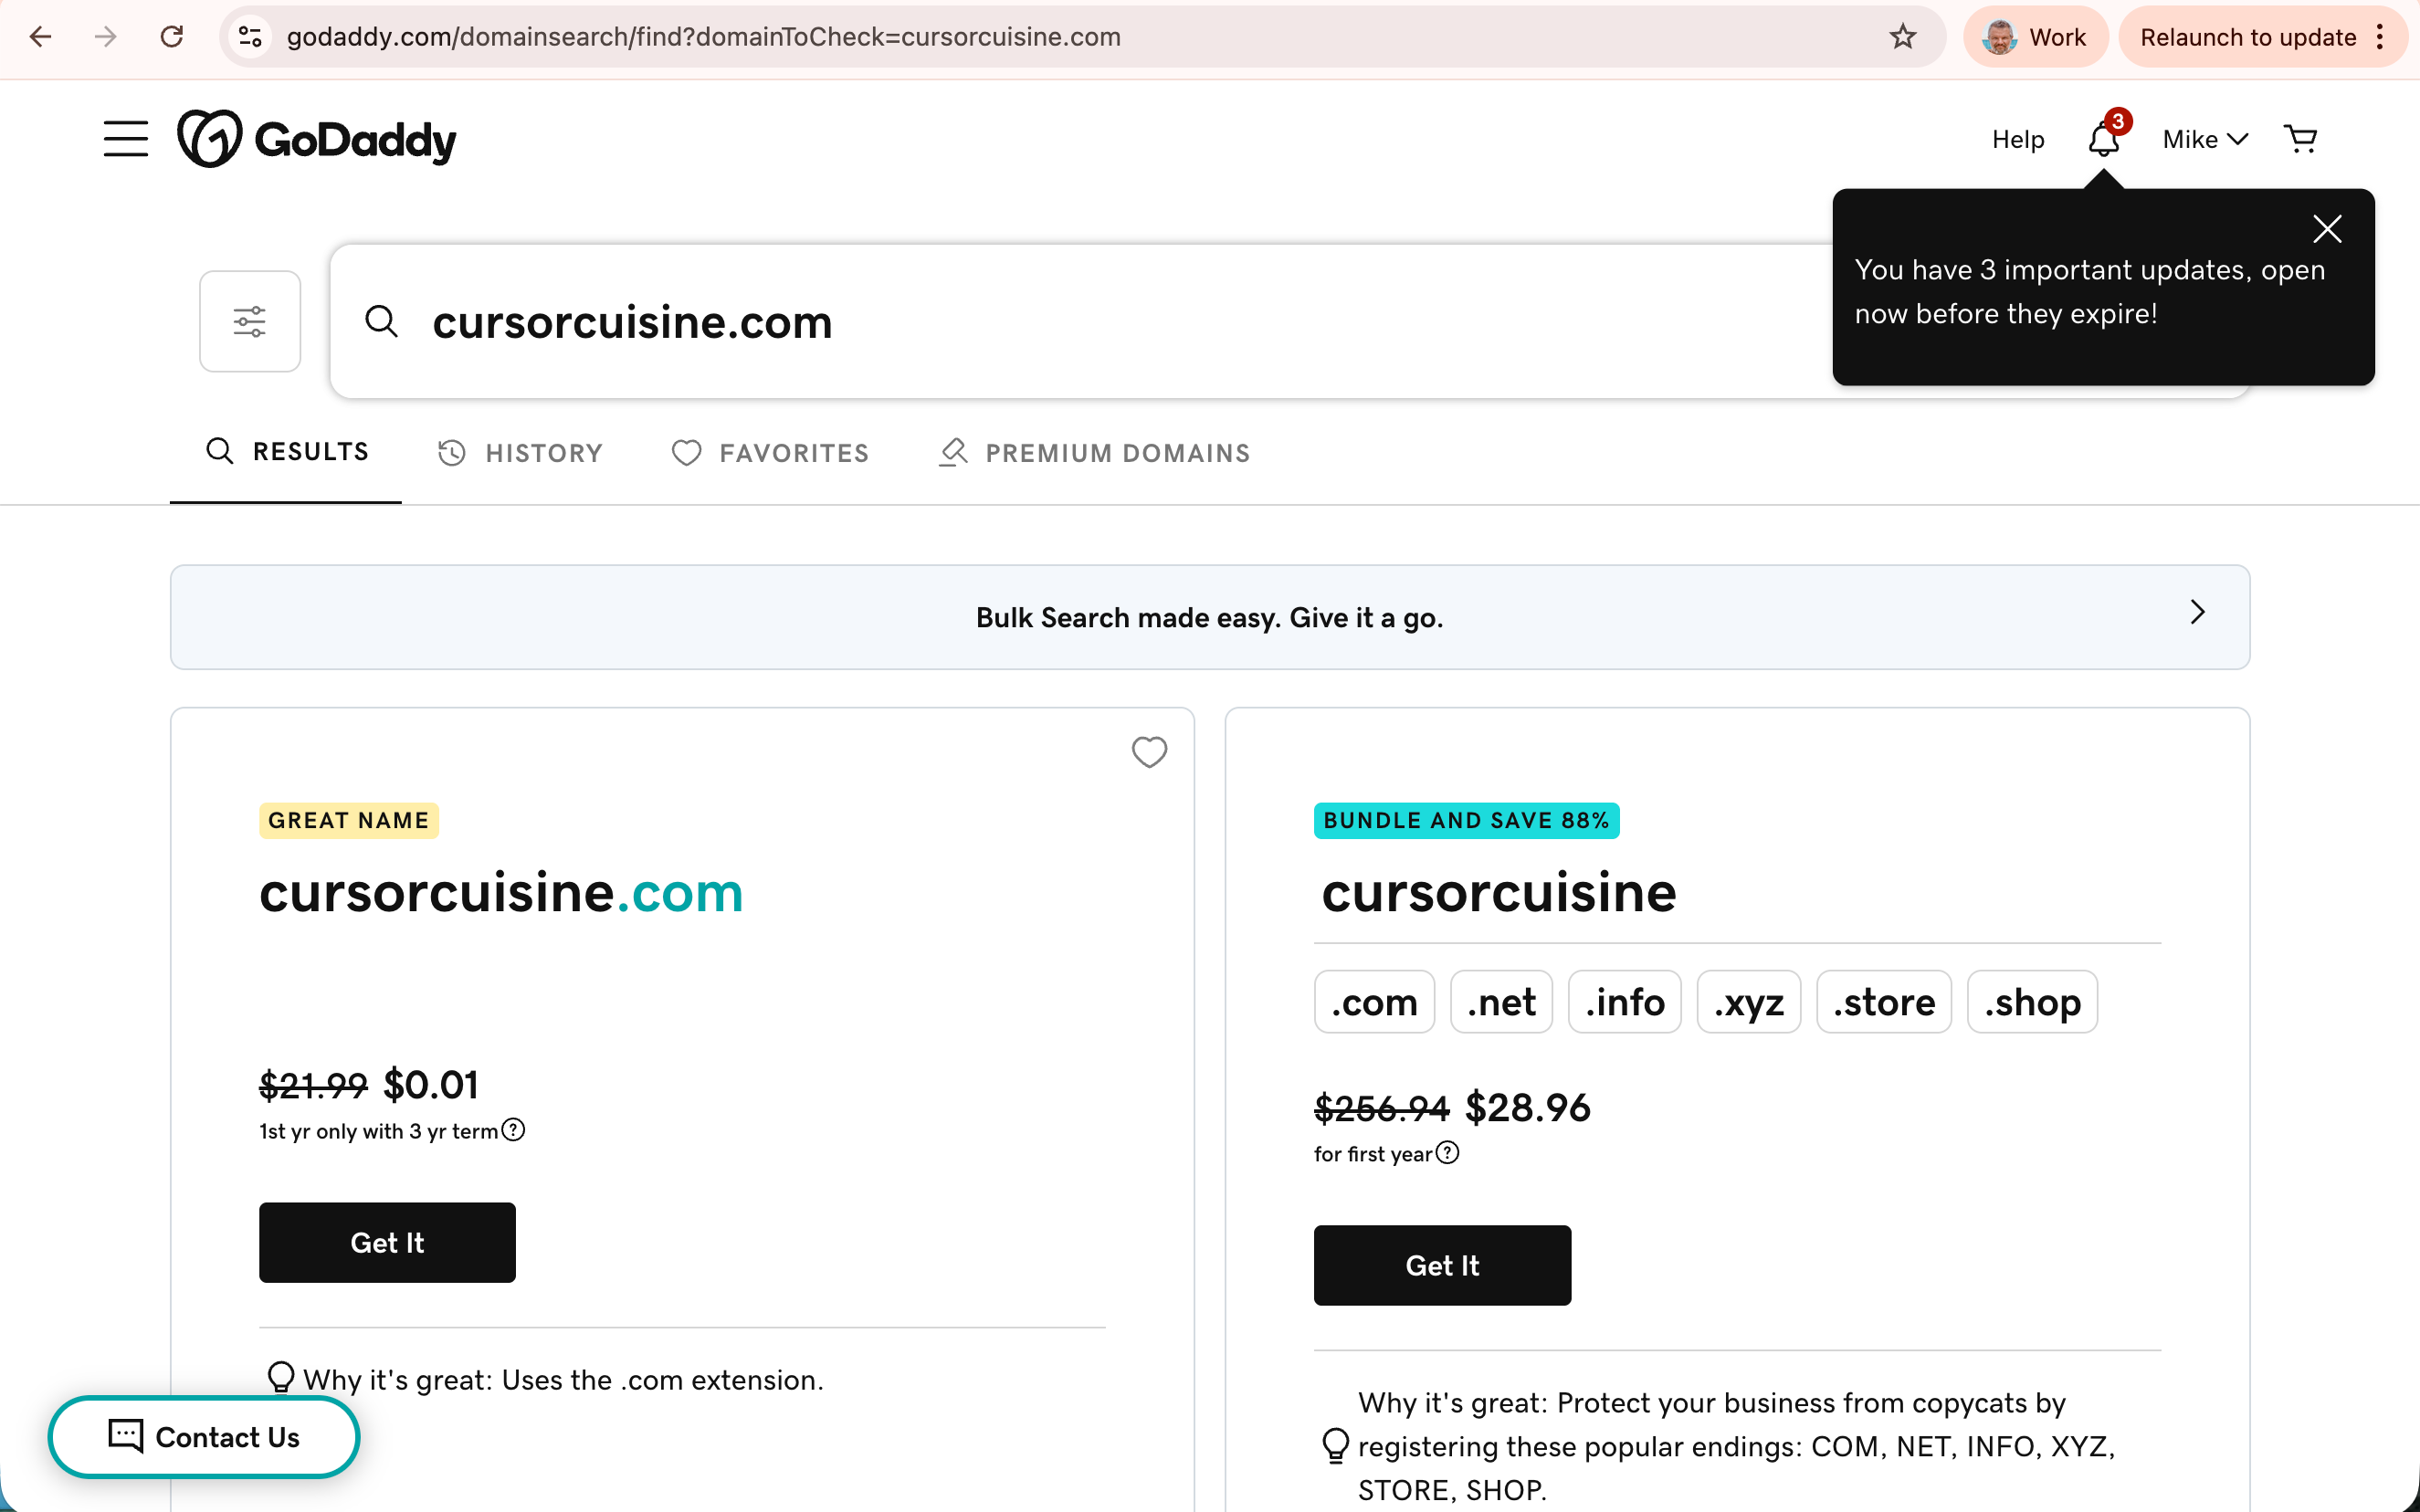
Buy your domain on GoDaddy.
In Vercel, go to Settings > Domains. Add
cursorcuisine.com.Vercel will give you two numbers (A Record and CNAME).
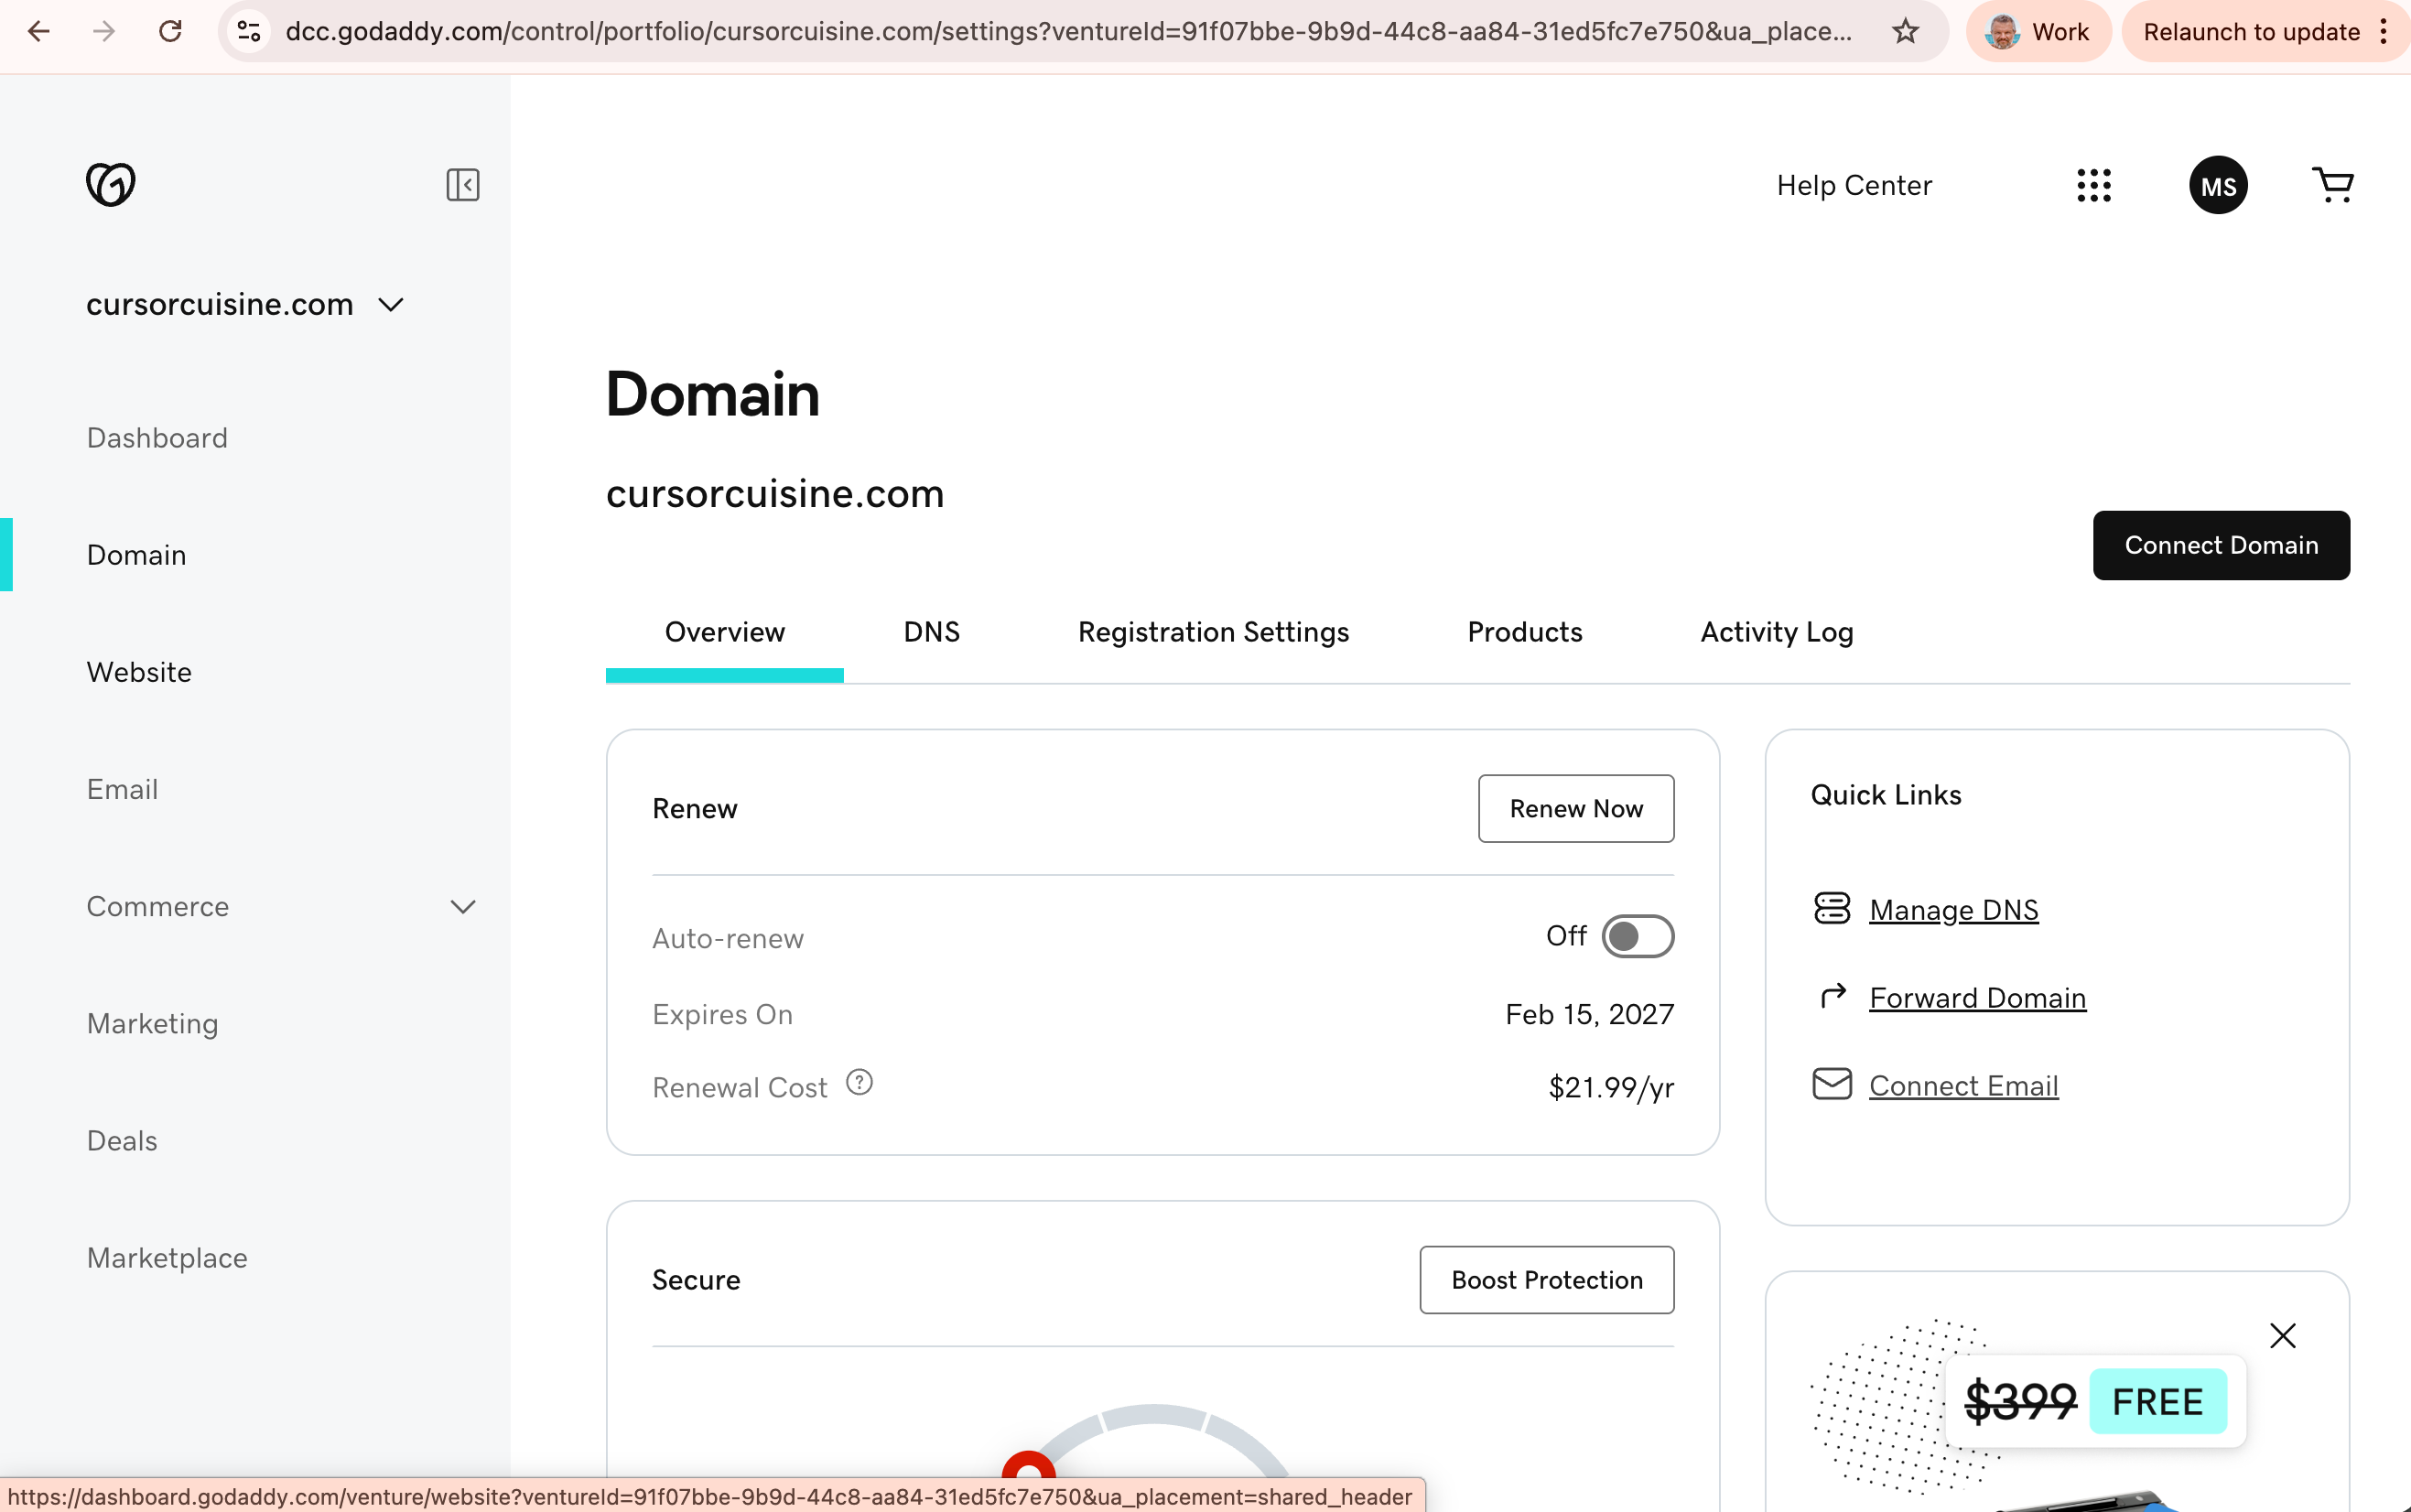
Go to GoDaddy > DNS Management.
Add the A Record (points to Vercel’s IP) and the CNAME (for ‘www’).
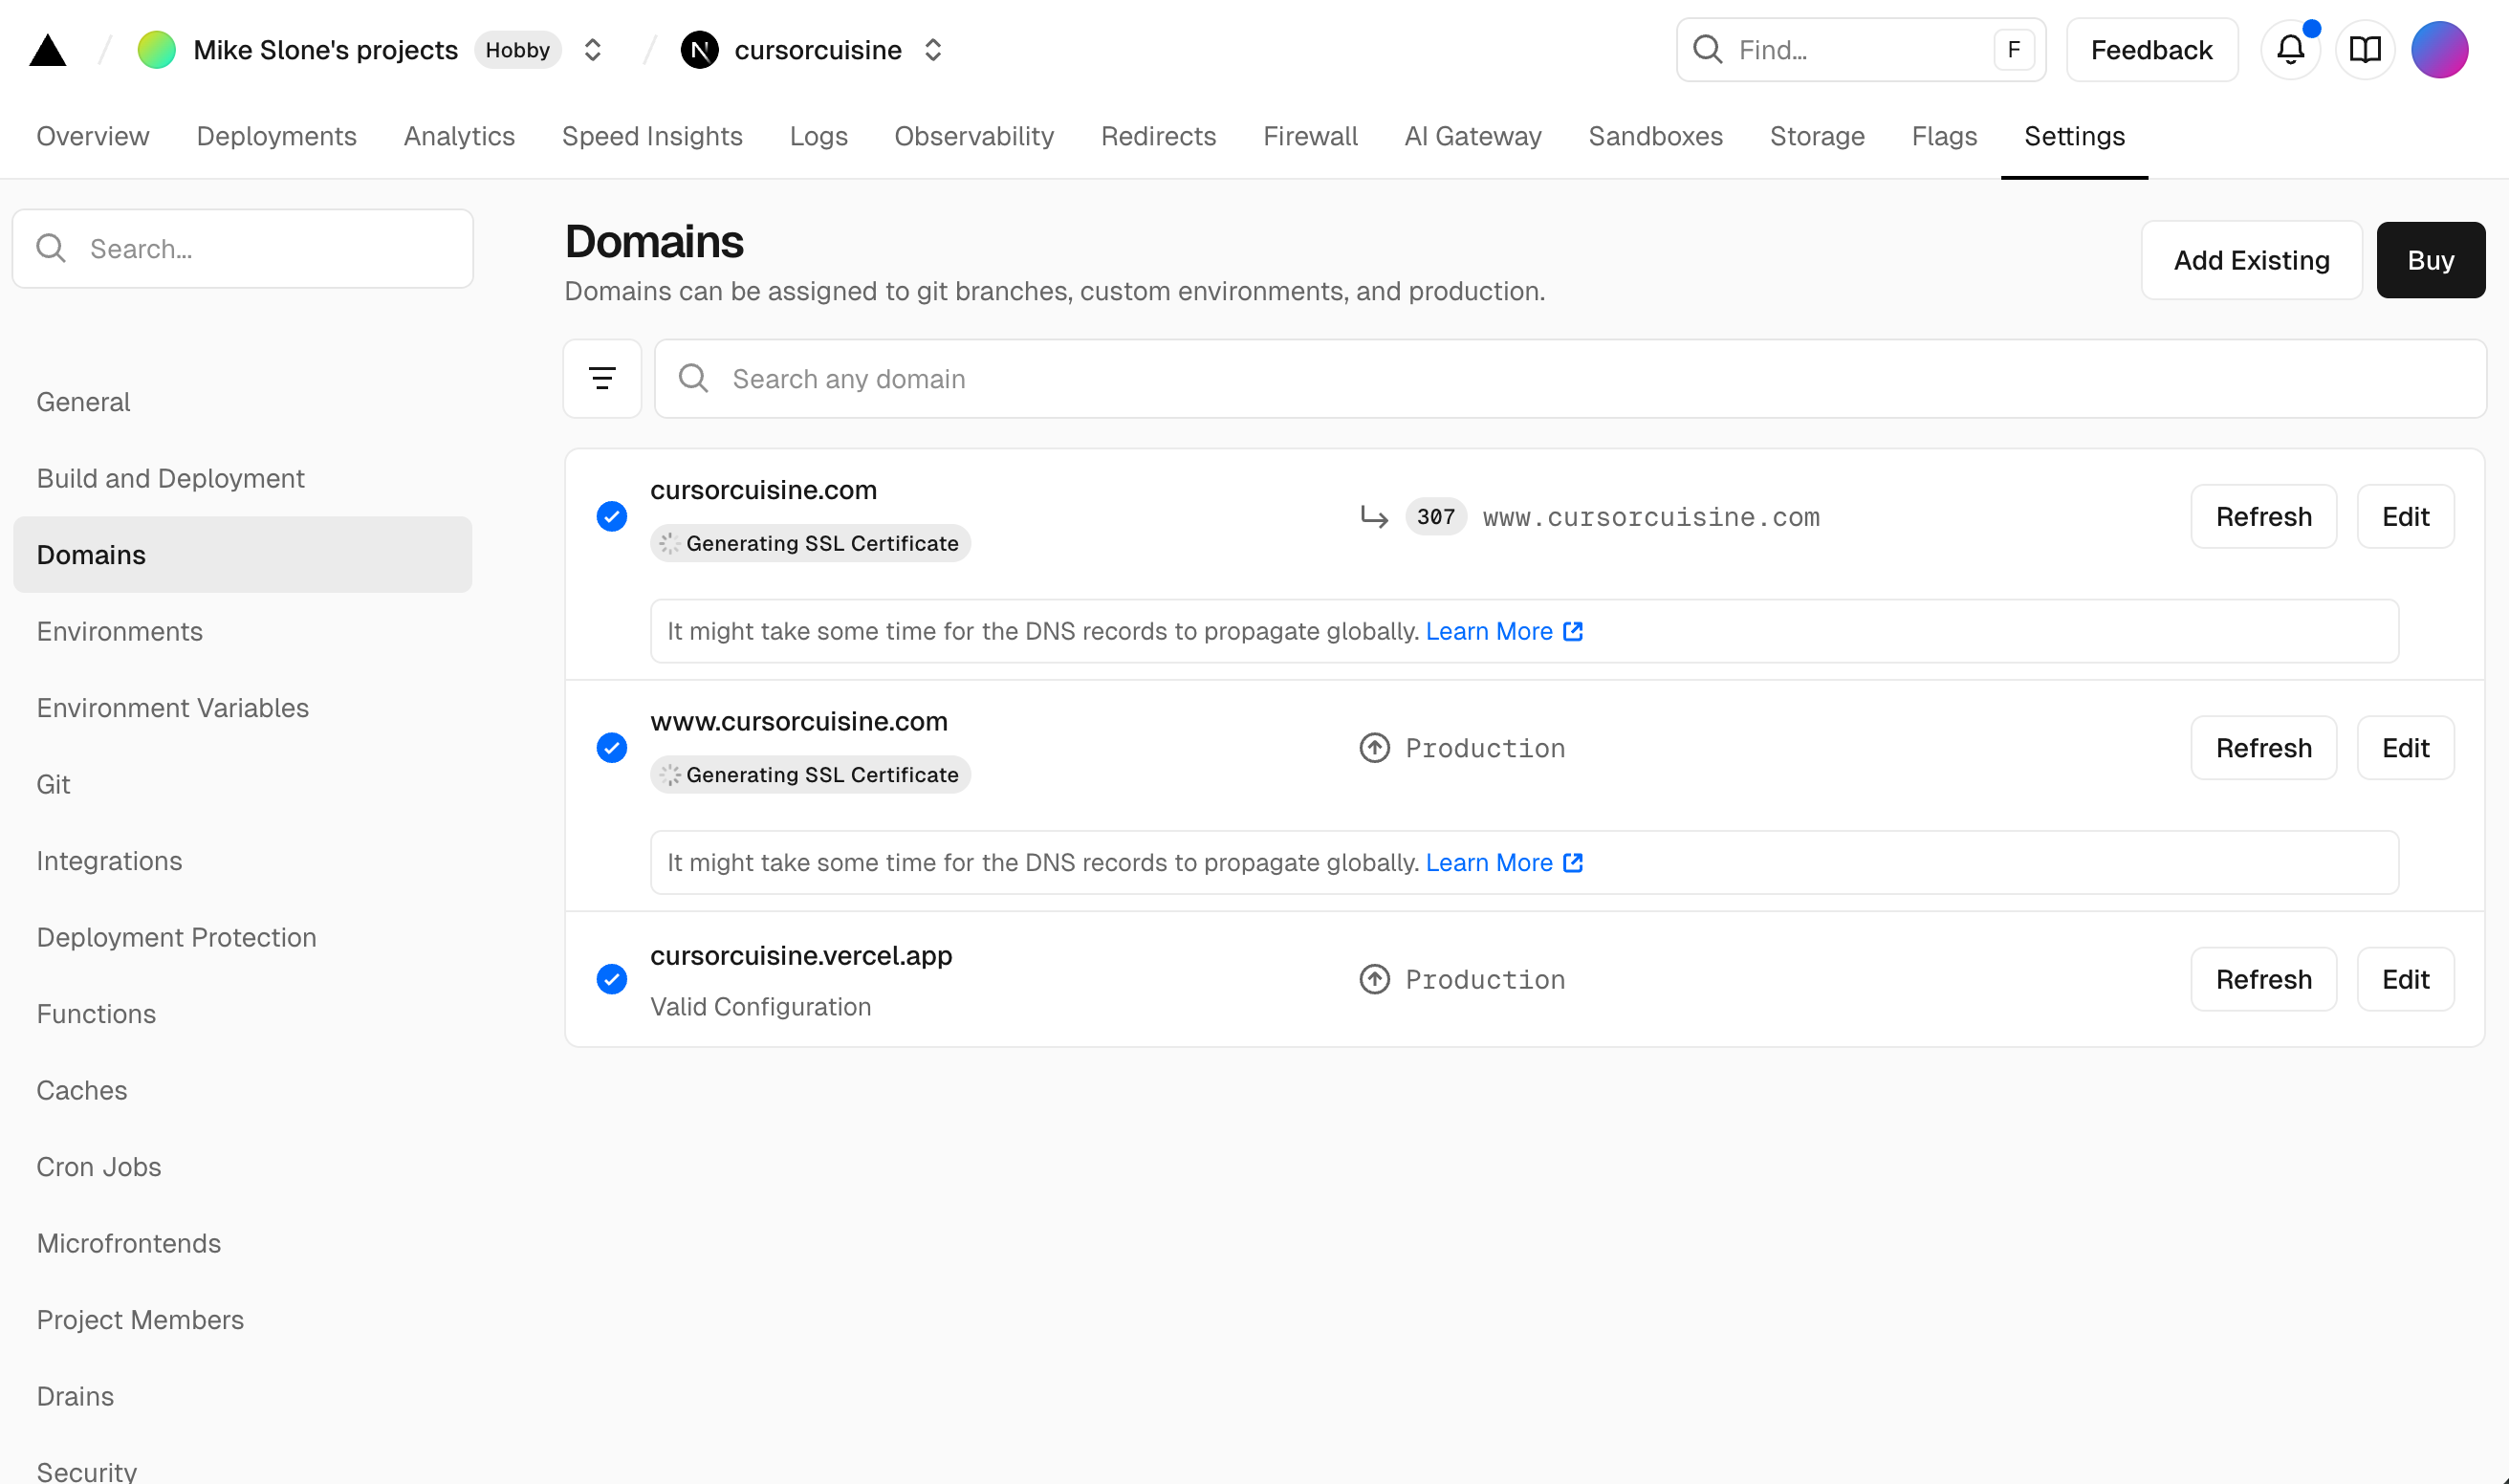
Wait 10 minutes. Your site is live!

Part 5: Next Steps & Optimization
You have a live site! But we aren’t done.
1. Newsletter Integration
You have a newsletter form, but it probably doesn’t send emails yet.
Sign up for Mailchimp or Resend.
Get your API Key.
Prompt Cursor: “Wire up the newsletter form to use the Resend API. Here is my API key...”
2. Analytics
You need to know who is visiting.
Prompt Cursor: “Add Google Analytics 4 to the site. Here is my Measurement ID...”
3. AI & SEO Optimization
We want AI chatbots to recommend our restaurant.
Prompt Cursor: “Optimize the
robots.txtand sitemap so that AI crawlers can easily read our menu and hours. Add schema markup for a ‘Restaurant’.”
4. The Human Touch
Spend time in Sanity. Upload real photos of your food. Write a genuine “About Us” story. AI built the frame, but you need to provide the soul.
Summary: You Are Now a Web Developer
Congratulations! In just a few hours, you went from a blank folder to a live, multilingual, reservation-ready restaurant platform.
Let’s recap what you built:
Live URL: https://cursorcuisine.com (or whatever you chose for your project)
Cost: Minimal.
Coding Knowledge Used: Zero.
Remember: The tool (Cursor) is powerful, but you are the pilot. You will hit bumps. You will get error messages. But if you simply copy the error and ask Cursor to fix it, you will get through it.
Stuck?
Don't spin your wheels. Book a 30-minute troubleshooting call with me.
Now, go build something amazing. And send me the link when you do!